
March 16
13 min. to read
How to Remove Face Shine in Photos Without Overediting
That one photo from a great evening where your face looks like a glazed donut under a spotlight. Everyone has been there. Shiny skin is one of the most common photo complaints out there, but it is also one of the most mishandled fixes. Most people either ignore it completely or go so hard with the smoothing tools that the skin ends up looking like it was molded from wax. There is a lot of middle ground between those two outcomes. The good news is that with the right knowledge of why shine happens and the right tools to address it, you can get natural-looking results every time.
The Definitive Solution for Picture-Perfect Portraits
DISCOVER TODAY!Key Takeaways
Oily skin and flat, direct lighting are the two biggest causes of facial shine in photos, and addressing both before the shoot saves significant editing time.
Matte-finish primers and setting powders applied specifically to the T-zone reduce sebum reflection enough to be visible in the camera.
Diffused lighting at a 45-degree angle to the subject dramatically reduces specular highlights on skin compared to on-camera flash.
Luminar Neo’s Skin AI tools can target shine and texture in specific facial zones without affecting overall color or exposure.
Overediting shine removal creates an artificial, waxy look, so preserving skin texture is just as important as reducing glare.
Why Does Skin Look Shiny in Photos?
 Shine is not purely a cosmetic issue. It is a physics problem, and cameras tend to make it worse.
The Role of Sebum, Skin Type, and T-Zone Oiliness
Skin constantly produces sebum, an oily substance that protects and hydrates the skin barrier. According to the American Academy of Dermatology, sebum production varies by skin type and concentrates most heavily in the T-zone: the forehead, nose, and chin. In person, this thin film is barely noticeable. In photos, it catches light and bounces it straight back toward the lens. Oily and combination skin types are most affected, and heat or humidity makes it worse, which is why outdoor summer shots tend to look shinier than indoor ones.
How Light Direction and Camera Settings Amplify Shine
Skin reflects light similarly to a semi-gloss surface. On-camera flash and harsh overhead lighting send reflected light straight back at the lens. That is where the blown-out highlights come from. A wide aperture concentrates this further, and oversharpening in post does not help either, since it pulls up fine texture and oil traces along with everything else. Understanding this is the starting point for knowing how to make a face less shiny, whether you tackle it on set or in editing.
Your AI-Powered Photo Editor for MacOS and Windows
Discover Now!Fix It Before You Shoot: Prevention That Saves Editing Time
 The best edits are the ones you never have to make. Reducing shine at the source is always more effective than fixing it in post.
Skincare and Makeup Prep for a Matte, Camera-Ready Look
Before anything else, apply a lightweight oil-free moisturizer. It sounds counterintuitive when you are trying to reduce shine, but skipping it causes dry skin to produce even more sebum. From there, the makeup routine that consistently works is primer on the T-zone, matte or satin foundation, and setting powder on the oiliest areas. Go for silica-based powder if you can. Unlike talc, it actually absorbs oil instead of sitting on top of it and catching light. Keep blotting papers close for anything longer than a quick shoot.
Lighting Setups That Naturally Minimize Facial Shine
Direct, flat lighting is the main culprit. Move your key light to about 45 degrees from the subject, and you immediately get shadows and depth that make oily skin far less obvious. Soft, diffused light handles shine better than almost anything you can do in post. A softbox works, and so does a large window as long as the sun is not hitting it directly. The room itself matters too. White ceilings and bare walls act like unintentional reflectors, and they will quietly undo everything your lighting setup was trying to achieve.
Camera Settings and Lens Choices That Reduce Glare
A circular polarizing filter cuts specular reflections off skin outdoors and is more useful in portrait work than most photographers realize. Tighten your aperture for close portraits, and you will immediately notice fewer hotspots on the face. As for format, just shoot RAW. You might not always need the extra headroom, but the one time shine blows out the forehead, you will be glad the detail is still there to recover, rather than baked into a compressed file.
How to Remove Face Shine in Photos Using Luminar Neo
Even with perfect preparation, some shine will make it into your final images. This is where post-processing becomes essential. Luminar Neo is one of the most effective tools currently available for this type of work because it uses AI to identify facial zones and skin texture independently of the rest of the image. Its AI face editor software can handle targeted corrections without requiring any manual masking, which dramatically reduces the risk of overediting.
Here is how to approach shine removal in Luminar Neo without flattening the skin.
Step 1: Open Your Image and Access the Portrait Tools
Import your image into Luminar Neo and navigate to the Edit panel. Select the Portrait category, which houses all the AI-powered facial tools. The AI will automatically detect faces in the image and prepare the relevant sliders.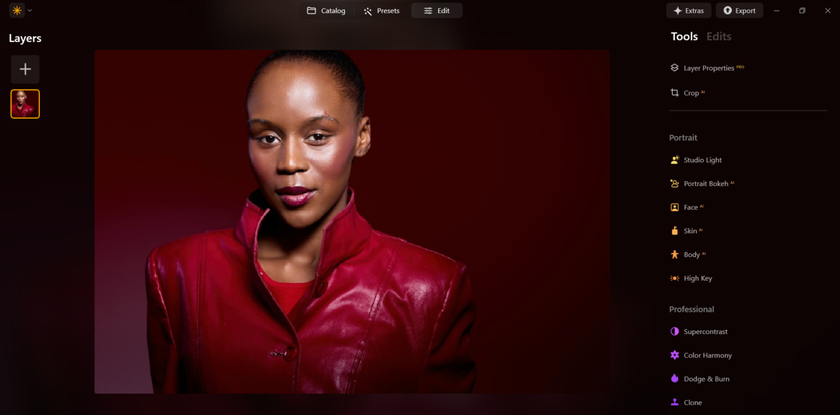
Step 2: Use the Skin AI Module to Target Shine
Open the Skin AI section. The AI skin retouching software within Luminar Neo identifies skin tones and texture separately from other elements of the image, so adjustments apply precisely where needed. Find the Shine Removal slider and move it gradually, keeping a close eye on the forehead and nose. A moderate adjustment typically produces natural results. Pushing it too far tends to create that flat, plastic look you are trying to avoid.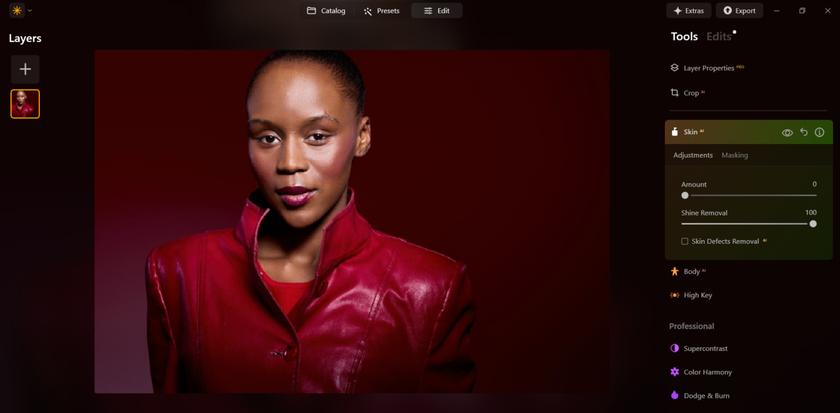
Step 3: Use the Amount Slider with a Light Touch
The Amount slider controls how aggressively Luminar Neo smooths the skin overall. After addressing shine, check whether the skin still looks textured and natural. If it appears too smooth or polished, pull the Amount slider back. The goal is to keep enough visible pore detail and texture that the skin still reads as real. Think of it as finding the point just before the edit becomes noticeable.
Step 4: Refine with Face AI
Navigate to the Face AI section and check whether shine reduction has affected the overall luminance of the face. Targeting highlights can sometimes leave the complexion looking a little flat. If that happens, nudge the Face Light slider up slightly: somewhere in the 5 to 15 range is usually enough to bring natural-looking brightness back without reintroducing shine.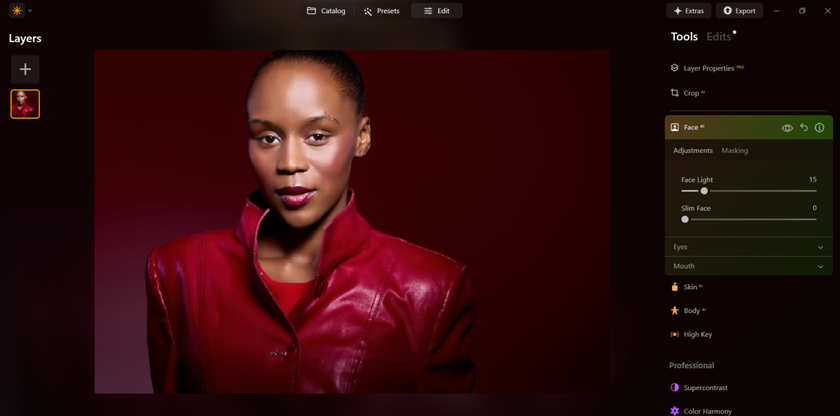
Step 5: Apply Local Adjustments for Problem Areas
For stubborn shine on the forehead or nose that the global sliders have not fully resolved, use Luminar Neo’s masking tools to paint corrections onto specific areas. This is the most precise way to handle how to remove shine from photos, zone by zone, without touching the parts of the image that already look right.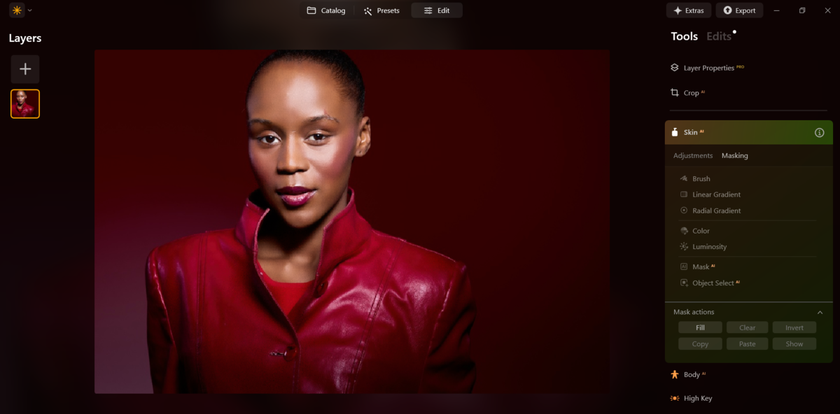
Step 6: Review at 100% Zoom and Export
Before exporting, zoom in to 100% and check that skin texture looks natural and that no blending edges or artifacts have crept in. What looks clean at a glance can reveal problems up close. Once you are satisfied, export in the format and resolution that fits your intended use.
Troubleshooting Common Issues: Shine on Forehead and Other Areas
 Different facial zones need different approaches. Here is what actually works for the most common problem areas.
Forehead. Because it is the largest flat surface on the face, the forehead tends to hold onto shine even after global adjustments. When that happens, local corrections with a luminosity mask restricted to the highlights will get you further than pushing the global sliders harder.
Nose bridge. Narrow and curved, which means broad strokes cause visible blending errors. Use a small brush and paint only along the ridge, leaving the sides of the nose alone.
Cheekbones. Be careful here. Some highlight on the cheekbones reads as natural and flattering. The goal when you remove shine from face in photo is not to flatten everything, but to separate controlled, sculpting highlights from blown-out glare. If you are not sure how far to go, back off a little. Undercooked is almost always better than overcooked.
Viewing conditions. An edit that looks too heavy on a bright monitor can look perfectly natural on a phone. Before you finalize anything, check your result on at least two different screens.
What to Take Away
Good shine removal is not about how much you fix. It is about how little you need to. Combine smart prep, decent lighting, and a tool like Luminar Neo that understands skin, and you will rarely need to push the sliders far. Knowing how to remove shine from face in photo while keeping the skin looking like actual skin is the whole game. Less editing, better results.
 >
>
