
December 16
11 min. to read
How To Create Lightroom Presets: 3 Ways
Presets save time and help you keep your photos consistent. Instead of manually adjusting sliders for every shot, they apply a bundle of adjustments at once. This is essential for photographers, influencers, and social media creators who want a cohesive feed. If you want to speed up your workflow and develop a signature style, learning how to make your own preset in Lightroom is key. You have the option to create or edit templates using Lightroom Cloud, Lightroom Desktop, or the mobile app.
Some methods have their advantages, depending on your workflow, device, and editing style. Here, we’re going to go through the three ways step by step, with instructions and practical tips.
Why Creating Your Own Presets Matters
Creating your own Lightroom presets saves more than just time; it’s actually about defining your style. When you have to edit dozens or hundreds of photos, manually making the same adjustments over and over becomes tiresome and inconsistent. Custom looks let you apply your favorite tweaks to any image in an instant, keeping your portfolio or social media feed cohesive.
They also make batch editing faster, which is a huge advantage if you work with clients or produce content regularly. By designing the custom styles yourself, every slider and color choice reflects your creative decisions rather than relying on generic pre-made options.
The Basics You Need to Know
Think of a Lightroom preset as a saved set of adjustments that you can apply to more than one photo with just one click. They can include things like exposure, contrast, white balance, color adjustments, split toning, effects like grain or vignette, and even camera calibration settings. They do not change your original picture, which makes experimenting with them risk-free. Understanding custom looks helps you decide which adjustments to include and which to leave flexible, like crop or local changes, so your editing style works well across different photos.
Way 1: Create Presets in Lightroom Cloud
The cloud-powered version of Lightroom lets you edit pictures on desktop, mobile, or tablet, and your saved looks sync automatically. This is perfect if you move between devices or want presets to be accessible anywhere.
Step 1: Edit a Photo
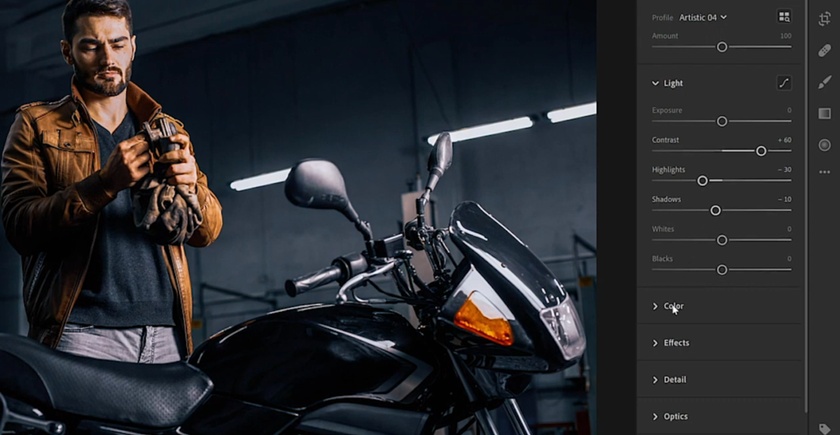
Start with a photo you like. Adjust:
Light: Exposure, highlights, shadows, whites, and blacks.
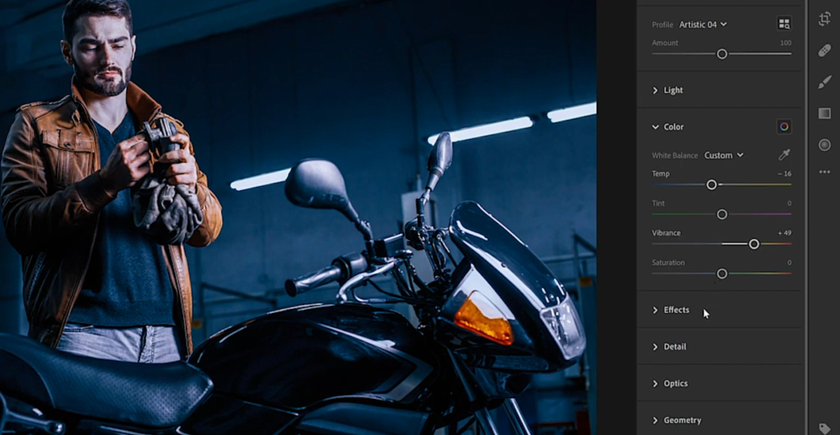
Color: Temperature, tint, vibrance, and saturation.
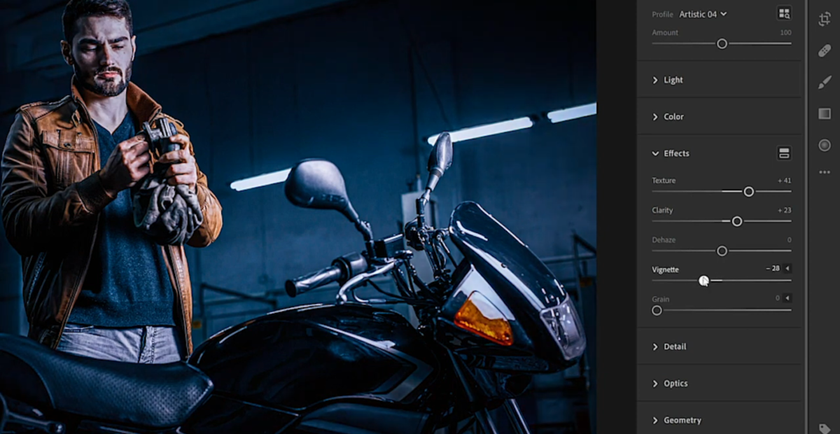
Effects: Grain, vignette, or dehaze.


Take your time to get a look you love. If you want inspiration, explore the golden hour photo filter to see how warm light and soft shadows affect the mood.
Step 2: Save as a Preset
Open the Presets panel under Edit tools.
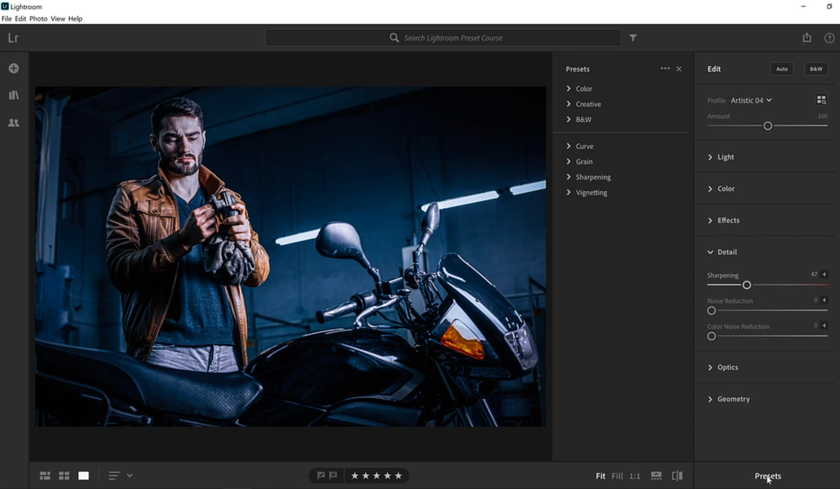
Click the three-dot menu in the panel and select Create Preset.
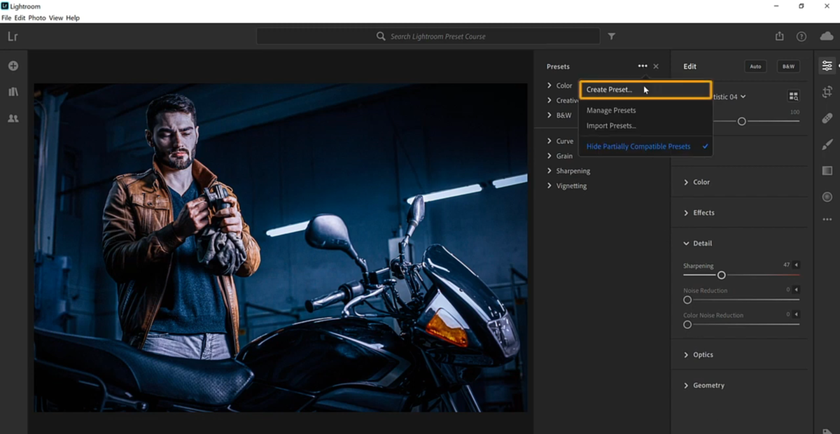
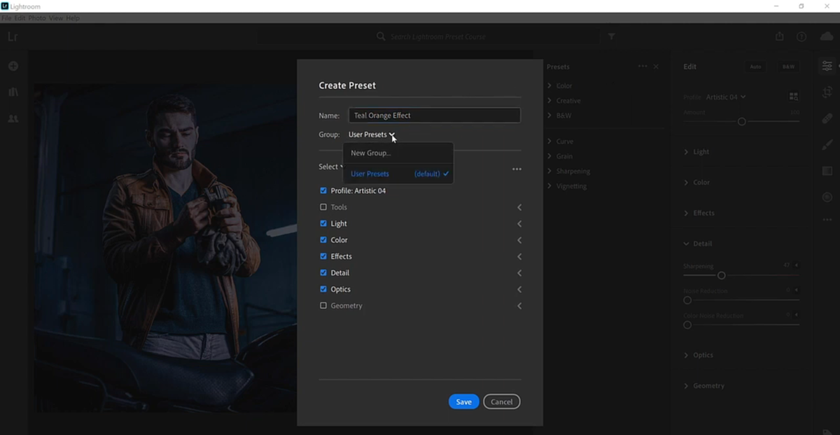
Name it and select a group or create a new one for the organization.
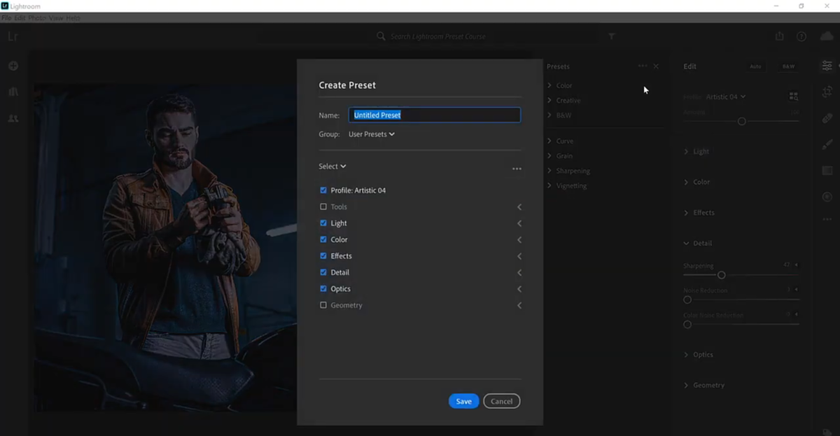
Choose which edits to include. For example, include Color and Tone, but leave out Crop if you want flexibility.
Click Save.


Your photo adjustment set now appears in the panel and automatically syncs to other devices with Lightroom.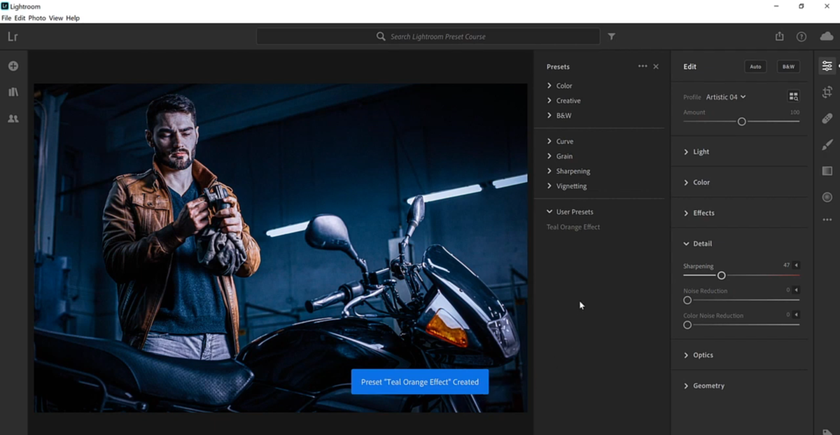
Tips
Only include settings that define your style. Excluding selective adjustments like crops or radial filters makes presets more versatile.
Try your saved adjustments on different photos to ensure they produce reliable results in varied conditions.
Use descriptive names for easy recognition, such as “Warm Summer Glow” or “Soft Portrait Base.”
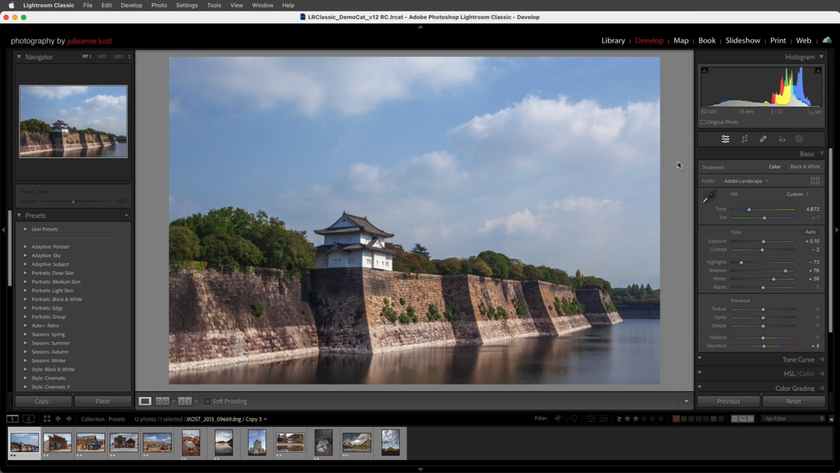
Way 2: Create Presets in Lightroom Classic (Desktop)
Lightroom Classic is the professional choice. Lightroom develop presets created here are saved in the Develop module and give you complete control over all adjustment sliders, tone curves, and color calibration.
Step 1: Decide on Your Editing Style
Before you begin, determine the style you want. Ask yourself:
Bright and airy or dark and moody?
Warm or cool tones?
Matte vintage or high contrast?
Vibrant or muted colors?
Examples of common styles include vintage, pastel, and cinematic looks. Once you know a style that you like, you can then duplicate it with multiple photos.
Step 2: Edit a Photo
Import a picture and adjust using the Develop panel. Focus on:
Basic settings: Exposure, contrast, highlights, and shadows.
Tone curve: Adjust light and dark areas for depth.
Color/HSL: Saturation, luminance, and hue per color channel.
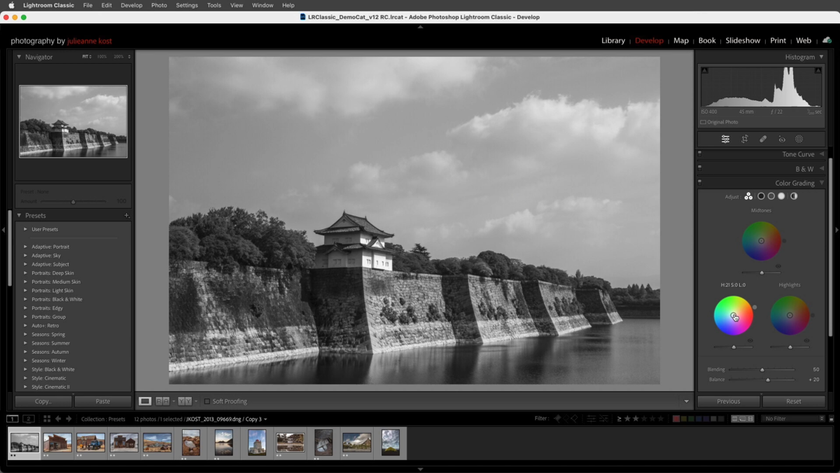
Split toning: Add colors to highlights and shadows.
Effects: Grain and vignette for texture and mood.
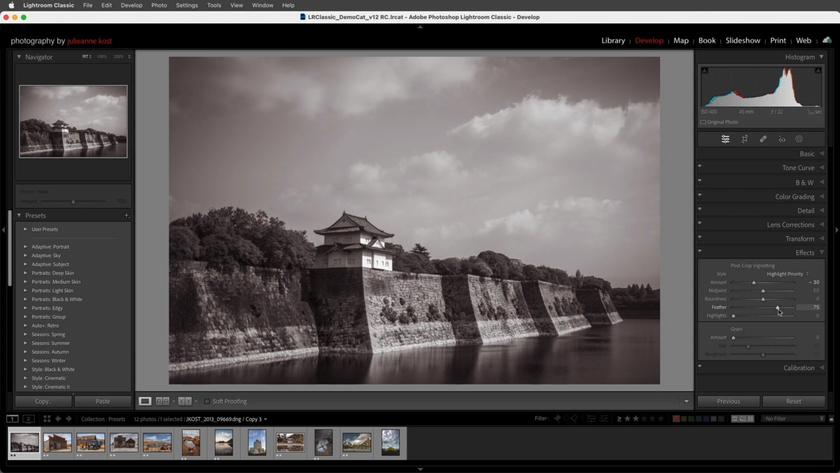
Camera calibration: Modify how Lightroom renders colors from the raw file.


If unsure where to start, check the vintage grain filter to understand how film-like textures affect shots.
Step 3: Create a Preset
Highlight your edited photo.
In the left panel, click the plus sign (+) and select Create Preset.
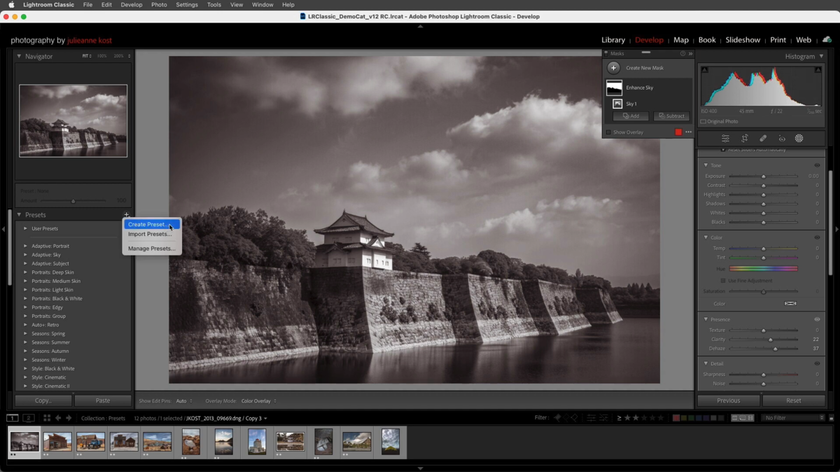
Name it and choose or create a group to store it.
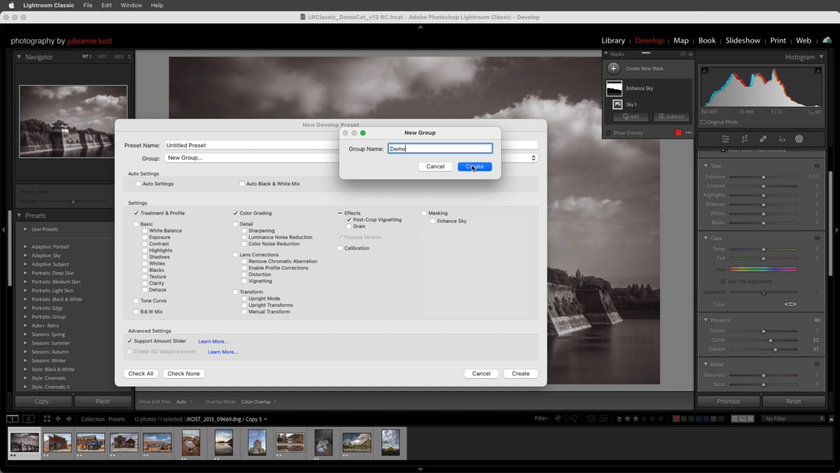
Select which adjustments to include. Only include what defines your look; exclude exposure and crop if you want versatility.

Click Create. Your edit template now appears in the Presets panel.
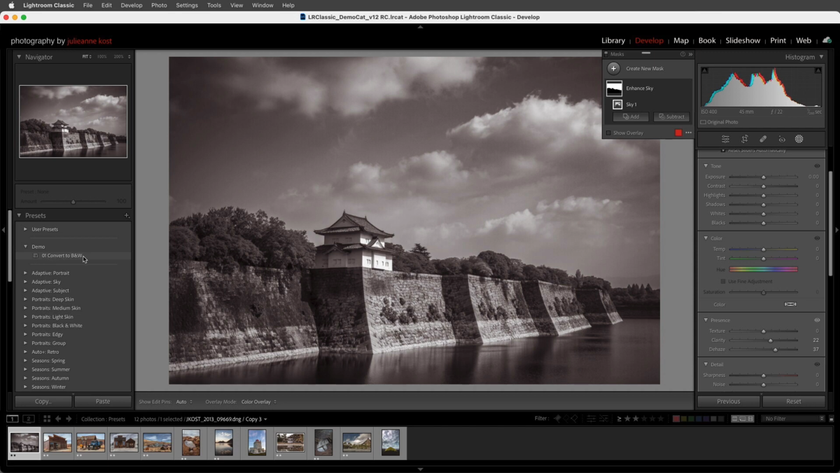


Tips
Test these settings on multiple photos to ensure consistency.
Save multiple versions for different lighting conditions, e.g., bright, medium, and dark.
Use plugins for creative effects. For instance, the Luminar Neo plugin for Lightroom adds unique textures and colors. Apply these effects and save as a new preset if you want them included.
Understanding how to create a preset in Lightroom Classic carefully, by experimenting with sliders and settings and saving the adjustments that work best, will make your custom look more reliable and professional.
Way 3: Create Presets in the Free Lightroom Mobile App
Even without a paid subscription, you can make and use presets on your mobile device. This workflow is great for on-the-go editing and social media content creation.
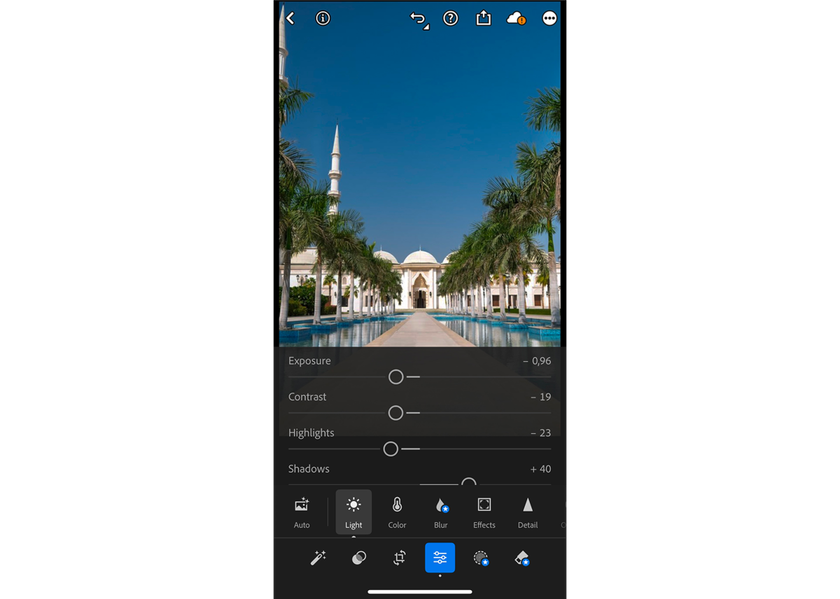
Step 1: Edit a Photo
Upload a photograph to the mobile app and adjust sliders. Focus on:
Exposure, highlights, shadows
White balance and tint
Saturation, vibrance, and color adjustments
Effects like grain or vignette

Take your time to create a look you like. You can reference professional packs like the Lightroom cinematic presets free collection for inspiration. Apply one, study which sliders changed, and experiment with recreating it yourself.
Step 2: Save as a Preset
Tap the three-dot menu in the top-right corner.
Select Create Preset.
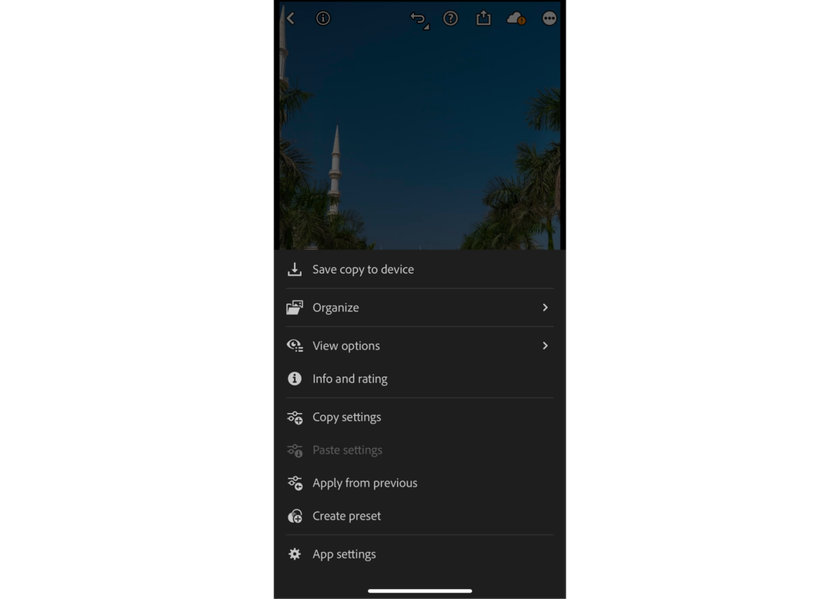
Name it and choose or create a group for organization.

Tap the checkmark in the top right to save.


Your saved edit will now appear at the far right of the bottom menu.  Test it on multiple photos and make small tweaks if needed.
 Save updated versions as new edit templates.
Tips
Organize them in categories like Portraits, Landscapes, or Social Media.
Export them as DNG files to share with others or back them up.
Avoid including selective edits (like radial filters) if you want presets to work on a variety of photos.
Use shorthand names, e.g., P-01 for portraits, L-02 for landscapes, to speed up selection.
Practical Tips for All Preset Workflows
 No matter which Lightroom workflow you use, following a few practical tips will make your custom look more reliable and easier to use.
Give Your Photos a Timeless Film Look Instantly
Try Film FiltersAlways test your tweaks on multiple photos and lighting conditions before relying on them.
Avoid overloading a custom style with too many adjustments; simplicity often works best.
Make incremental edit templates: start with a base look, then create secondary versions for creative effects.
Keep your preset library organized with clear group names to find them quickly.
Wrapping Up
Mastering how to make Lightroom presets saves time and maintains a consistent editing style. The process is basically the same: edit a photo carefully, save your changes, and test them on a variety of images. Once you understand how to make a custom preset in Lightroom, you can confidently build, test, and refine your library of personal adjustments to suit any style or platform.
Over time, these editing tools will become a personal toolkit that makes your workflow faster, more creative, and more enjoyable. With practice, you’ll also develop a signature look that’s instantly recognizable across all your photos.
 >
>
