
November 07
16 min. to read
Tricks For Changing Outfits WIth AI In Photos
If you’ve ever taken the perfect photo, but absolutely hated your shirt, you know the pain. Maybe the color clashes with the background, or perhaps you realized after the fact that your outfit was way too casual for the vibe you were going for. For ages, fixing that meant painstakingly editing in Photoshop, a huge time sink, or just living with a less-than-ideal picture.
But welcome to the future. Artificial intelligence has completely changed the game, making it ridiculously simple to swap out your wardrobe in any image. It’s not just about simple edits anymore; we’re talking about generating entirely new, realistic clothing right onto your body in a photo.
Understanding AI Outfit Changing in Photos
 The technology behind this might sound like magic, but it’s actually incredibly clever pattern recognition and generation.
How AI Tools Transform Your Clothes in Images
At its core, a smart outfit-changing tool uses what’s called a Generative Adversarial Network (GAN) or similar deep learning models. In simple terms: you show it a photo of yourself in a plain t-shirt and tell it, “Put me in a navy blue tweed blazer.” The AI first analyzes the contours of your body, the lighting, and the shadows already present in the image. It then generates the new blazer, making sure the fabric drapes realistically over your shape and that the shadows from the original environment fall correctly on the new material.
It’s not just a digital sticker; it’s a full 3D simulation applied to a 2D image. If you’re a photographer or a model, this tech lets you shoot a single look and generate dozens of others, which is where you really start to see the massive utility of learning how to change clothes with AI.
Remove Backgrounds with an Advanced AI Tool
Try it Now!Difference Between Changing and Removing Clothes in AI Editing
This is an important distinction to make because these terms often get mixed up. When we talk about changing an outfit, we are replacing the existing item with a new, desired item. The goal is to make the new clothing look natural.
Yet, some people search for tools to remove clothes from a picture, which generally refers to a more complex and often more controversial use of AI. This function is designed to undress a subject, essentially predicting and generating what the body underneath the clothes would look like. These tools often border on unethical or explicitly violate terms of service, and they are not what we are focusing on here.
Privacy and Ethics
Whenever you use AI to manipulate photos of people, you have to think about ethics. Be thoughtful with how you use this technology. Only edit or create images you have the right to use. Generating fake or invasive visuals can cross serious ethical lines. Use smart editing technology as a creative tool for your own projects, not as a way to misrepresent people. The smarter the tech becomes, the more careful we need to be. It’s also why many developers are careful about creating an easy clothing remover AI tool, as the potential for misuse is very high.
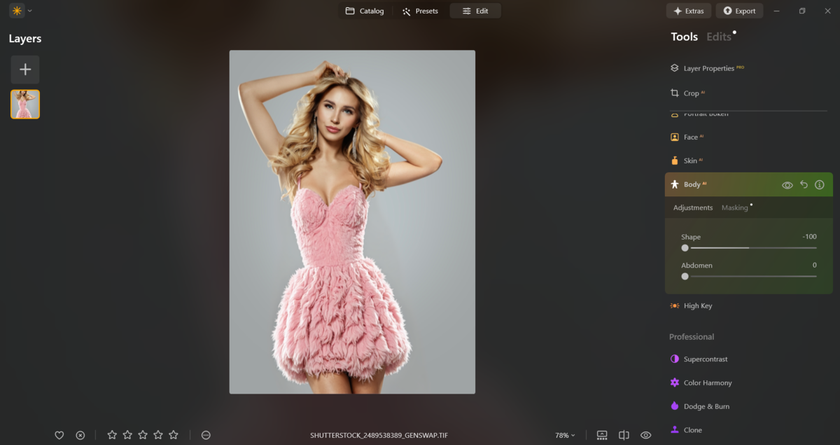
How to Change Clothes with AI Step by Step
Ready to start swapping outfits? Here’s a detailed breakdown of the process that gives you great results every time.
Choose and Prepare a Clear Source Photo
Start by opening a sharp, well-lit image in Luminar Neo. GenSwap works best when the clothing you want to replace isn’t overly patterned or hidden by other elements. A high-resolution photo gives the AI more data to analyze, resulting in cleaner, more realistic replacements.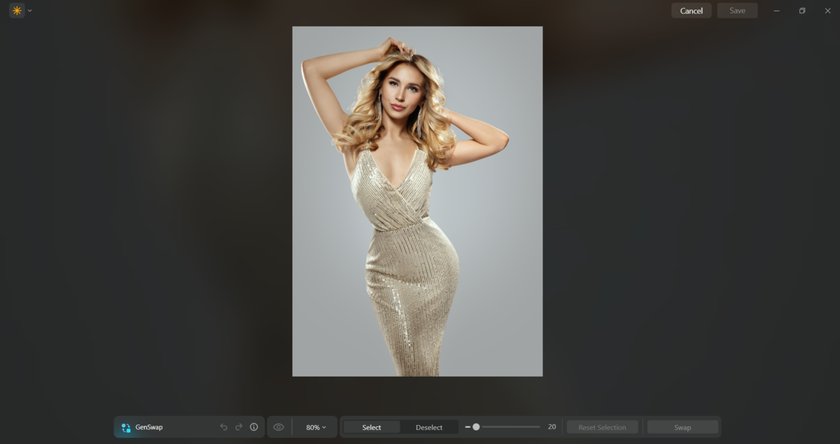
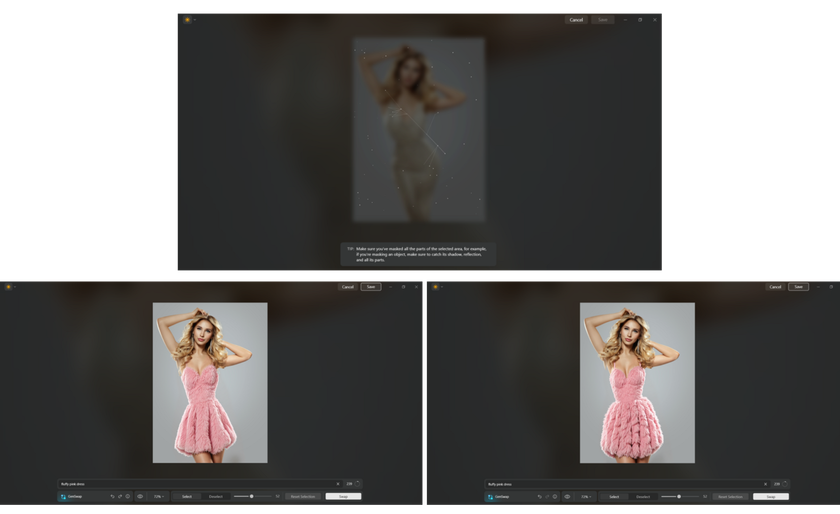
Mask the Area You Want to Replace
Use Luminar Neo’s masking tools, brush, or selection to highlight the exact area of clothing you want to change. Careful masking tells the AI exactly where to work, so it only edits the clothing and doesn’t spill into other parts of the image. Taking a few extra seconds to be precise here will save you a lot of cleanup later.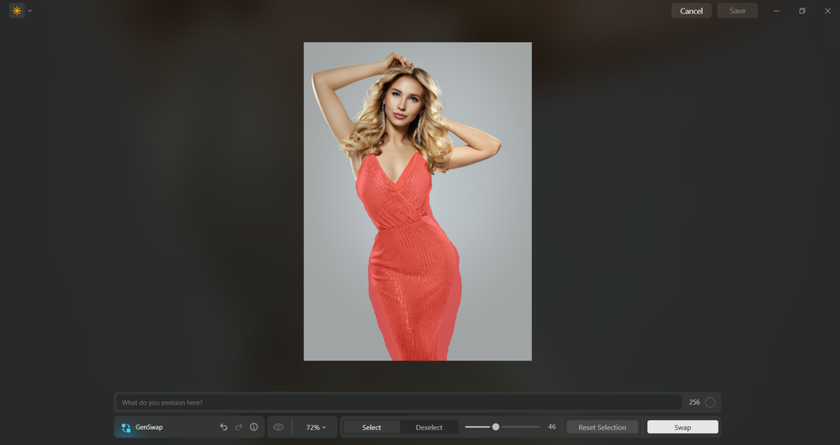
Write Clear and Detailed AI Image Editor Prompts
Type a descriptive prompt in the GenSwap panel. Be specific about the clothing type, fabric, and lighting. For instance: “Replace the shirt with a white silk blouse, fitted cut, under soft window light.” Specific AI image editor prompts help GenSwap create textures, folds, and lighting that look natural within your photo.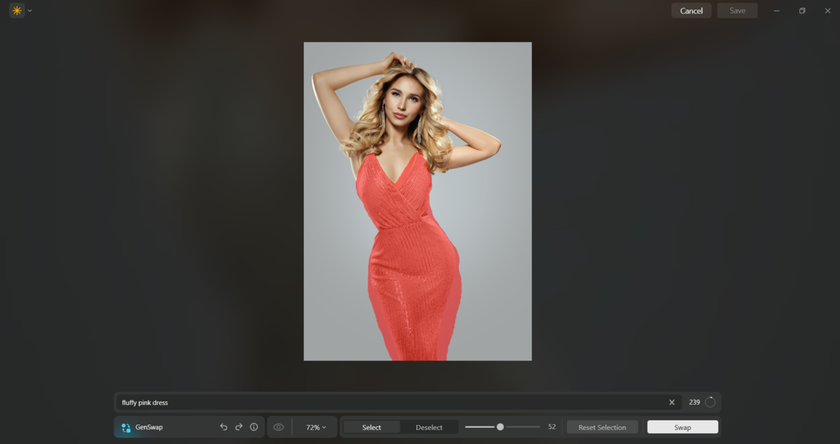
Generate and Refine With the Swap Button
Click “Swap” to run GenSwap and preview the generated result. If the first version doesn’t look right, try adjusting your prompt or re-masking the area. You can generate multiple variations until the clothing matches your vision. This iterative process helps fine-tune realism and fit.
Adjust Proportions and Edit Body Naturally
Once the new outfit is generated, use edit body tools to make subtle proportion fixes. For example, replacing a puffy jacket with a slim top might require slightly reshaping the torso. Keep adjustments minimal, and natural corrections make the swap believable.
Match Lighting, Shadows, and Textures
Take a close look at how the new outfit reacts to the light in your photo. Use Luminar’s Dodge & Burn or Relight tools to fine-tune highlights, shadows, and fabric texture. Small tone adjustments can make a big difference, helping the clothes blend naturally with the rest of the image.

Finalize and Save Your Results
Once satisfied, apply final color grading or touch-ups for consistency. If you used GenSwap to replace garments or to remove clothes from a photo and re-dress the subject, carefully check for any mask halos, stray pixels, or lighting mismatches; then save different versions so you can compare outcomes.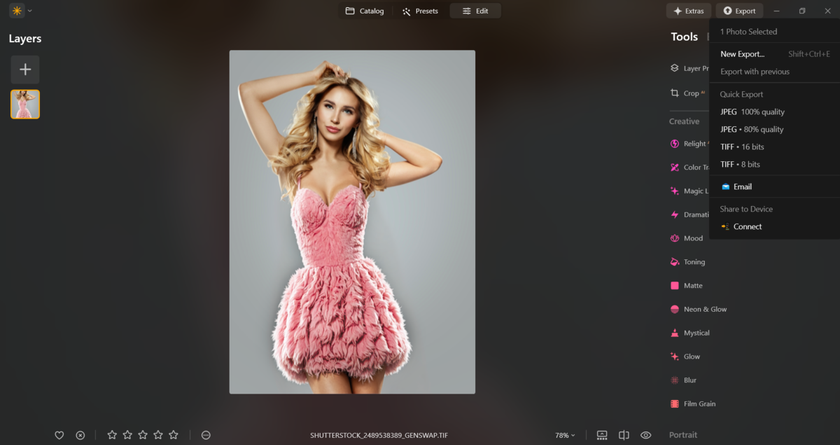
Best Tricks for Realistic AI Outfit Changes
 If you want people to believe the final image is real, you need to go beyond the basic prompt. You need to focus on the nuances of light and texture.
Match Lighting and Fabric Texture for Real Results
The biggest tell of a bad AI outfit changer is a mismatch in lighting. If the photo was taken outdoors on a sunny day, the new AI-generated outfit must have sharp highlights and deep shadows. If the original was indoors under soft, diffused light, the new fabric must reflect that. When you write your prompt, always include lighting cues like “matte finish with soft shadows” or “highly reflective, shiny texture with sharp window light reflections.” This small detail is what truly sells the illusion.
Change the Color of Clothes in a Picture
One of the simplest yet most effective AI edits is changing the color of an existing item. This is a great intermediate step before a full outfit swap. You can easily find tutorials on how to change the color of clothes in a picture using algorithmic masking and color replacement tools. This is particularly useful for things like uniform items or if you are trying to match an item to a background or brand color. It’s a low-effort, high-impact edit that requires less computational guesswork from the algorithms than generating a whole new item.
Use AI Photo Touch Up for Finishing Touches
Once the outfit is swapped, the final step is to unify the entire image. This is where you bring in tools for AI photo touch up. These AI functions can automatically adjust things like skin texture, eye brightness, and overall color grading to make sure the newly generated clothes fit seamlessly with the person and the background. A perfectly generated outfit will still look fake if the rest of the image is poorly graded. A final, subtle touch-up pass ensures that all the elements in the photo, the person, the new clothes, and the environment, look like they belong together, which is the key to a professional result.
How to Keep Results Natural and Professional
A natural look comes down to attention to detail, especially around tricky areas like folds and shadows.
Mind Proportions When You Remove Clothes from a Photo
Wait, didn’t we talk about this? Yes, but it’s important to reiterate in a different context. If someone is looking for “How I remove clothes from a picture?” (and again, we’re talking about creative replacement, not inappropriate removal), they often run into issues with body proportion. The AI sometimes struggles with the volume of clothing that has been replaced. For example, if you replace a thick winter jacket with a thin tank top, the algorithm must shrink the perceived volume of the chest and arms. If it doesn’t do this realistically, the proportions will look off. 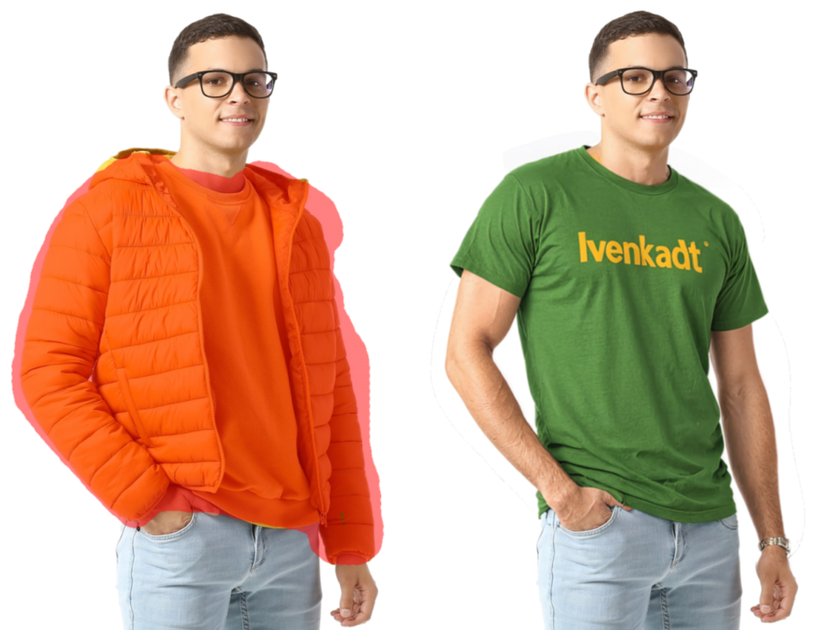
The trick is to check the generated image against a mental image of what the person would actually look like in that new, less bulky outfit. Always ask yourself: Does the subject still look grounded and proportionate? If you find a tool being marketed as an AI clothes removal tool, treat it with caution and skepticism; focus on its capability to replace realistically.
Retouch Background and Shadows for Realistic Looks
When the AI places new clothing on the subject, it sometimes misses a tiny patch of the original background showing through the old clothes. It can also create an unnatural ’halo’ around the new garment. You need to check for these imperfections manually. More importantly, check the shadows. A thick, dark fabric will cast a sharper shadow than a thin, light fabric. If the automated tool didn’t adjust the shadow the subject casts on the wall or floor, you need to go in and tweak that manually.
Learn How to Photograph Clothing for AI Editing
The better the starting image, the better the end result. Learning how to photograph clothing effectively, even if you are just using your phone, will dramatically improve your editing success. A clear, sharp image with balanced, even light, where the clothing doesn’t have too many extreme wrinkles or is not obscured by arms or accessories, gives the AI the best data to work with. If you are starting a fashion line and plan to use artificial intelligence to show product variations, take professional-quality base photos. Don’t rely on the software to fix a badly lit, blurry photo.
Final Thoughts
The ability to try on clothes with AI digitally is a revolutionary tool for creatives, marketers, and everyday users. It saves immense amounts of time and money that would otherwise be spent on multiple photo shoots, changing rooms, and complex traditional photo editing. The trick with any powerful tool is using it well. It isn’t just clicking a button. Write clear prompts, watch tiny shifts in light and shadow, and use your eye to fine-tune the AI’s output. Do this and your edits will look real, not artificial.
 >
>
