Short Lighting Photography Explained With Examples
Last Updated on May 12, 2025
Short lighting adds depth, drama, and emotion to portraits. Learn how to use this moody technique with examples and tips for striking, low-key photos.
Like a crack in a slightly open door, a narrow strip of light adds mystery and drama to the portrait. What lies behind that portal? What complex human emotions does this soft beam of light on the face, submerged in darkness, want to convey?
Short lighting is often used in cinema and photography to depict a character’s contradictory nature and the hidden details of their story. In this article, you will learn about the features of short lighting, how to properly create portraits using low key photography settings, and explore the main short lighting examples.
Master Light in Your Photos with Relight AI
Explore Now!What is Short Lighting?
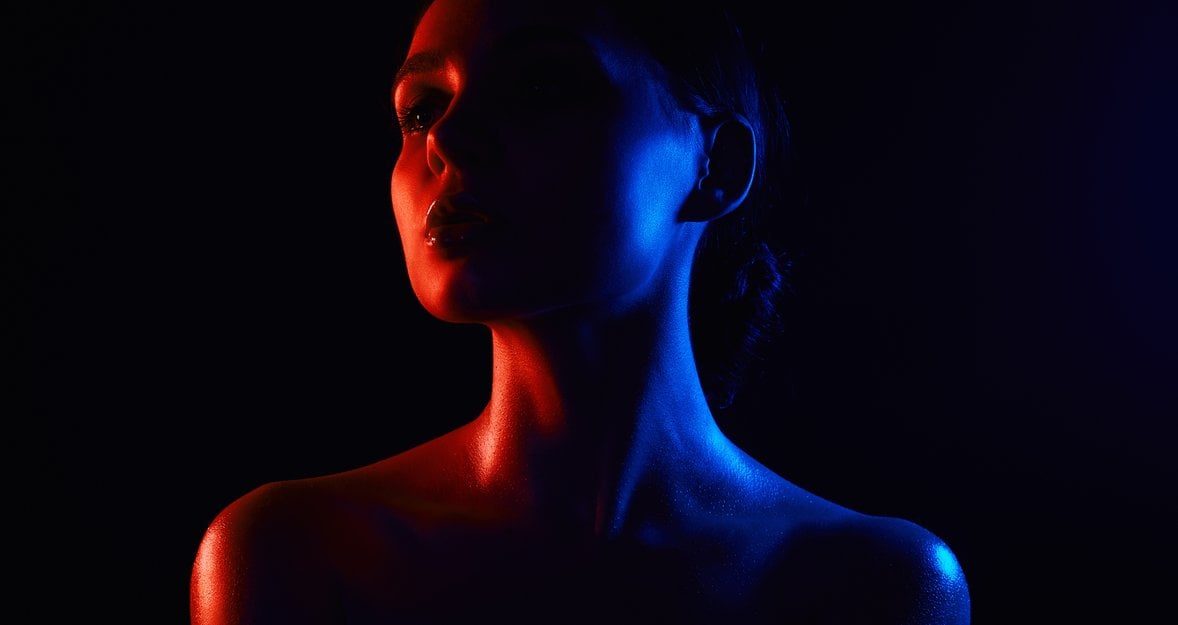
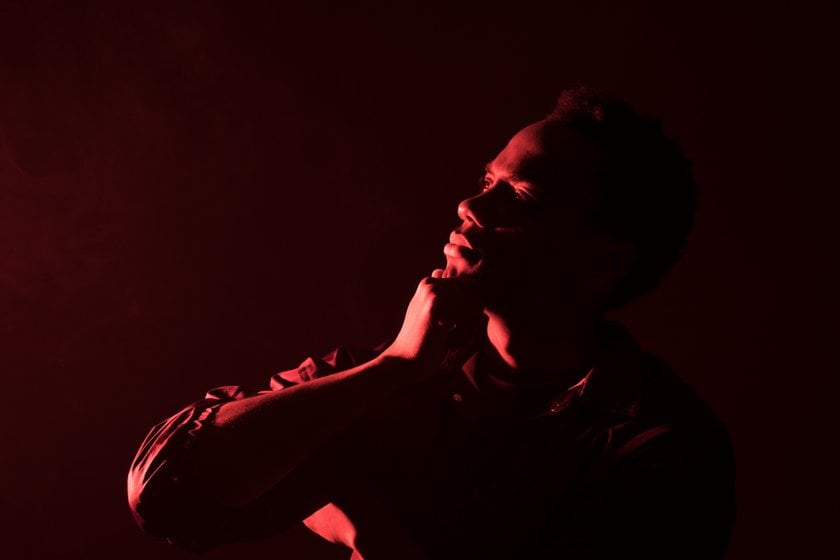
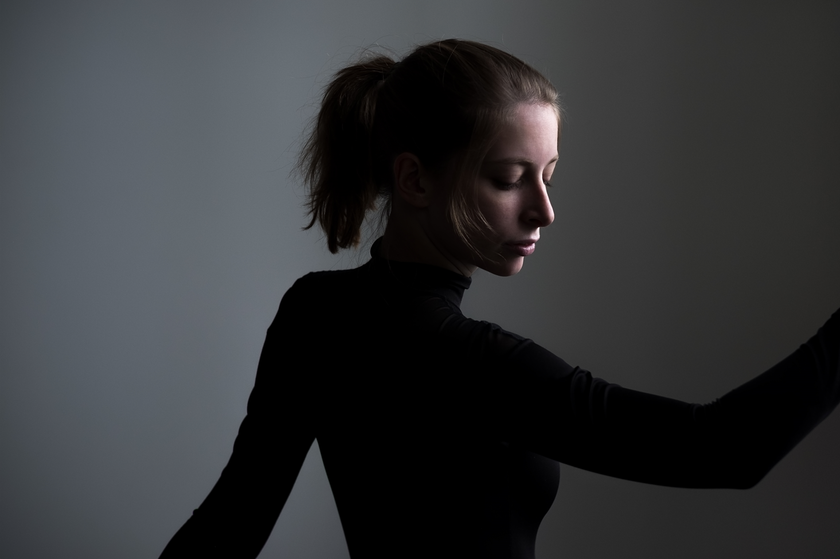
 Short lighting is a technique mainly used in portrait photography, where the near and broad side of the model's face remains in shadow, while the far, narrow side is illuminated. As a result, you get a high-contrast portrait with a focus on facial features and skin texture.
This style is most suitable for producing a meaningful picture with gloomy or melancholic tones, as well as a sense of intrigue. In short lighting, men's faces appear particularly expressive, taking on a strong character. It works well for faces that are too wide, as the shadow hides much of them.
Discover the Power of AI in Portrait Editing
DIVE IN NOW!Techniques and Tips for Mastering Short Lighting
How Short Lighting Creates Drama
To make a short lighting portrait, you need to properly position the luminous source, the camera, and regulate the angle of the subject's head. The number of illuminants can be one or more, as well as auxiliary tools like a modifier, reflector, softbox, or umbrella to produce vivid visuals. These factors depend on the type of shadows you want to create, whether soft or sharp, and the balance you want to establish between light and darkness.
 Several common rules for short lightning are listed below:
Exposure focusing. Locate the model in the center of a virtual loop and ask them to slightly turn to the side, exposing the narrow part of their face to the light.
Light angle. Set the main light source between a 45-degree and 90-degree angle to the model. The light source should be at eye level or slightly higher.
Position. The photographer must be on the opposite side of the light source and direct the camera at the wide part of the model's face. The closer the lens is to the side of the subject, the darker the portrait will be.
The short lighting outlines the basic contours, leaving plenty of room for imagination. It allows for experimentation with the number of light sources and the camera angle.Camera Settings
Short lighting relies heavily on contrast, shadow, and precision — so camera settings play a big role in getting the mood just right.
Here’s what to keep in mind:
Aperture | f/1.8 – f/2.8 for soft, shallow depth of field f/4 – f/5.6 for sharper detail | Wide aperture isolates the face; narrower gives more texture and clarity |
Shutter Speed | 1/125s or faster (or match flash sync speed, e.g. 1/200s) | Prevents motion blur; syncs with flash if used |
ISO | As low as possible (ISO 100–400) | Maintains image quality and reduces noise in shadows |
White Balance | Use preset matching your light (e.g. Flash, Tungsten) or custom setting | Ensures accurate skin tones; helps balance warm or cool lighting |
Bonus Tip: Shoot tethered if possible. It allows real-time preview and precise light/shadow adjustment.
Short Lighting Diagram

Short Lighting Examples For Visual Inspiration
Among the most popular short lighting patterns in portrait photography are:
Rembrandt Short Lighting.
Split Short Lighting.
Loop Short Lighting.
Let’s take a closer look at these examples.
Rembrandt Lighting: A Glimmer of Hope Amidst Despair
This short lighting setup is named after the famous artist Rembrandt. You can recognize it by the presence of light and shadow under the left eye. It connects the nose and cheekbones, forming a triangle. The Rembrandt lighting softens the dark side of the face, giving it a more natural yet elevated appearance. If you want to apply this diagram during your shoot, keep the following in mind:
| Stage | Description |
Light Source Position | Located at a 30-degree angle to the subject, slightly above eye level and tilted downward. |
Adding Catchlights to the Eyes | Adjust the height and angle of the light depending on the shape of the subject's face. If you use a fixed light source, change the position of the model. |
Softening the Light Flow | Use a diffuser, softbox, or umbrella to create soft shadow edges. Move the light source farther from the model. |
Creating Sharp Shadows | Attach a grid to the modifier, or simply avoid using it. |
Rembrandt Lighting is popular among contemporary photographers such as documentary journalist Steve McCurry, celebrity portraitist Annie Leibovitz, Gregory Crewdson, and David LaChapelle, who is often referred to as the Fellini of photography.
Enhance Your Photos with Luminar Neo's Studio Light
TRY IT NOW!Common locations for creating Rembrandt Lighting, aside from studios, can be museums and historical buildings from the Renaissance and Baroque eras. Their high windows with heavy curtains, abundant soft diffused light, as well as arches and columns, create ideal conditions for using Rembrandt Lighting.
Split Lighting: The Clash of Two Essences
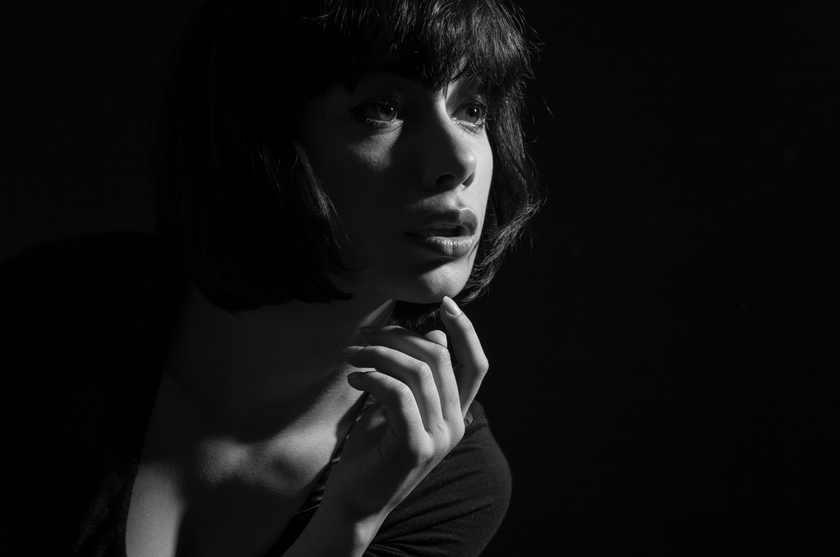 This technique is defined by high contrast, which highlights the internal tension of a person. Sharp shadows are produced by the obvious separation of the human face into dark and light sides, making them ideal for portraits of men. According to the Split Lighting diagram, the light source should be positioned to the subject's side at a 90-degree angle from the model, just above eye level.
Night-time photography strategies might be helpful for subtle portraiture. You can move the light farther away from the subject and lessen its brightness if the contrast between the two sides seems too sharp. Softer shadows can also be produced with a reflector. Strongly defined facial features add dynamism to the portrait, which seems to shout, speak about intense feelings, and capture the attention of the person standing before it.
Loop Lighting: The Calm Before the Storm
If you're not ready to work with high contrast, complex, and captivating portraits, they can be created using loop lighting. Unlike the split illumination, it features a small shadow extending from the nose and has a simple setup:
The primary light source is angled 45 degrees, tilted downwards, and slightly above the model's eye level.
To achieve smoother shadow transitions, place a reflector opposite the model.
This style is best suited for diffused lighting, which can be achieved from sunlight, a flash, or continuous lighting.
The loop lighting is ideal for photographing faces of different sizes and features, as it easily conceals imperfections. Even individuals with a slightly crooked nasal septum can appear more masculine. Soft shadows do not mean a lack of emotion; on the contrary, they produce a special intrigue and hide an unexpected plot twist.
Make Your Photos Even Better with Luminar Neo


You will inevitably come across flawed elements during post-processing. They will need to be removed to avoid spoiling the impression of the portrait and its message. When it comes to short lighting, you might need to modify the contrast, reduce or add more shadows, alter the color palette, or retouch imperfections on the face that stand out too much in the portrait. Luminar Neo has a set of tools to help with these adjustments.
Based on artificial intelligence, it can automatically make corrections to your portrait, saving you time and effort. It features Enhance AI, which brightens the darker areas of your photo. With Relight AI, you can find the perfect balance by altering the lighting in specific parts of your image. Skin AI is useful for smoothing the skin without losing a natural look.
Wrapping Up
 Behind the simple short lighting definition lies the true art of low-key photography, which is both glossy and thoughtful at the same time. This diagram allows you to highlight the unique features of the human face, thus revealing the character hidden behind them.
Since working with short lighting means a complex play of shadows and light, Luminar Neo becomes an indispensable tool, just like a camera or light source. With its numerous features, you don't have to be afraid of making your photos contrasty. Thanks to its AI functions, you can easily find the perfect lighting balance and make your pictures more high-quality and professional.