
February 27
10 min. to read
How to Make a Sticker from a Photo on iPhone: Easy Steps
Stickers are a fun, personal way to liven up chats, stories, and posts. Whether you want a tiny outline of your dog’s face, a dramatic cutout of your latest selfie, or a looping mini-moment from a Live Photo, your iPhone can do most of the heavy lifting. Below, we’ll walk you through simple, reliable methods, both native and app-based, so you’ll know exactly how to create stickers on iPhone and use them everywhere you like.
Key Takeaways
A simple long-press on the subject in a photo instantly turns it into a reusable reaction image.
Photos with plain backgrounds almost always produce cleaner stickers than busy scenes.
Live Photos can become animated reactions that feel much more personal than emojis.
You only really need extra apps if you want cleaner edges or plan to share them on other platforms.
Most sticker mistakes come from the image choice, not from the iPhone feature.
After trying it once, you will naturally start spotting moments in your gallery that work as stickers.
Step-by-Step Guide to Turning Photos into Stickers
Your iPhone already knows what the subject of your photo is, and you’re about to use that.
Open the Photos app and pick the photo (or Live Photo) with the subject you want.
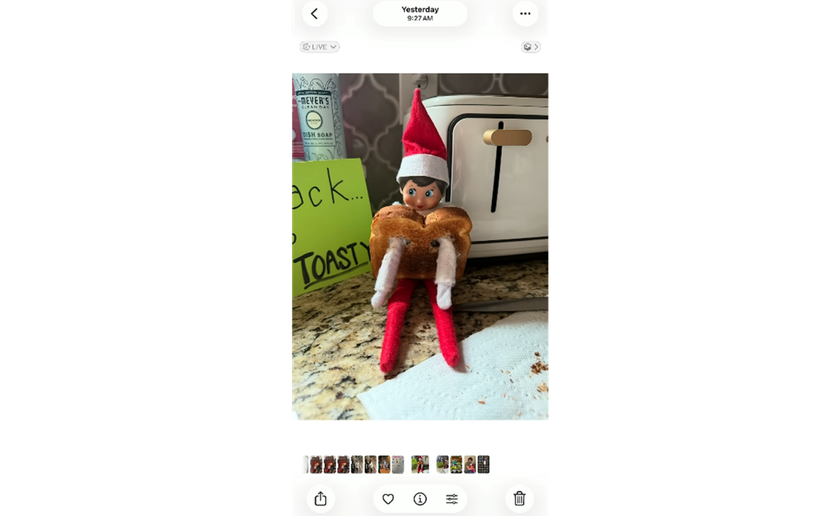
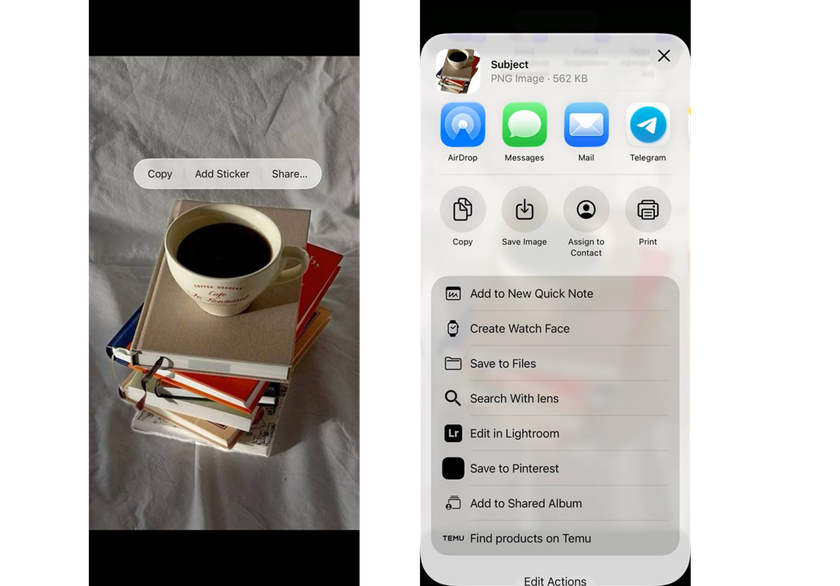
Tap to open it full screen, then touch and hold the main subject until an outline appears around it.
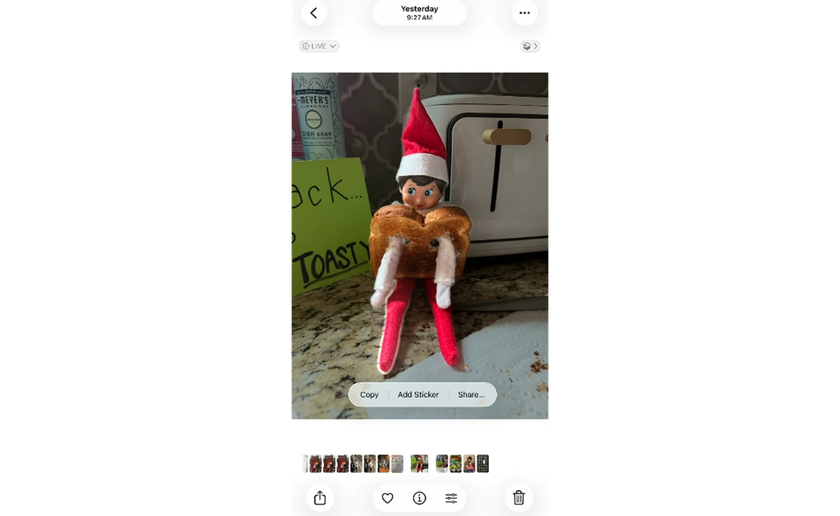
When the pop-up appears, tap Add Sticker (or Share → Add Sticker). The cutout will be saved to your drawer, and you can use it in Messages, Markup, and other supported apps.


If your photo is a Live Photo, the cutout can stay animated, which works nicely for short looping reactions, or you can switch it to a still image instead. This simple subject-isolation gesture is why learning how do you make stickers on iPhone feels almost magical, because iOS automatically detects the main subject and lifts it from the background.
Editing and Customizing Your Photo Stickers
Once you create it, you can still tweak it before or after saving:
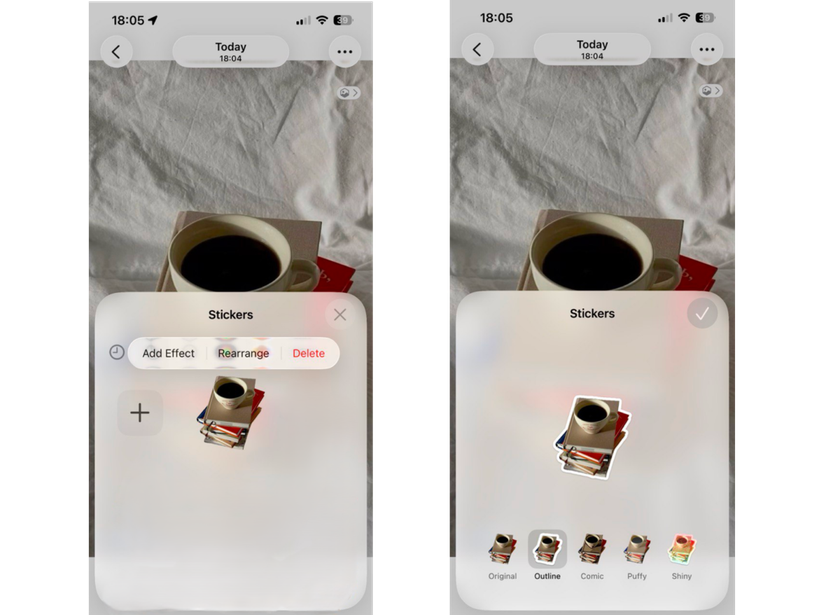
Tap Add Effect right after creating the sticker to choose styles like Outline, Puffy, Comic, or Shiny.
Long-press a saved cutout in your sticker drawer to edit the effect later or refresh its look.
For more precise control, crop the photo first in Photos (use the crop tool to zoom closer) so the subject isolation is cleaner. Wired and Lifewire both note this step when explaining the iOS feature.

If you want to polish edges or remove stray background bits, try the transparent background removal software. It lets you fine-tune the cutout, add shadows, or smooth the border for a professional sticker finish.
Using Third-Party Apps to Design iPhone Stickers
 The built-in tool works perfectly for quick stickers, but apps offer more freedom, like layouts, templates, and exporting files you can use in WhatsApp, Telegram, or custom keyboards.
Top app choices include web and mobile tools like Adobe Express (fast background remover and export), Canva (one-click remover and design templates), and online services such as remove.bg for quick, automated cutouts. Each has free tiers and mobile apps that allow how to make pictures into stickers if you prefer more design power.
How to use these apps, generally:
Import the photo.
Use the background remover or cutout tool to isolate the subject (or rely on an automatic subject-detect feature).
Add effects, borders, or text.
Export as PNG (transparent) or save directly to Photos as a sticker-compatible image.
If you want an animated one, some apps let you trim the clip and export it as MP4 or APNG for platforms that support motion.
Troubleshooting Common Sticker Creation Issues
 The nice part is that nearly all issues can be fixed in a couple of seconds.
The Subject Isn’t Separating Properly
Zoom in and crop closer to the person or object before long-pressing in Photos. Busy backgrounds confuse detection, so you can also run the picture through a cut out image background tool first to remove clutter.
The Sticker Doesn’t Appear in Messages
Make sure you tapped Add Sticker and not just Copy. It should appear in the sticker drawer right away. If it still doesn’t show up, close and reopen the Messages app.
Sticker Edges Look Jagged or Messy
Use a background eraser app to smooth the edges of the original image. Another quick fix is adding a thin outline effect inside the sticker editor; it hides small imperfections surprisingly well.
Your Live Photo Sticker Won’t Animate
Only stickers created from Live Photos can move. Open it, tap Edit, and check that animation is enabled.
Managing and Deleting Stickers on iPhone
To keep your sticker drawer tidy:
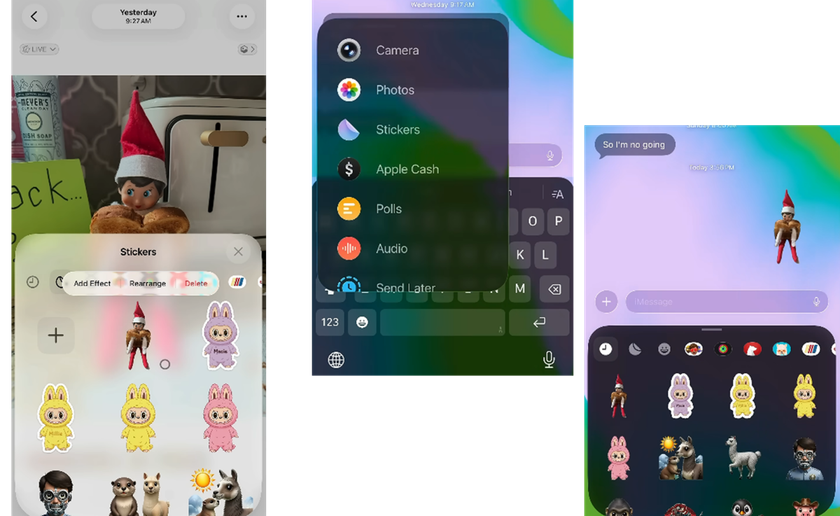
Open Messages, go to the drawer, tap the pack icon (or the three dots), then press and hold the image and choose Delete or Remove.

You can rearrange, rename, or remove packs from the keyboard menu. These controls are helpful once you collect a lot of custom reactions and want to tidy things up.

Knowing how to do sticker on iPhone management will save you time and keep your keyboard uncluttered when you’re in the middle of a chat.
Sharing and Saving Your Sticker Creations
Once you’ve made a sticker:
Use Share in Photos to send the sticker via AirDrop, Mail, or save it to Files.
Create a transparent PNG in a helper app and upload it to platforms that support custom reactions, including WhatsApp, Telegram, and Slack. The first setup may feel unfamiliar, but most tutorials walk you through it step by step. Animated WhatsApp reactions are also possible by turning a Live Photo into a looped pack.

Planning to use it outside Apple Messages? Export it as a transparent image and make sure it matches the app’s file size and format rules.
Tips for Perfectly Shaped and Clean-Cut Stickers
 Follow these tips and your stickers will look intentional instead of automatically cropped.
Start with a high-contrast subject photo; plain backgrounds make cutouts cleaner.
Crop tightly around the subject before creating the sticker, so automatic subject extraction has less background to guess.
Use a dedicated background eraser or cut-out image background tool when the subject blends into the background, or there are lots of fine hairs or transparent details.
Export at high resolution and resize later; upscaling a small PNG will reveal jagged edges.
Apply subtle inner shadows or outlines in an editor to make stickers read clearly on both light and dark chat bubbles.
One More Thing
Turning a photo into a custom reaction on your iPhone is honestly easier than most people expect. If you’ve ever searched how to turn a photo into a sticker iPhone, the built-in long-press feature is the step many guides overlook, and it works perfectly for quick replies inside Messages. When you need cleaner edges or a cutout you can share elsewhere, tools like Adobe Express, Canva, or remove.bg give you more control. The entire process still takes only a couple of minutes.
 >
>
