What Is Red Eye In Photography And How To Fix It Easily
October 16, 2025
Red eyes can turn a perfect moment into an accidental horror show. But with a few simple tricks, you’ll never be surprised by them again.
The dreaded red eye. We’ve all been there. You think you’ve captured the moment: smiles, motion, the real thing. Then the screen reveals two bright, creepy red eyes, and the whole vibe collapses. Luckily, it’s not a curse, just simple physics and the way our eyes reflect light. As a professional photographer, I’ve battled this issue many times, and I’ve gathered a wealth of simple, practical tricks to prevent and fix it. We are going to dive deep into what causes red eye in pictures and arm you with easy, effective solutions that’ll save your snapshots.
Understanding the Red Eye Phenomenon
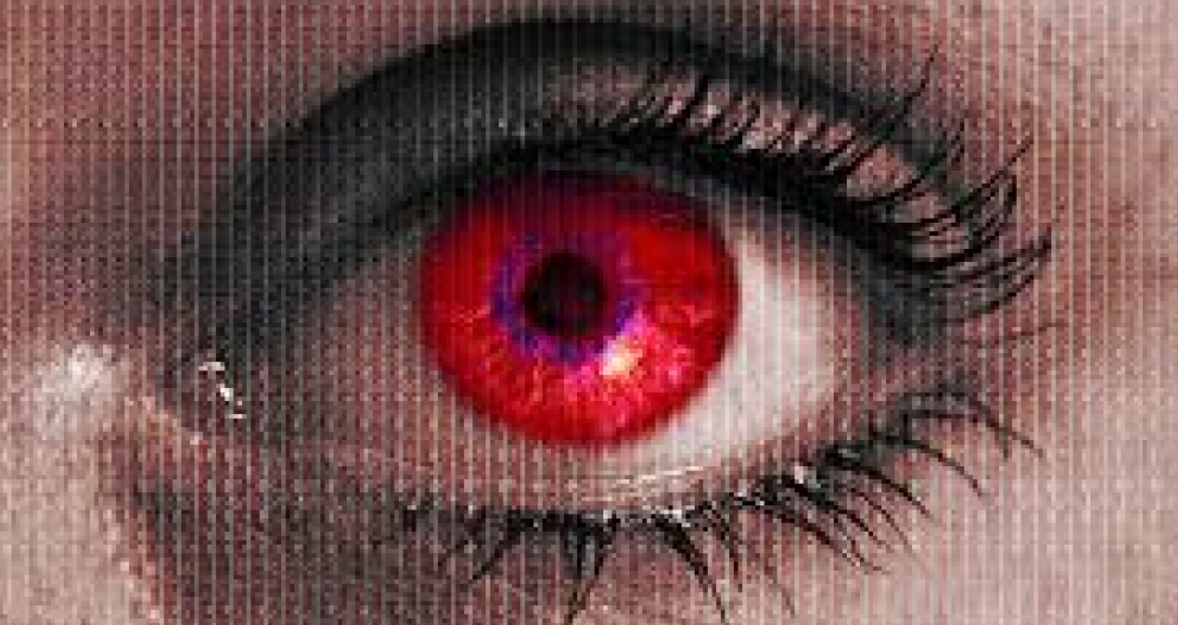
 So, you’re looking at a photo, and the eyes are a jarring, almost unsettling crimson. Have you ever wondered, “What causes eyes to be red in pictures?” The explanation is surprisingly straightforward: it comes down to the camera’s flash, low ambient light, and the human eye’s internal workings. When you take a photo in a dimly lit environment, your subject’s pupils are dilated; they’re wide open to let in as much light as possible. When the camera’s flash fires, its light travels through the wide-open pupil, hits the richly supplied blood vessels in the retina at the back of the eye, and then reflects directly back into the camera lens.
Because the light reflects off the blood-rich tissue, it appears red in the resulting photograph. The speed of light is so fast that the pupils don’t have time to contract before the exposure is recorded. It’s essentially a very fast snapshot of the eye’s interior being illuminated. It’s worth noting that flash-eyes most often appear in children or people with a large pupil diameter, because their pupils dilate more in the dark.
Unleash Your Creativity with Luminar Neo's Auto Photo Editor
Try it Now!Simple Preventive Measures: Stopping Red Eye Before It Starts
The absolute best way to deal with the red-eye effect is to prevent it from ever happening. Trust me, it’s much quicker and easier to avoid it in the first place than to spend time on complicated post-production fixes later. Here are my go-to techniques for avoiding those glowing eyes.
Increase the Available Light in the Scene
 This is the most fundamental and effective step. If the environment is bright, the subject’s pupils will naturally contract and become smaller. A smaller pupil means there’s less space for the flash to penetrate and reflect off the retina, thus significantly reducing the chances of red eye. So, before you even think about turning on the flash, try turning on a lamp or opening a curtain. If you’re indoors and trying to figure out how to get red eyes in photos, just remember to flood the room with extra light. This simple act drastically reduces the need for a blinding flash altogether.
Use the Camera’s Built-In Pre-Flash Feature
 Many cameras, from basic compacts to more advanced DSLRs, have a dedicated red-eye reduction mode. When activated, the camera emits a very quick burst of light: a pre-flash, a moment or two before the main flash fires to take the picture. This initial burst of light causes the subject’s pupils to constrict naturally. By the time the main flash goes off, the smaller pupils effectively act as a shield, preventing the light from reflecting off the retina.
Physically Separate the Flash from the Lens Axis
 This is a trick that professional photographers rely on heavily. The reason why do eyes look red in photos is often because the flash is too close to the lens. On a DSLR or mirrorless camera, using an external flash unit that can be angled or positioned away from the camera is the gold standard. By aiming the flash up at the ceiling (bouncing the light) or using a flash bracket to position the light source a few inches higher or to the side. You ensure that the light reflecting off the retina returns at an angle that misses the lens. If you’re just using a phone, this isn’t an option, but for any serious camera work, moving the light source is a game-changer.
Ask the Subject to Avert Their Gaze Slightly
 If you’re still battling red eye and can’t change your lighting setup, try this simple direction: have your subject look slightly away from the camera lens. Instead of staring directly into the lens, ask them to look at your shoulder, their friend beside the camera, or an object just off to the side.
Since the flash is only an issue when it reflects directly back into the lens, changing the angle of the eye even slightly is often enough to break that direct line of reflection, solving the problem immediately. For those who enjoy specialized photography, learning how to take pictures of eyes without the red-eye issue often involves careful off-camera lighting, a skill set you can explore further.
Post-Processing Power: How to Fix Red Eye After the Fact
Sometimes, despite all your best efforts, the red eye still sneaks into your picture. Or maybe you inherited a bunch of old family photos taken with a primitive flash. When prevention fails, your best bet is a powerful editing software. Thankfully, you don’t need a degree in graphic design to fix this.
Applying a Red Eye Removal Tool
The absolute easiest and fastest fix is using a dedicated tool designed specifically for this purpose. Nearly every major photo editing program today has a Red Eye Removal feature. For example, in a powerful yet intuitive editor like Luminar Neo, there’s a specific tool to remove red eye. This tool uses smart algorithms to detect the pixels in the eye area.
Here’s a breakdown of how this simple tool usually works:
Detection: The software scans the image, looking for the tell-tale clusters of red pixels.
Selection: The user either clicks directly on the red pupils or draws a small box around them.
Correction: The algorithm instantly desaturates the red color and replaces it with a natural-looking black or dark gray, matching the rest of the pupil.
When a single flaw threatens a perfect shot, this quick, one-click repair is the lifesaver you need.
Utilizing Manual Color Correction and Local Adjustments
If the one-click tools don’t quite cut it, try editing by hand. It’s a little slower, but you can fine-tune every tiny detail. If you’re wondering, “How can I remove red eye in photos?” with maximum precision, manual tools are the answer.
You can use a Color Replacement Tool to selectively target and change the hue, saturation, and lightness of the red color. Sometimes, simply darkening the area isn’t enough; you need to adjust the actual color channel. For a more painterly, precise fix, you can use a local adjustment brush.
The steps are simple:
Select a small, soft brush.
Set the brush to the Color Replacement or Desaturation mode.
Carefully paint over the red area, changing the color to a deep black or very dark gray sampled from a non-red part of the subject’s pupil or a different eye in the photo.
This manual method allows you to precisely control the intensity and boundary of the correction.


Creative Alternatives: Embracing the Fix
You might have a perfect picture ruined by red eyes that simply won’t behave, no matter what tools you try. Instead of trashing it, try one of a few clever alternatives.
Converting the Image to a Monochromatic Masterpiece
 One of the cleanest fixes for stubborn red eye is to remove color altogether. Turn the image to black and white, and those angry red pixels simply read as another shade of gray, slipping into the pupil naturally. It’s a fast, elegant rescue that often works beautifully for portraits and moody shots. This works exceptionally well for portraits and dramatic shots. It’s a quick, stylish rescue when the red eye is beyond simple color correction.
Fixing Photos on the Go
 In the age of mobile photography, most of us edit on our smartphones. You’ll be happy to know that even on mobile devices, red-eye removal is simple. Knowing how to touch up photos on iPhone or Android is essential for sharing pictures quickly. Many mobile editing apps, and even the built-in photo editors on smartphones, include the same automated red-eye removal feature found in desktop software.
You tap the tool, tap the eyes, and voilà, instant fix! This is perfect for those quick social media shares where you notice the issue right after snapping the photo. The key takeaway here is that you don’t need to be tied to a desktop computer to correct this pervasive photographic issue.
Final Thoughts
Red eye is a technical flaw, not a creative one, and thankfully, it’s one of the easiest problems to fix in photography. Whether you prevent it by using an external flash or increasing ambient light, or tackling it head-on in post-production, you now have a comprehensive arsenal of tools and techniques. Understanding how to remove red eye effect means you can either prevent it while shooting or zap it away in post with almost no effort. Take more pictures; the awkward red glow won’t follow you anymore.