How to Photograph Landscapes at Sunset
Last Updated on August 18, 2025
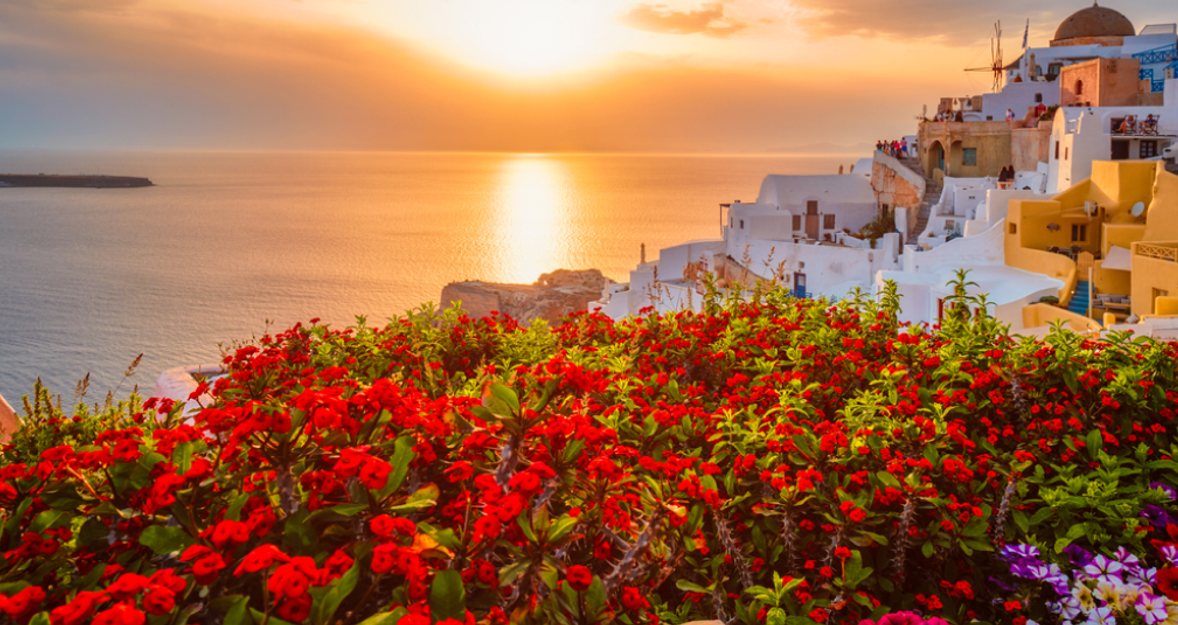
Learn how to capture stunning sunset photos with the right timing, composition, and gear. Discover tips on framing, using a tripod, and shooting in RAW for perfect tones.
To capture a sunset scene, you cannot simply point the camera towards the horizon. The light can vary in colors between warm gold and deep purples within minutes, so it is all about the timing. Get there early and explore the best composition, framing the sun behind a hill, a pier, or a silhouette of trees. A tripod helps to maintain the sharpness of shots when the light is failing, and shooting in RAW helps maintain fine tones that can be manipulated later.
Landscape Sunset Photography Camera Settings
 When considering sunset photography tips, low ISO (100-200) keeps noise minimal, while a narrow aperture (f/8-f/16) sharpens details across the frame. Set a lower shutter speed when the sun goes down. It will capture deeper shades, but the camera must be stable. Setting the White balance to shade or cloudy will produce warmer tones, and bracketing the exposures may serve to deal with bright skies and darker foregrounds.
When discussing how to photograph landscapes at sunset, your camera settings will determine whether the image captures the depth of the scene or blurs into a flat, colorless image. These sunset photography tips focus on balancing ISO, aperture, shutter speed, focus, and white balance – the five core elements that shape the final image. How to take sunset pictures?
Step | Setting | Recommendation | Example in Practice |
1 | ISO | Start low (100-200); raise gradually as light fades | Keep ISO 100 until 10 minutes before the sun sets |
2 | Aperture | Narrow (f/8-f/16) for sharpness across the frame | f/11 for a beach sunset with foreground rocks |
3 | Shutter Speed | Adjust to control brightness; slower after sunset | 1/125s at sunset, 1/30s during twilight |
4 | Focus | Use the manual for better precision | Focus on a silhouette 1/3 into the frame |
5 | White Balance | Try “shade” or “cloudy” for warmer tones | Cloudy WB for a glowing orange horizon |
Applying these settings when photographing sunsets ensures you capture both the atmosphere and the fine detail. After shooting, a Photo Editor can refine tones without losing the natural mood, giving your work the final polish it deserves.
Exclusive Tools of Endless Possibilities in One AI Editor
Explore Now!Composition Tips On Sunset Photography
When deciding how to photograph a sunset, composition determines whether the image feels flat or has depth. Good framing is the one that naturally attracts the viewer into the most striking object of the scene. Photographing sunsets benefits from principles such as the rule of thirds, balancing bright skies with darker areas, and adding foreground details for context. These concepts also apply when you are on a beach, a mountain, or even shooting at a rooftop in the city.
Rule of Thirds
 In how to take a good sunset photo, the rule of thirds is one of the most reliable guides. Suppose you divided your frame into a 3x3 grid. Putting the sun, a silhouette, or cloud form along these lines gives a more dynamic tension and a feeling of movement. As an example, putting the horizon in the lower third gives prominence to the sky, whereas putting it in the upper third gives prominence to the foreground. This will work well in a coastal sunset where there is a natural separator in the form of the waterline.
Where to Find Interesting Foregrounds to Accompany Your Sunset
 Foreground elements anchor the image and add context, which is especially helpful when photographing sunsets. The viewer can be directed in the frame with the use of rocks, tree branches, boats, or even urban structures. It would be a nice idea to scout the location earlier in the day to locate shapes that will be evident in silhouette. An example is the windmill on an orange sky, which gives scale and texture. This extra planning makes how to take good sunset pictures easier, as you already know where to position yourself.
After capturing your shots, tools like an AI background remover can help refine silhouettes without affecting the natural glow of the sunset.
Experimenting with Different Angles and Perspectives
When shooting a sunset, a change in viewpoint can completely transform the mood of the photo. Try positioning yourself lower to the ground to highlight textures, or move to a higher point for a sweeping horizon. Varying angles can also help reveal elements hidden from eye level.
Three angles worth trying:
Low ground level — emphasises foreground details like grass or rocks.
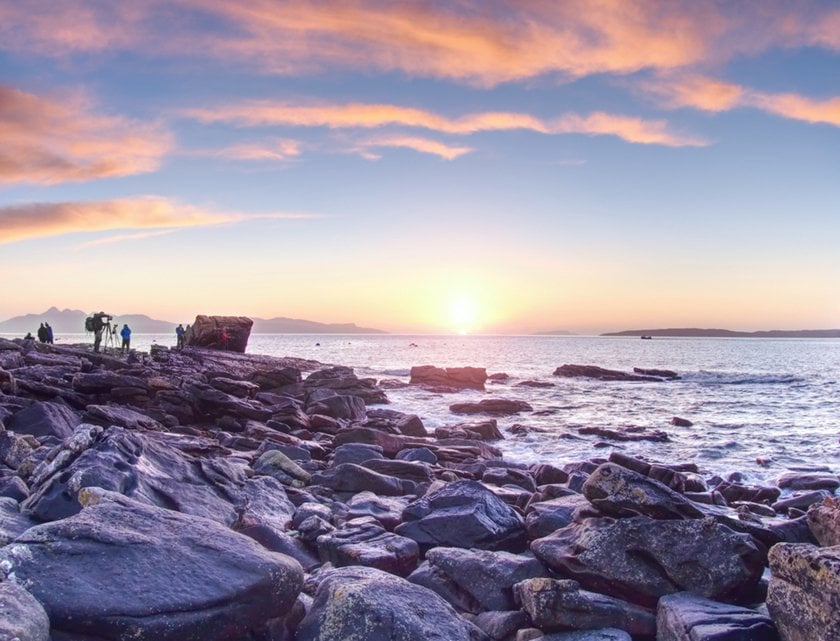
Eye level — a balanced perspective showing both sky and terrain.
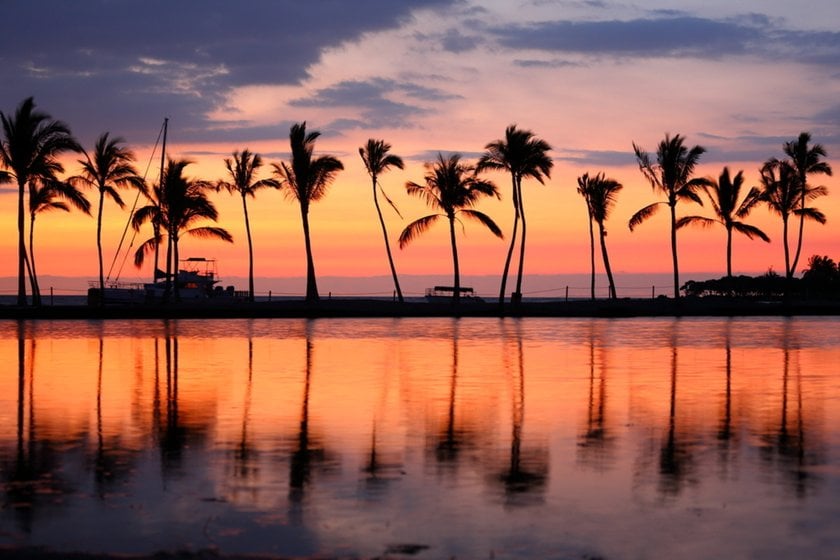
High viewpoint — captures wide views and dramatic colour transitions.
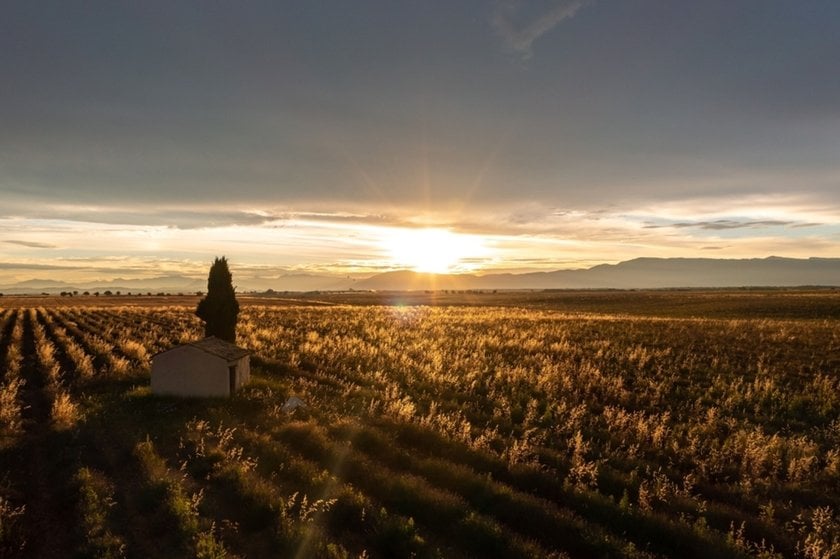
Mixing these tips for sunset photography will help you spot compositions you might otherwise overlook and keep your sunset photography portfolio diverse.
Leading Lines: Directing the Eyes of the Viewer in Sunset Landscapes
 How to do sunset photography? Leading lines photography is a proven way to direct attention toward the most vibrant part of your sunset shot. Lines may exist in the natural world or be built by man-made objects, and when they are intentionally placed, they draw the eye directly to the sun or the reflection of the sun. Good examples of leading lines:
Banks that bend away to sea
Wooden jetties going out into the water
Field tracks or ruts across the fields
Crops or vineyard vines in lines
Fences forming the line of sight
The shadows of the low sun
Bridges or boardwalks that bordered the horizon
Warm light would allow combining these elements to get the impression of immersion and intentionality of the image.
Additional Sunset Photography Tips for Perfect Shots
Preparation and the use of proper techniques are what determine whether you get beautiful landscape photos during the golden hour. Through the planning of the location to professional shooting modes, all measures are taken to maintain the depth and richness of colours. The combination of technical and creative thinking will help you produce sunset shots that will be natural but powerful at the same time.
Prep Your Sunset Shoot
 Remarkable and distinctive sunset images can hardly be the result of chance. The best way to ensure there is a possibility of getting something special is to find out the precise time of sunset in your area. Coming 30 minutes or more before the sunset time you have will give you time to investigate the scene. During this time, you can scout the possible shooting angles, elements of interest in the foreground, and evaluate the interaction between the clouds, water bodies, or urban profiles, with the light. Premeditation of these elements gives richness and ambiance to your end picture.
Some photographers also have special applications that monitor the position of the sun and can forecast where and when the colors can be the most intense. These devices assist you in strategically placing yourself in order to get the optimal point of the sunset in terms of color. This will alleviate the pressure of working under the gun, and a more relaxed creative process will be possible. Proper planning of your shoot will allow you to have freedom to play around with composition and camera settings rather than rushing to respond to the changing light.
Bracketing: The Method of Obtaining the Complete Dynamic Range of the Sunset
 The range of contrast in sunsets is difficult to deal with: the sky may be very bright, and the foreground or the landscape may be in deep shadow. Bracketing is a viable alternative since it takes a number of exposures of the same picture at varying exposure levels.
How to photograph a sunset? To give an example, one shot can be underexposed to retain all the details and colors in the sky so as not to blow out the highlights. There is another shot that is over-exposed to make the darker elements of the foreground show the texture and detail. It may take a third shot with balanced exposure as a midway. The exposures can be later combined with the stacking photography software, which creates a single photograph that has balanced light on highlights and shadows.
The technique produces an image with detail in all parts of the frame, which could not possibly be accomplished in one exposure. Bracketing comes in handy when using a slower shutter speed to shoot moving clouds or water, as they need to be taken in a smooth manner without losing significant tonal details.
RAW to allow Full Flexibility in Editing
 Raw files preserve much more image data, such as greater color gamut and dynamic range, than JPEGs.
This additional data permits greater refinement of the color gradients, exposure, and contrast with no penalty in image quality or the addition of compression artefacts. As an example, a sky exposed, blown out, or over-exposed in-camera may be recovered in editing by reducing highlights. In the same way, darkened spaces can be illuminated to bring out the hidden features without losing the natural look.
RAW files are especially useful in combination with such programs as Luminar Neo or Adobe Lightroom that have extensive editing capabilities. The additional data is used to enable these programs to assist the photographers in the fine-tuning of color variations and contrast changes that add the mood and depth to the sunset images.
Realistically, shooting in RAW means that the initial exposure settings of the camera can be greatly improved later during the post-processing phase.
When the Sun Goes Down, You Don't Pack Up-Continue to Shoot the Scene
 It is usually at the time when the sun has already set behind the horizon that the most vivid and conspicuous colours transpire. It is in this period that the sky changes through an exciting color palette- it starts with warm oranges and reds that are fired to deep pinks, then rich purples and, lastly, cool blues. This short moment is usually called the blue hour. It gives soft diffused light with a moderate contrast and forms a special atmospheric effect in photography. The blue hour contrasts with the brighter light of earlier in the day by providing a soft, ethereal light that illuminates textures and detail, and makes it an attractive time of day to shoot sunset scenes for photographers.
During this period, photographers will be at the right place to capture a variety of things, such as reflections on water bodies, the shadows of trees or buildings, or the city lights coming on as the twilight intensifies. All these details allude to the narrative of the scene and deepen the picture. This requires patience; waiting around to see how colors and light develop can take what otherwise might have been an interesting sunset photograph into a portfolio piece.
Tripod to get Sharp, Steady Shots
 During and after sunset, less light is available to the camera sensors, and this usually requires slower shutter speeds to ensure correct exposure. This slow shutter speed will bring about camera shake without the stabilization feature, which will lead to blurred photographs. This is when a good tripod is required as a stable base to hold the camera still during long exposures.
Slow shutter speed settings with a tripod are creatively open. To take a simple example, you can calm down the surface of a lake or an ocean and turn the flowing water into a smooth, glassy texture, contrasting splendidly with some jagged, unmoving objects like rocks or ships. The other method is to have the light trails of passing vehicles, which bring the dynamic lines and motion to the composition as the colors of the sunset fade in the background. Such effects are based on the stability of the camera, which is only achievable through a dependable tripod. Otherwise, such shots would never be possible to make with clarity.
When choosing a tripod for sunset photography tips and shooting sunset, look for these features:
Feature | Why It Matters for Sunset Photography |
Adjustable height | Let's you experiment with angles |
Quick-release plate | Speeds up camera setup |
Sturdy but lightweight build | Easy to carry without losing stability |
Independent leg adjustment | Works on uneven terrain |
Smooth head movement | Better control for panoramic shots |
Combining a good tripod with a remote shutter release from your Photographer tools kit will ensure maximum sharpness.
Capture More than Just the Sunset – Include the Landscape
 A sunset is beautiful; however, the impression of the location is provided by other objects in its environment. For how to take good sunset pictures, frame the sun with mountains, shorelines, buildings, or even people. This lends depth to the composition and gives the picture more movement and action. The background colors are turned into a place where a bigger story can be told, rather than a plain horizon shot; you end up with a place that is vibrant and connected to a real place.
Luminar Neo Editing The Sunset Photos
 How to take a sunset picture? The post-processing is the critical factor in changing sunset photos into dramatic images. Luminar Neo provides the instruments specially designed to deal with this task, so photographers can achieve much better results in exposure, colors, and details.
The AI-driven adjustments made by Luminar Neo are one of its strongest features since it automatically finds areas that need correction, and can also be controlled manually. Sunsets will require white balance correction, usually to bring out warm tones without the photograph becoming saturated. The color grading abilities of the software aid in perfecting the color to create the mood that the shooting had.
One such method would be to use a local adjustment to add more shadows or highlight something in either clouds or reflections of the water. Using masks, a photographer can selectively edit parts of the photo, enhancing contrast where the slow shutter speed has created smooth water surfaces or motion blur in clouds.
Stacking photography software is helpful if multiple exposures were taken to capture different brightness levels of the sunset. Luminar Neo will allow the combination of such exposures to stretch the dynamic range, retaining detail in the shadows and highlights.
Real-life example: a photographer capturing a sunset over a lake used slow shutter speed to smooth the water. Post-processing in Luminar Neo allowed enhancing the reflection’s vibrancy and clarity, while reducing noise at higher ISO camera settings.
The Sunset Photography Best Gear
 Taking pictures of sunsets requires certain types of equipment that can be used for shooting under varying light conditions and help to capture the color shades.
A camera with good low-light performance and adjustable ISO settings helps manage the light shift during the golden hour. The broader ISO ranges of the camera can enable it to shoot at higher sensitivities to reduce excessive noise, which is necessary because light disappears.
Wide aperture lenses (such as f/2.8 or f/4) help to gather more light and produce sharp pictures, but the landscape-oriented shots are usually better with smaller apertures (f/8-f/11) to enlarge the depth of field. Using the rule of thirds in photography when framing the horizon or sun position creates balanced, compelling compositions.
A sturdy tripod is indispensable for shooting with slow shutter speed, stabilizing the camera during longer exposures to avoid blur. Neutral density (ND) filters can also be used to reduce the speed of the shutter in a bright situation to allow artistic effects such as smoothing out moving water or catching cloud trails.
Sample configuration: a full-frame mirrorless camera with an ISO range of up to 51200, combined with a 24-70mm f/4 lens, tripod, and circular polarizer filter, will give the user the versatility to shoot detailed sunset scenes in various situations.
Your AI-Powered Photo Editor for MacOS and Windows
Discover Now!Continue Doing Experiments And Improving Your Sunset Photography
Advancement in sunset photography comes about as part of a cycle of practice, experimentation, and analysis. Every meeting is a chance to experiment and develop a creative vision.
Experimenting with slow shutter speed settings reveals different textural effects, such as turning waves into silky surfaces or capturing starbursts from the sun’s rays. Adjusting the ISO camera value affects image noise and exposure latitude, offering control over sharpness and grain.
Composing with the rule of thirds in photography invites variation – placing the sun off-center or using natural foreground elements can change the emotional impact of the shot. Experimentation with focal lengths changes perspective, and experimentation with shooting angles affects the interaction of light.
Critically reviewing results on a calibrated screen or otherwise will help in finding areas of improvement. Using stacking photography software to combine exposures can extend what was captured in-camera, expanding creative possibilities.
Photography of sunset also gains an advantage in studying weather conditions and paths of the sun to predict the best times and conditions to take pictures. In the long run, such experimentation results in an individual style and an enhancement of technical prowess.


