How to Take Product Photos
June 25, 2025
If you want to learn how to take product photos that make your products pop, keep reading.
Product photography is more than snapping pictures of items. It’s about making buyers feel something before they even touch it. If you’re a photographer diving into e‑commerce, learning how to take product photos can become a real income booster. This guide is tailored to photographers looking to master the art of shooting compelling, sell‑worthy images.
Why Product Photography Matters in E-Commerce Success
Good photos sell. It’s that simple. Whether you’re shooting for a client or your own online shop, images influence buying decisions far more than descriptions do.
The impact of good product photos on conversions
Customers can’t touch or feel a product online. That’s where your photos do the convincing. Clear, good product photos reduce hesitation and increase trust. Studies show users spend more time on images than reading copy, and conversions often mirror that attention. Especially in fashion, tech, and beauty categories, image quality heavily influences perceived quality.
One survey found that 75% of online shoppers say images heavily influence their purchase decisions. So if you want to win in e‑commerce, make sure your images aren’t just technically correct—they need to resonate emotionally as well.
How professional-looking photos build trust
Blurry or dark photos signal amateurism. Clean, consistent, high-resolution photos—especially when you know how to photograph products with care—suggest quality and professionalism. That first impression can mean the difference between someone bouncing or buying.
High-quality images also reduce returns. Customers know what to expect because the product is shown from every angle, in the right colors, and under accurate lighting. Transparent and attractive photography builds trust—one of the most valuable currencies in the digital marketplace.
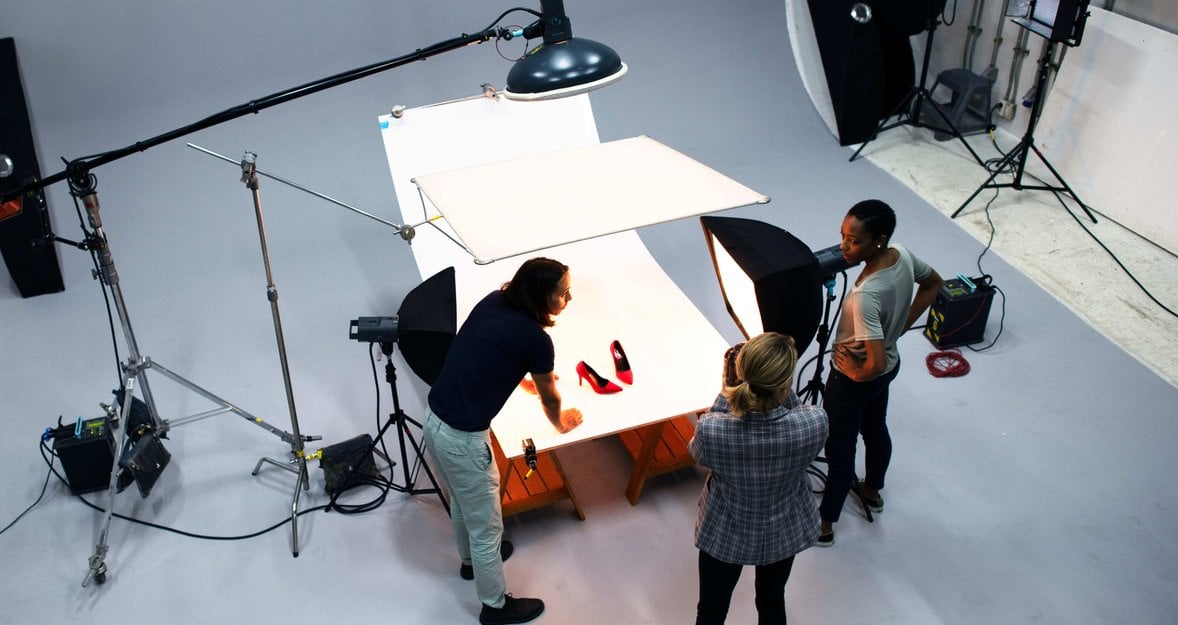
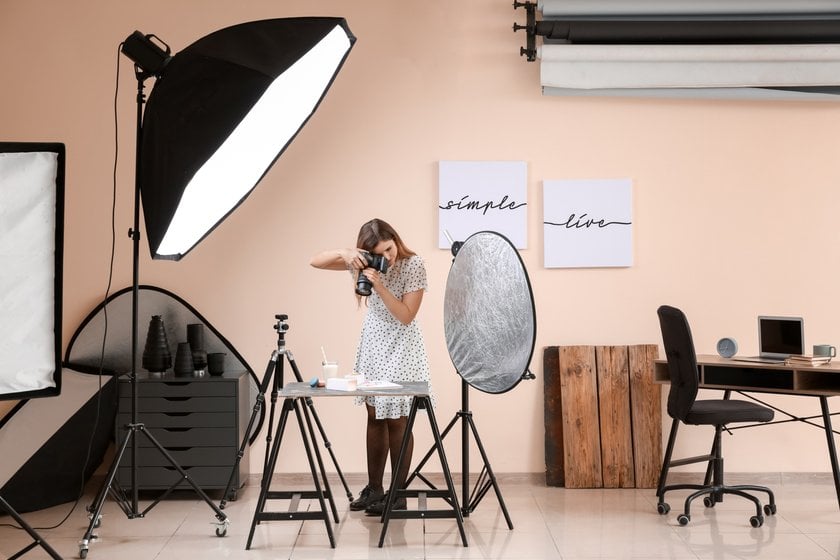
Essential Gear for Product Photography
Before you get overwhelmed by gear, know this: you can start with what you already have. The goal is clarity, consistency, and good lighting.
Camera or smartphone: What you really need
A DSLR or mirrorless gives manual control, better dynamic range, and sharper images. But modern smartphones also work if used smartly. Many pros begin by figuring out how to take good product pictures using just a phone and window light.
Gear | Pros | Cons |
DSLR/Mirrorless | Full control, superior quality | Higher cost, steeper learning curve |
Smartphone | Portable, quick setup | Limited manual control, variable |
For serious clients or product lines, invest in an interchangeable lens camera. But when you’re starting out or shooting lightweight content, a recent smartphone like an iPhone or a Samsung Galaxy will do the job if used with proper lighting.
Tripod for stability
A tripod prevents blur and keeps framing consistent between shots. It’s essential for learning product photography techniques like HDR stacking or precise focus. It also speeds up editing by giving you consistent framing, making batch editing much easier.
Consider a tripod with an overhead arm for flat lay shots. This setup is perfect for shooting cosmetics, food, or accessories. It adds visual diversity to your portfolio and opens up new angles for storytelling.
Backdrop and white sweep setup
Use a white sweep (paper or plastic) to remove harsh lines. It isolates the product and makes background removal easy in post. A sweep seamlessly curves from vertical to horizontal, eliminating the horizon line.
Vinyl and foam boards work well, too. Choose matte surfaces over glossy to reduce unwanted reflections. Neutral grays or subtle textures are also acceptable if they align with the aesthetic.
Lighting equipment: Softboxes, ring lights, or natural light
Soft, even lighting reduces harsh shadows. Softboxes, ring lights, or continuous LEDs work well. But a simple window with diffused daylight is often the best way to shoot product photography on a budget.
For more control, consider a two-light setup: one main light and one fill light or reflector. This gives you dimension and depth without dramatic shadows. If you’re shooting reflective objects like glass or metal, a light tent can reduce unwanted glares.
Reflectors and foam boards
Bounce light back with white foam boards or reflectors. This fills in shadows and reveals texture. Gold reflectors add warmth, silver increases contrast, and white balances the light. Foam boards are cheap and can be found at any craft store. When using only one light source, placing a reflector on the opposite side balances the exposure beautifully. It’s a pro trick that makes a big difference.
Optional: Lightbox, lenses, props
Lightboxes are great for small items. Macro lenses help with jewelry or tiny textures. Props can enhance context and scale. For example, a candle can be shot on its own or beside a book and coffee mug to suggest cozy vibes. Props should complement, not compete with, the object. Keep them minimal and consistent with your brand identity.
How to Take Product Photos at Home or in a Studio
Let’s walk through a standard product photography setup you can use at home, in a small studio, or even in a garage with the right light.
Step 1: Set up your shooting area
Choose a well-lit space—beside a window or under soft lighting. Clear out distractions and lay down your backdrop. Make sure surfaces are dust-free. Arrange your lights and reflectors before bringing in the product. Test the light direction and strength by placing an object and taking a test shot. Avoid mixed lighting sources (like daylight + ceiling lights) to maintain color consistency.
Step 2: Choose and position your lighting
Place a softbox or LED panel on either side. If using natural light, set the product near a window with reflectors opposite. This is a core product photography tip. Adjust the distance between the light and the item to control shadows. The closer the light, the softer the shadows. For harsh highlights or reflections, try diffusing the light further with a sheet or translucent curtain.

Step 3: Prepare and position your produc
Clean it, straighten labels, and adjust wrinkles. Any small imperfection becomes obvious on camera when you’re trying to take professional photos. Consider rotating the product slightly between shots for added dimension. Secure rolling objects with museum wax or adhesive putty to keep them in place without damaging the surface.
Step 4: Adjust camera settings (exposure, aperture, white balance)
Start with ISO 100–200 for low noise, an aperture around f/8–f/11 for sharpness, and set a custom white balance to capture accurate hues. Use manual focus for full control, especially for close-up shots. Avoid auto white balance—it often misreads light when surrounded by white surfaces. Use a gray card if you’re unsure.

Step 5: Frame your shot: Composition techniques that work
Center the object, leave breathing room, and shoot straight-on or at a 45° angle. Try the rule of thirds or symmetry, depending on its shape and purpose. Experiment with camera height—sometimes shooting slightly above the product adds elegance, especially for fashion items or food.
Step 6: Take multiple photos from different angles
Shoot front, back, side, and detail close-ups—cover them all. That’s key when taking pictures of products for listings. Add a scale indicator (e.g., a coin, ruler, or hand) if needed to help viewers understand the product’s size. If it has movable parts or multiple configurations, show each one.
Step 7: Review and retake if needed
Zoom in and check focus, lighting, and alignment. Adjust and retake any shot that feels off. It’s better to catch issues during the shoot than notice them later during editing. Use a checklist so you don’t forget essential shots: front, side, back, close-up, lifestyle, and context.
Best Tips for Taking Professional Product Photos
Even if you’ve got the gear and setup, knowing how to take professional product photos means avoiding common mistakes and making smart choices.
Use natural light whenever possible
Typical mistake: Overusing artificial lights creates harsh shadows or unnatural colors.
Fix: When possible, shoot near a large window with diffused daylight. Natural light offers soft, flattering illumination that can make textures pop without harsh shadows. If direct sunlight is too strong, use sheer curtains to diffuse it.
Natural light also helps you learn to take better product photos without needing expensive lighting setups. If you need to supplement, bounce natural light with a reflector or foam board to fill shadows softly.
Shoot from multiple angles (front, back, 45-degree)
Typical mistake: Only showing one or two angles leaves buyers guessing.
Fix: Show every important side. A product’s back or underside often reveals details buyers want. Angled shots add depth and dimension.
Try shooting from a standard set of angles: front, back, 45-degree, top-down, and close-ups on details. This helps customers imagine the object fully and reduces return rates.
Highlight key features with close-up shots
Typical mistake: Ignoring texture, labels, or craftsmanship.
Fix: Take macro or close-up shots to reveal stitching on clothes, surface texture on tech gadgets, or brush strokes on handmade items.
Close-ups add authenticity and elevate perceived value. Make sure these shots are tack-sharp by using a tripod and manual focus.
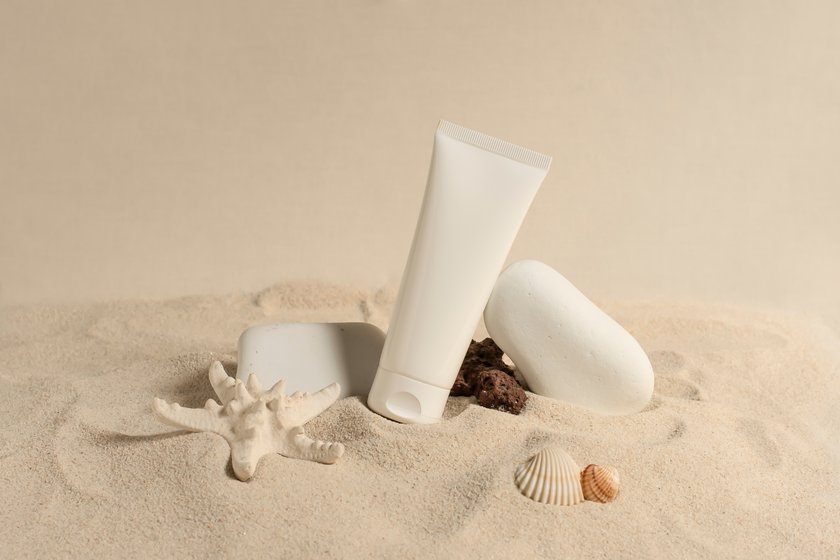
Use lifestyle shots to show products in use
Typical mistake: Only using studio shots that don’t convey context.
Fix: Lifestyle shots show the product being used in real life. For example, a mug shown on a cozy desk with a book and plant feels more relatable than a plain mug on white.
Lifestyle photos create an emotional connection and help customers visualize the product in their own lives. But balance this by also providing clean studio shots for clarity.
Maintain brand consistency across images
Typical mistake: Using inconsistent backgrounds, lighting, or styles.
Fix: Pick a consistent style and stick to it. Use the same background, lighting setup, and color grading across all images.
Consistency builds your brand’s identity and professionalism. It also helps shoppers feel more confident because they know what to expect.
How to Edit Product Photos Like a Pro
Editing is the final step in how to take good product photos that stand out online. Let’s break down a simple workflow using Luminar Neo, a powerful yet user-friendly photo editor designed for both beginners and pros.

Basic editing steps: Crop, adjust brightness and contrast
Start by cropping your image to remove distractions and focus on the product. Use Luminar’s cropping tool to maintain the right aspect ratio, usually square or 4:5 for e-commerce platforms.
Adjust brightness and contrast to make the product pop. Increase contrast slightly for sharper detail, but avoid overdoing it, which can create harsh shadows or unnatural edges. For challenging lighting conditions, using HDR photo editing can help balance shadows and highlights perfectly.
Retouching imperfections
Use the photo remover tool to clean dust, scratches, or unwanted reflections. Luminar’s AI-powered retouching helps smooth minor flaws without making the image look artificial. This is key for how to take professional photos of products that look flawless but still real.
Color correction and consistency
The image color editor lets you fix any color casts caused by lighting. Set white balance precisely to true-to-life tones. Consistency is critical when editing product lines. Batch process photos with Luminar to keep colors and tones uniform across multiple images.
How to resize and compress for the web without losing quality
Optimize images for fast loading by resizing them to the maximum display size needed on your website, typically between 800 and 1200 pixels wide. Compress images to reduce file size but keep quality using Luminar or dedicated tools. This balance is crucial in how to take product images that load quickly and look sharp.
File formats and export settings for ecommerce
JPEG is most common for e-commerce, balancing quality and file size. For transparent backgrounds, use PNG. Export images with sRGB color profile for consistent display across devices. Use descriptive file names incorporating keywords but keep them simple.
Optimizing Product Images for E-commerce
Great photos need to perform well technically on your website. Image optimization affects SEO, speed, and user experience.
Why image optimization matters for SEO
Optimized images help your site rank higher on Google and other search engines. Use descriptive alt text with keywords to improve accessibility and SEO. For example, alt text like “handcrafted leather wallet brown” helps Google associate your images with relevant searches.
How to name and tag images correctly
Name files clearly and descriptively with hyphens, e.g., leather-wallet-brown.jpg. Avoid generic names like DSC00123.jpg. Use relevant tags and categories in your CMS to improve site navigation and search.
Speed vs quality: Finding the balance
Large images slow down your website, frustrating users and harming SEO. Compress images to reduce size without noticeable quality loss. Tools like Luminar Neo and other best picture editor software can help find this sweet spot.
Mobile optimization tips
Since many shoppers browse on phones, test images on mobile devices to ensure clarity and fast loading. Use responsive images and lazy loading techniques to improve mobile performance.
How to Take the Best Product Photos That Sell
In summary, the secret to how to take the best product photos is:
Use consistent, soft lighting—natural light when possible.
Show every angle and detail with sharp focus.
Tell a story with lifestyle shots.
Keep editing clean and realistic.
Optimize for fast, accessible web display.
Mastering these steps helps you create photos that attract and convert shoppers, building trust and reducing returns.
FAQ
Can I take product photos with just a smartphone and no other gear?
Absolutely! Modern smartphones have excellent cameras. Use natural window light and a tripod or stable surface. Reflect light with white paper or foam boards for softer shadows. Learn how to take product pictures carefully by controlling light and composition.
What’s the best background color other than white for product photos?
Neutral grays are popular alternatives that provide contrast without distraction. Black backgrounds work well for bright or metallic products. Pastel or subtly textured backgrounds suit lifestyle or fashion brands, but always test to see what highlights the best.
How many product photos should I include per listing?
At least 5–7 images are ideal: front, back, side, close-ups, and a lifestyle shot. More images build buyer confidence and reduce returns by showing every angle and detail.
How can I take product photos for Amazon specifically?
Amazon requires a pure white background (#FFFFFF) and that the product fills 85% of the frame. Use bright, even lighting and avoid props or text overlays. Amazon’s style guides emphasize clean, distraction-free images, so mastering how to take photos of products for Amazon means focusing on clarity and simplicity.
What’s the ideal resolution or image size for e-commerce platforms like Shopify or Etsy?
Generally, 2000 x 2000 pixels at 72 dpi is recommended for Shopify for zoom functionality and crisp detail. Etsy recommends 1500 x 1500 pixels minimum. Larger images provide better zoom and more detail, but must be optimized for fast loading.