How To Photograph Interiors: From Cozy To Chic
July 05, 2024
Discover the art of interior photography with our comprehensive guide on how to capture stunning images of any indoor space. Learn essential tips on selecting the right equipment, mastering lighting, and enhancing your photos to transform ordinary rooms into magazine-worthy visuals!
Ever glance around a room that just feels right and think, "I wish I could bottle this moment"? Well, grab your camera because you're about to learn how to take interior design photos! Interior photography can be used by anyone who wants to capture the warmth and beauty of living spaces. So today, we'll walk through everything you need to know how to shoot interior photography — from choosing your equipment to the finishing touches in editing with Luminar Neo!
Let's turn your cozy nook or stylish space into a snapshot worth sharing!
Advanced yet easy-to-use photo editor
Get Luminar Neo Now1. Pick the Right Camera and Gear
 Choosing Your Camera
 Choosing Your Camera
Starting in interior photography? Great news — you don’t need the fanciest gear to begin! A Canon 80D is a solid choice for beginners. It's easy to use and delivers great results. Ready to take it up a notch? The Canon 90D offers more advanced features without breaking the bank. If you want to use a more professional-level camera, the Canon EOS R is perfect for detailed work, but it may be too much for beginners! Remember, it’s not just about the gear — it's how you use it that brings your photos to life, so you can choose any other camera brand!
Selecting Your Lens
What really makes a difference in your shots? The lens. Most indoor scenes come out best using a 24-45mm lens. We recommend the Canon 16-35mm for its flexibility and quality in wide shots. Choose the f/2.8 version for better performance in low light — a real advantage indoors!
Investing in a Good Tripod
Don’t underestimate the power of a good tripod because it keeps your shots steady and sharp!
2. Get the Lighting Right
 Using Natural Light
 Using Natural Light
Natural light is your best friend if you want to learn how to take interior design photos! First off, turn off all ceiling lights and lamps — they often cast a yellow glow and create unflattering shadows. Aim to shoot in bright, natural light for the truest colors and the clearest shots!
If you understand where and when the sun shines in your shoot location, it can dramatically improve your results. Avoid times when sunlight directly enters the windows if it’s too intense. Also, use curtains or blinds to filter and control the light flow into the room!
If the sun is too bright, causing harsh shadows and overexposed spots, a cloudy day can be your ally. Cloud cover diffuses sunlight, softening shadows and evening out the light distribution, much like a natural softbox would!
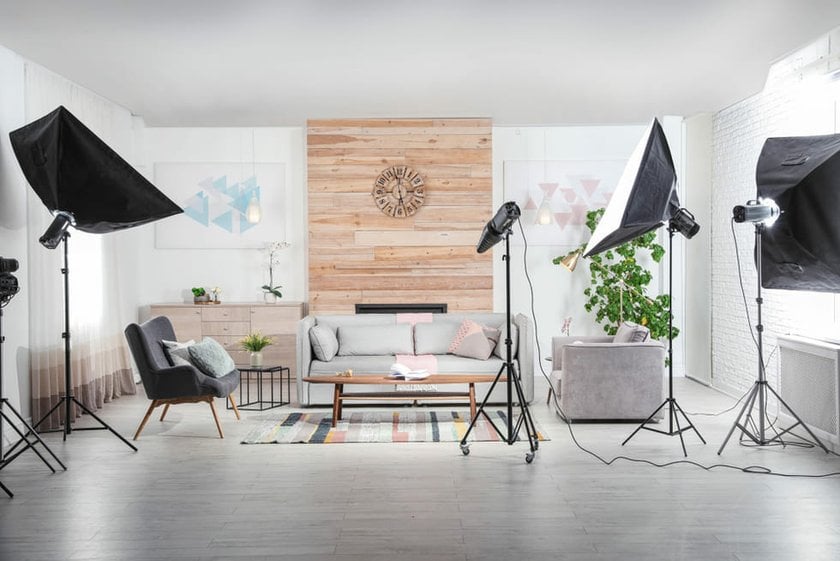
Adding Extra Light
Sometimes, natural light isn’t enough, especially in dimly lit spaces. In these cases, adding extra lights can help. Use soft, diffused artificial lights to mimic natural light as closely as possible. Position these strategically to fill in the darker areas without overpowering the natural light. Learning to adjust your camera’s ISO and aperture settings can also help you make the most of lower light conditions without introducing noise or blur.
Using Reflectors
Reflectors are invaluable tools for balancing light in your photos. They help brighten dark areas, soften shadows, and add light to finely detailed spots. Place reflectors opposite light sources to bounce light back into the scene!
Create Eye-catching Real Estate Photоs with Luminar Neo
EXPLORE3. Set Up Your Shot
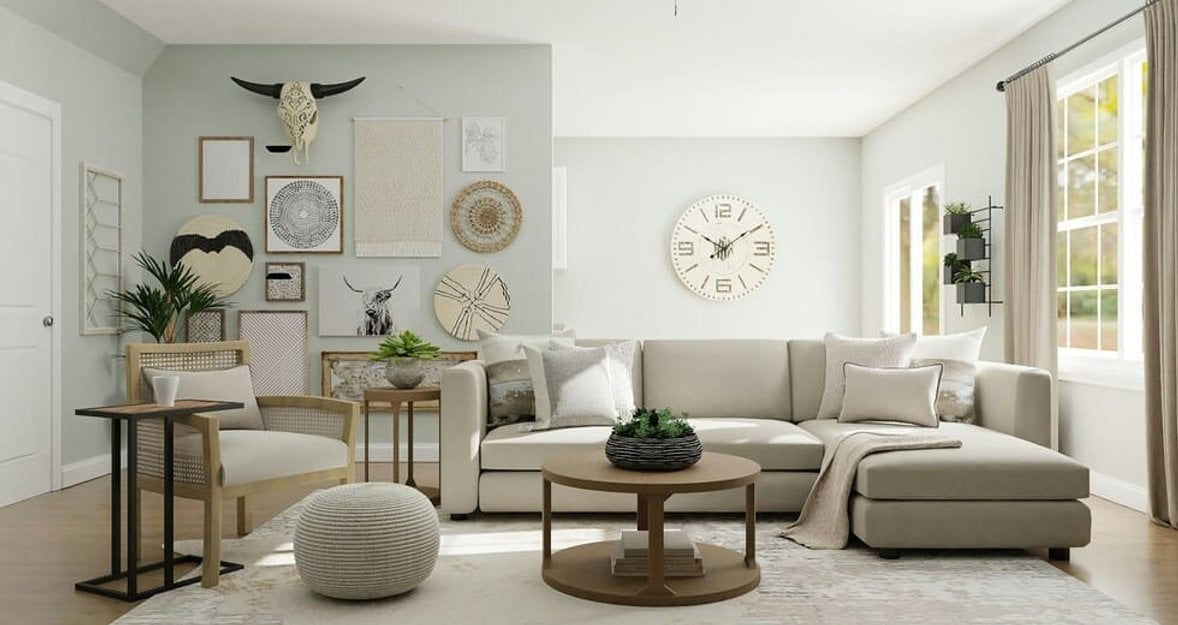
 When photographing interiors, the composition of each shot matters significantly. Here’s how to ensure your photos are both attractive and effective!
Keep Lines Straight
Interior spaces are full of straight lines like the edges of tables, door frames, and where the ceiling meets the walls. Make sure these lines are vertical or horizontal in your photos to maintain a natural perspective.
Avoid Blocking the View
Objects like large furniture pieces can block other interesting elements in your room. Move them out of the way or change your shooting angle to keep the view clear and open.
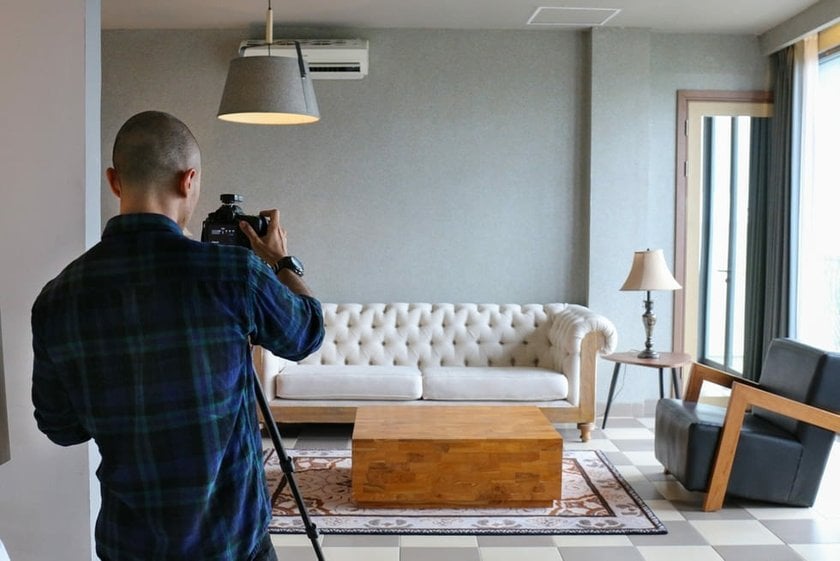
Choose the Right Angle
For a balanced shot, align your camera with a main feature of the room, like the back wall. This setup helps your photos look straight and even. When shooting a larger space, lower your camera to waist height to give a more natural perspective, as if you are in the room.
Level Your Camera
Use the grid function on your camera to keep your shot level. This helps in making sure everything from furniture to artwork is even and aligned correctly.
Clear Composition
Arrange objects so each is distinct and easy to identify. Avoid overcrowding. Leave some space around items to define their shapes clearly!
Focus on a Key Element
Choose a focal point, such as a piece of art or a furniture arrangement. Make this the clear subject of your photo. Tidy up around this area to ensure it stands out, but keep a touch of realism — maybe a draped blanket or an open book.
Apply the Golden Ratio
This is a classic composition technique that aligns the main subject off-center, creating a more engaging photo. Use it to place your focal point for a pleasing effect!
Exclusive Tools of Endless Possibilities in One AI Editor
EXPLORE NOW!4. Choose Camera Settings
 Capturing the essence of an interior space means tweaking your camera just right:
Aperture: Stick to f/8 to f/11. This sweet spot keeps everything from the couch in the foreground to the art on the back wall crisp and clear.
ISO: Keep it at 100 to avoid any grainy textures creeping into your tranquil abode. If you're losing light, you can nudge it up to 400 and still keep things pretty clean.
Shutter Speed: Indoors aren't known for their brilliance, so you'll likely need a slower shutter speed to gather all the available light. Anchor your camera on a tripod to avoid any wobbles — anything slower than 1/60th of a second could turn your stylish snapshot into a blurry mess.
Tripod Tips
The right tripod height can transform a good shot into a great one. Generally, set it between your hips and shoulders, adjusting it based on the layout and key elements in your room. Shooting over a kitchen island? Lift the tripod a notch so you can see the countertop clearly without hovering over it like a helicopter.
Tweak these settings, and you’ll be able to showcase interiors in their best light, making every shot worthy of a magazine cover! Read more about camera settings for indoor photography in our previous post!
5. Enhance Photos
 Editing photos for real estate has never been simpler than with Luminar Neo, an AI-powered photo editor. Among its many AI tools, Relight AI stands out as a powerful picture brightener. This feature can transform your dimly lit images into brightly illuminated pictures, offering full control over the exposure to achieve realistic and visually appealing results. Whether you need to brighten a shadowy corner or enhance the background exposure, Relight AI adjusts the light with precision, ensuring that the final image looks natural and true to life!
For images that lack sharpness or detail, Luminar Neo's Structure AI is the perfect fix. It enhances contrast and clarity to make your photos pop without overdoing it. This content-aware tool selectively boosts details where needed while preserving the natural look of human figures and other delicate areas. Simply adjust the slider, and watch as your photos gain depth and dimension, making even the simplest backgrounds more interesting and engaging!
The photo editor also makes it easy to quickly improve your pictures with minimal effort. Just use the Interior Enhancements Presets to instantly perfect your interior shots with a single click!
With tools like these, Luminar Neo redefines the ease and effectiveness of photo editing for real estate, making it possible to achieve professional-quality results in just a few seconds!
Bottom Line
 Taking great photos of indoor spaces is all about using the right equipment, setting up your shot carefully, and adding the final touches with some good editing. We've gone through interior photography tips for choosing the right camera, using natural light to your advantage, and making your photographs look their best with editing tools like Luminar Neo!
Now, you know enough to turn any ordinary room into a photo that looks like it's straight out of a home decor magazine. So get your camera and start capturing the beauty of the spaces around you!