Exploring The World Of Glow-in-the-Dark Photography
March 06, 2025
Step into the world of glow-in-the-dark photography! Discover creative ideas, low-light techniques, and expert tips for capturing striking images.
With the lights switched off, photographers have the opportunity to explore the captivating world of glow-in-the-dark photography. This unique style can include capturing using glow-in-the-dark paint on models to create surreal and striking portraits.
While fun and visually exciting, glow-in-the-dark photography is also quite challenging, as it requires skill in managing extremely low-light settings. In this guide, we’ll take a closer look at this genre, share creative ideas, and provide tips and tricks to help you capture mesmerizing glow-in-the-dark shots. Let’s get started!
What is Glow-in-the-Dark Photography?
 Glow-in-the-dark photography involves capturing scenes or portraits that feature glowing items or UV-reactive paints to produce vibrant, eye-catching images. A popular approach within this genre is portraiture, where photographers use items like glow sticks and UV paint to create striking and otherworldly visuals.
While this style often includes shooting in low-light or dark conditions, it doesn’t always require complete darkness. In addition to UV light, LED lighting is commonly used to add depth and interest. RGB LED strip lights, in particular, can introduce a wide range of colours, helping to address any low-light challenges while complementing the glow effect without overpowering it.
Colour is central to glow-in-the-dark photography, with bright glow sticks, UV paints, and LED lighting working together to create surreal and dynamic compositions. Adding colourful LED lighting allows for vivid, varied tones without detracting from the glow elements, helping to maintain the dreamlike atmosphere of the image.
This genre thrives on creativity, encouraging photographers to push boundaries and experiment with techniques to create ultra-surreal portraits or scenes that captivate viewers. In the next paragraphs, we’ll share some creative tips to help you make the most of glow-in-the-dark photography. But first, let’s look at the essential camera settings you’ll need to know to get started.
Best Camera Settings to Capture Glow-in-the-Dark Photos
 Low-light photography can be particularly challenging, especially when shooting glow-in-the-dark scenes. Our main goal in these situations is to reduce noise as much as possible, as low light often amplifies grain in images.
Here are some key settings and tips to help you capture sharp, vibrant photos.
RAW Mode: This is one of the most essential aspects of low-light photography. Make sure you are shooting in RAW mode rather than JPEG. RAW files offer a greater dynamic range, allowing you to retrieve more detail from shadows and highlights during editing. When trying to brighten shadowed areas in a JPEG, you’re likely to introduce even more noise, so RAW is crucial for clean results.
Shoot for the Highlights: When shooting in RAW, you can recover more detail from shadows than from overexposed highlights. Blown-out highlights may have limited recoverable detail, so it’s best to follow the golden rule of low-light photography: shoot for the highlights. Aim to get your highlights right in-camera, even if your image appears darker overall, as you can adjust the shadows during post-processing.
ISO: ISO is an essential setting for low-light photography, allowing you to introduce more light into the image when you’ve already maxed out your aperture and shutter speed. However, higher ISO also increases noise, so use it sparingly.
Every camera’s ISO performance varies; high-end models allow you to increase ISO more without excessive noise, while entry-level models may struggle beyond ISO 500. Experiment to find the ISO limit that works best with your camera.
- Shutter Speed & Aperture: Set your aperture to its widest setting (lowest f-number) to let in the most light. Shutter speed can also be adjusted to stay open longer, though this may introduce blur, especially when shooting portraits. For low-light portraits, aim for a shutter speed around 1/125 sec; 1/60 sec can work at a pinch, but is more likely to produce motion blur. If you're capturing static scenes, use a longer shutter speed with a tripod for stability.
Setting Up for Low-Light Photography: Step-by-Step Guide
Ensure you are in RAW mode.
Set your aperture to its widest setting (lowest f-number).
Adjust your shutter speed to 1/125 sec for portraits; go slower for static scenes if needed.
Increase ISO until your highlights look well-exposed and avoid overexposure.
If you notice excessive grain due to high ISO, consider slightly lowering ISO and adjusting the shutter speed.
Low-light photography often requires a process of trial and error. By following these steps, you’ll be well on your way to capturing crisp, dynamic glow-in-the-dark photos!
You may also like: Photography Cheat Sheet: Camera Manual Settings (Infographic)
Creative Ideas for Glow-in-the-dark Photography
Now that you’ve got the right gear and know how to get great results in low light, it’s time to get creative and start planning some ideas for glow-in-the-dark photography.
Exclusive Tools of Endless Possibilities in One AI Editor
Explore Now!Here’s a list of our favourite ideas:
1. Light Painting with Glow Sticks
We mentioned that you’ll generally want a fast shutter speed to avoid blur, but this idea breaks that rule for a good reason. The longer you open the shutter, the more movement you can capture. By moving glow sticks around your scene, you’ll create trails of light.
Tip: Mix glow sticks with LED lights for a wider range of colours and try painting letters in the air.
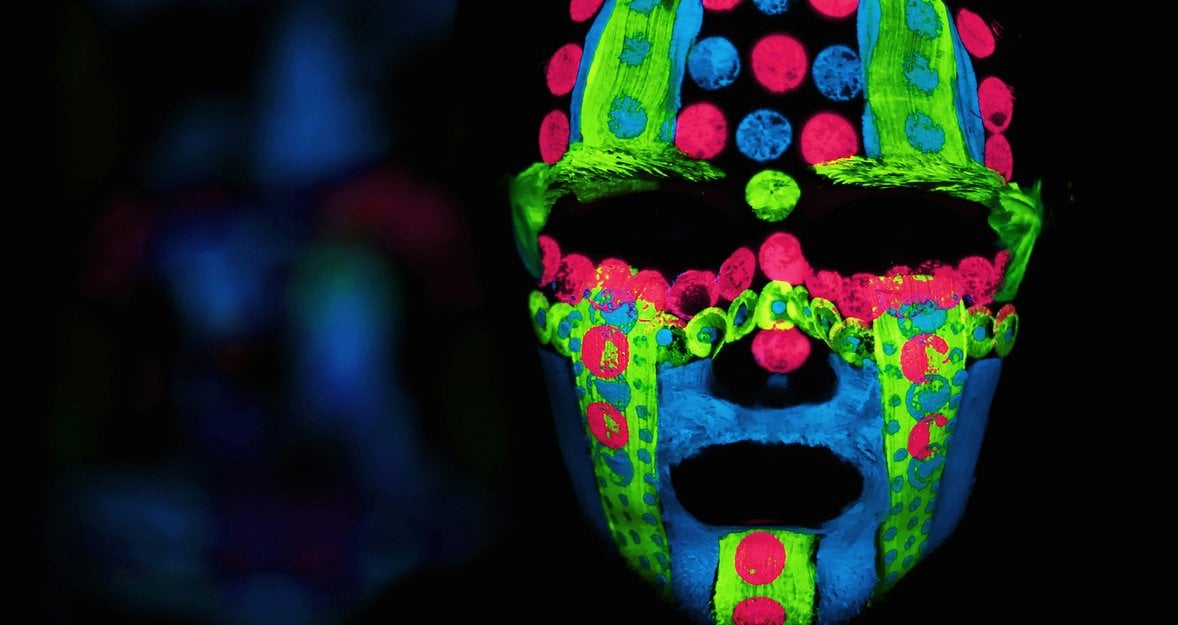
2. UV Paint Portraits
One of the most exciting forms of glow-in-the-dark photography is using UV paint for portraits. You can get really creative by applying makeup-like effects or even splattering colours on your model, similar to a Jackson Pollock painting.
Tip: Use RGB LED lights to bring in extra colour and highlight the outline of the body without diminishing the glowing effects.
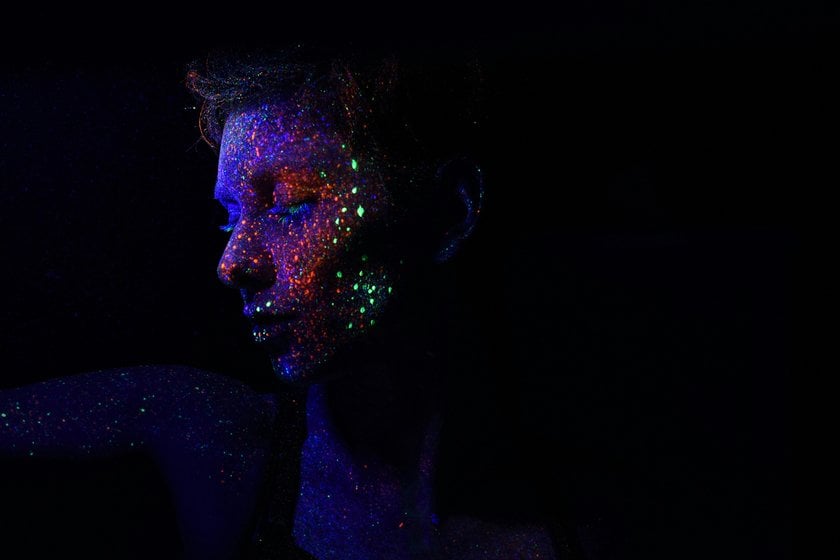
3. UV Neon Powder Paint
 Fluorescent powder, which glows under UV light, can be used to create dynamic effects. Capture it mid-air or as a colourful background for your portraits.
Tip: A fast shutter speed will help capture powder details. This may require experimenting with high ISO settings to get a clean image.
4. UV Paint on Props
Don’t limit UV paint to skin, use it on props like sunglasses or umbrellas to make your scene vibrant and full of character.
Tip: Paint an umbrella with UV patterns and capture powder falling from above to create a “neon rain” effect.
5. Smoke Machines
Using smoke or fog can add depth and mystery to your scene, making the glow more dynamic and surreal.
Tip: Add laser pointers, which will become more visible in the smoke, for extra colour and atmosphere in your glow-in-the-dark shots.
6. Go Cyberpunk!
Embrace a cyberpunk aesthetic by using bright neon colours and a futuristic vibe in your set design. This theme works particularly well with UV paint, LED lights, and colourful props.
Tip: Use UV paint on your model’s skin and clothing, add RGB lighting, and if possible, wet the floor for neon reflections to complete the cyberpunk look.
7. Reflections
Use mirrors, glass, or water to reflect the glow and add layers to your shot, enhancing the visual impact.
Tip: Position your model near a mirror so that UV effects appear vibrant in both the subject and their reflection.
As soon as you step into your space to shoot, ideas will start to flow. Glow-in-the-dark photography offers limitless possibilities for making vibrant and surreal images. Enjoy experimenting and have fun capturing eye-catching shots!
The Bottom Line
 Exploring the world of glow-in-the-dark photography is a fantastic way to unleash creativity and produce vibrant, surreal images. From otherworldly scenes in a dark room to stand-out portraits bursting with colour, glow-in-the-dark photography offers endless possibilities. You can even experiment with cyberpunk-style scenes by incorporating futuristic outfits and using UV paint on props like umbrellas.
The only challenge is mastering the low-light environment, which can make it difficult to capture crisp images with minimal noise. Remember to keep ISO levels low to avoid noise, and experiment with longer shutter speeds to minimise blur. This genre truly involves trial and error, so keep practising, and over time, you’ll achieve cleaner, sharper images.
So, find a dark room, turn off the lights, and dive into the exciting world of glow-in-the-dark photography, have fun!