Photo Editing 101: Easy Ways to Change Clothes Color in Pictures
November 29, 2024
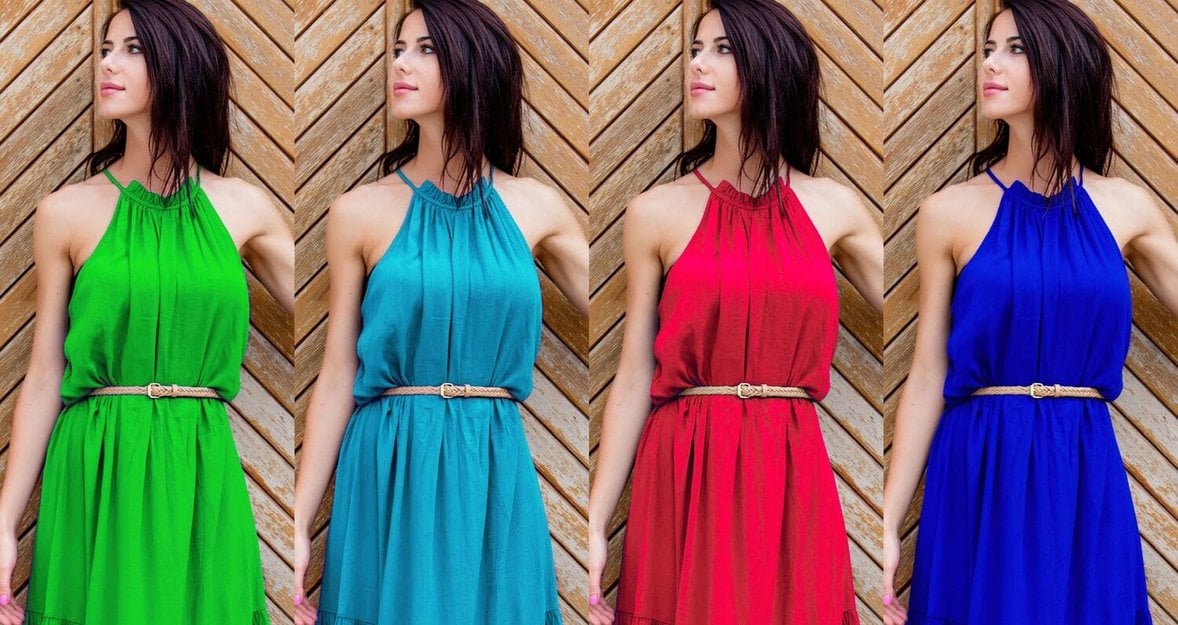
Want to give your photos a new look? Learn how to change clothes color effortlessly with these beginner-friendly photo editing tips and tricks.
The possibility of editing the colour of the clothes in a photo is a handy technique that allows us to easily adjust the colours for fashion adjustments, colour matching, or other creative reasons. While most photographers would prefer to re-shoot the photos, this isn't always possible for several reasons, including location access or time and budget limitations. This is where the colour-changing editing technique steps in.
Depending on the photo editing software and the scale of the task, the colour-changing technique may vary; however, in this blog post, we will focus on the traditional way to adjust the colours using HSL controllers in combination with selection and masking.
Understanding the Basics of Color Editing
Before we move to the actual process of changing the colour of clothes in photos, let's cover the basics of colour editing in photography.
How Colors are Represented in Digital Images
Every digital image is created by many tiny units called pixels. Each pixel has its specific colour, usually represented by a combination of three primary colours—Red, Green, and Blue (RGB).
On the top of the colour combination created with the primary colours, the pixel's colour is further controlled by Hue, Saturation and Luminance (HSL) values. The Hue refers to the actual colour or shade of the pixel; saturation defines the intensity or vividness of the colour, and Luminance (brightness) refers to how bright or dark a colour appears.
When changing the colour of clothing in the picture, you are essentially altering the values of the RGB and/or HSL to make this change without affecting the other elements in the image.
Tools for Changing the Clothes Color
As we go through the process of changing the clothes colour in the following guide, we will be using the examples from Luminar Neo photo editing software. However, most of the current photo editing software, like Aperty or Photoshop, has colour-changing functionality that requires the HSL panel and masking.
Exclusive Tools of Endless Possibilities in One AI Editor
Explore Now!How to Change Clothes Color in Photos: Step-by-Step Guide
The colour-changing process follows a few simple steps. The initial step basically involves selecting or masking the clothing item we want to adjust. In the next step, we then use the Hue adjustment to shift or change the colour. Once happy with the Hue, we can then use the HSL panel to fine-tune the colour using the Saturation and Luminance controllers.
1. Open the image in the editing software and select the masking or selection tool.
2. Use the available tools to select the clothing item you want to adjust the colour of. While some applications like Luminar Neo or Photoshop will have advanced selection tools (Luminosity, Color or AI Mask), a simple brush tool will be enough in most cases.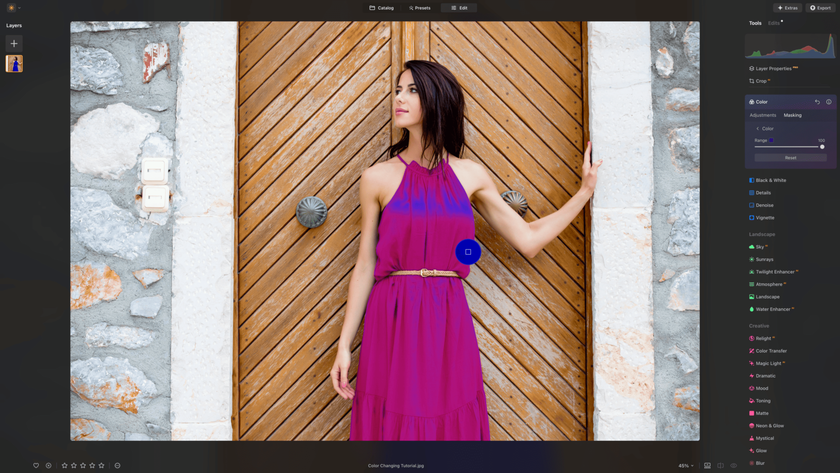
3. Start by selecting the clothing using the masking tool of your choice. We will use Color Masking in our example.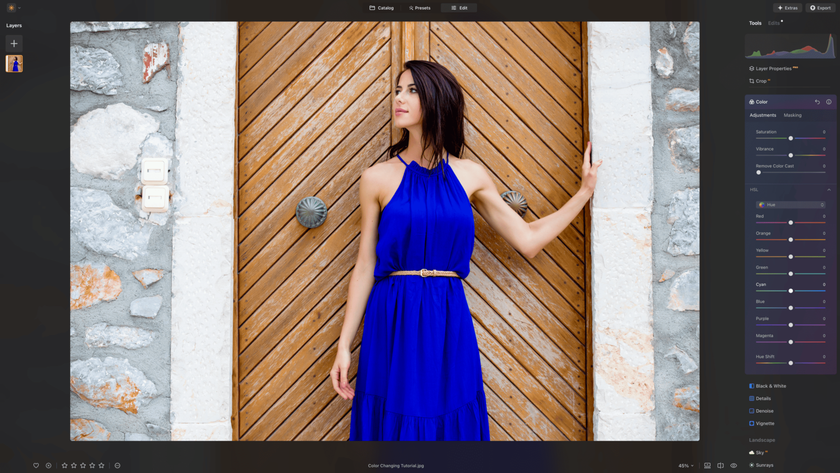
4. Once you finish with the selection/masking, open the HSL panel.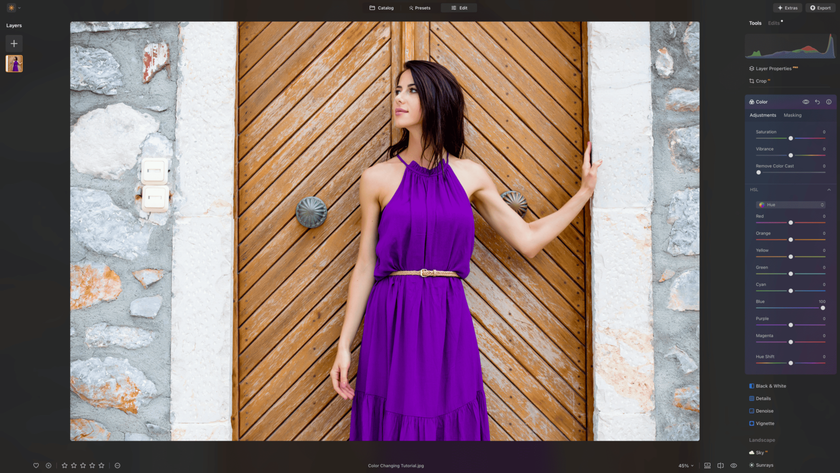
5. Use the Hue sliders to change the colour.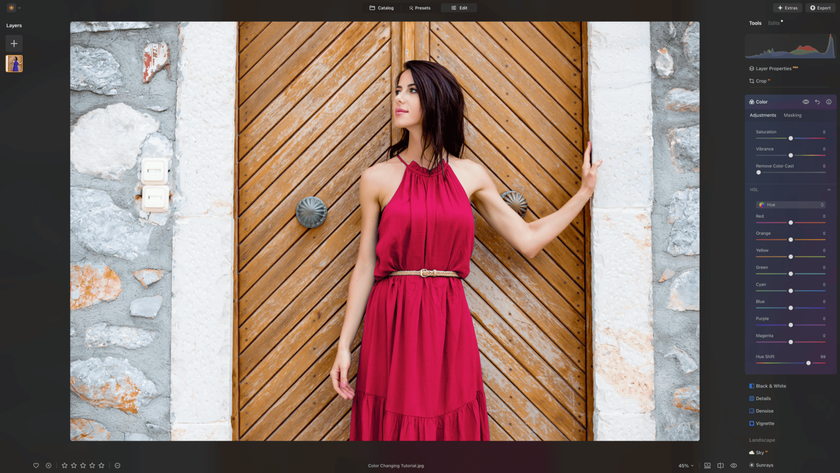
6. If the Hue sliders do not cover the colour you require, use the Hue shift slider (if available) for even more colour possibilities.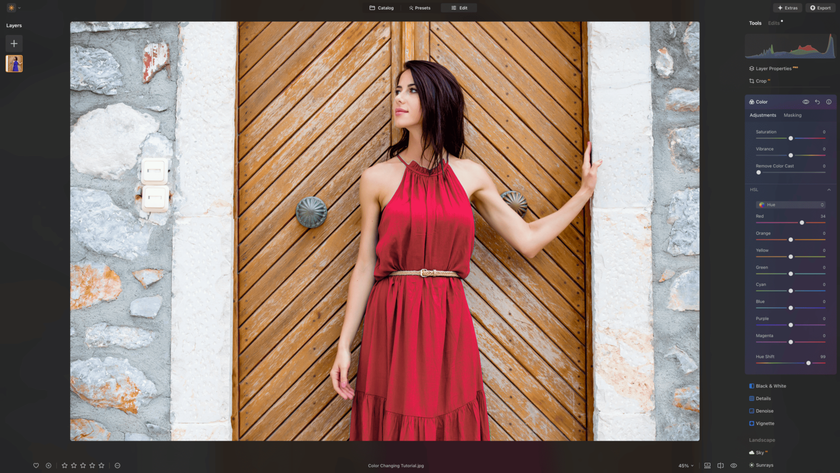
6. Fine-tune the colour and shade using the Hue sliders in the HSL panel.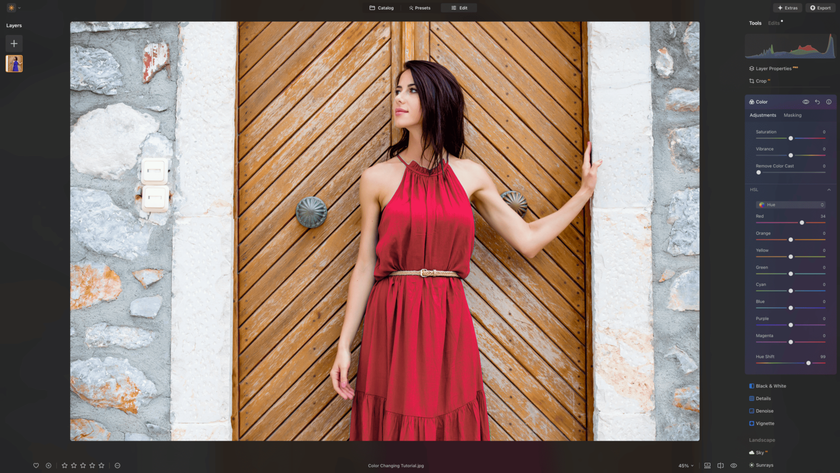
7. Adjust the intensity and vividness of the new colour using the Saturation sliders in the HSL panel.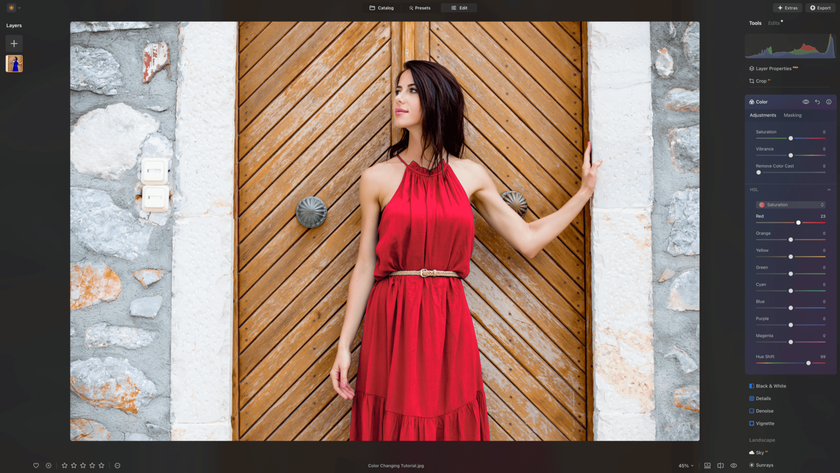
8. Finally, the brightness of the colour can be modified using the Luminance sliders in the HSL panel.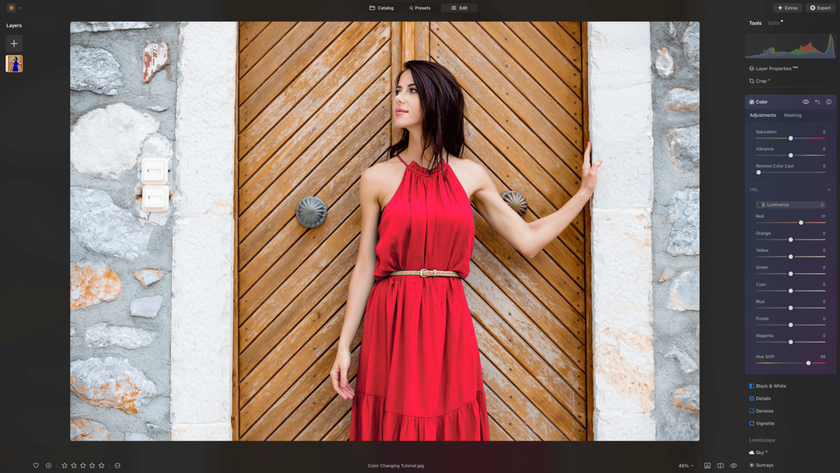
9. Once happy with the new colour, review the masking by zooming into the photo.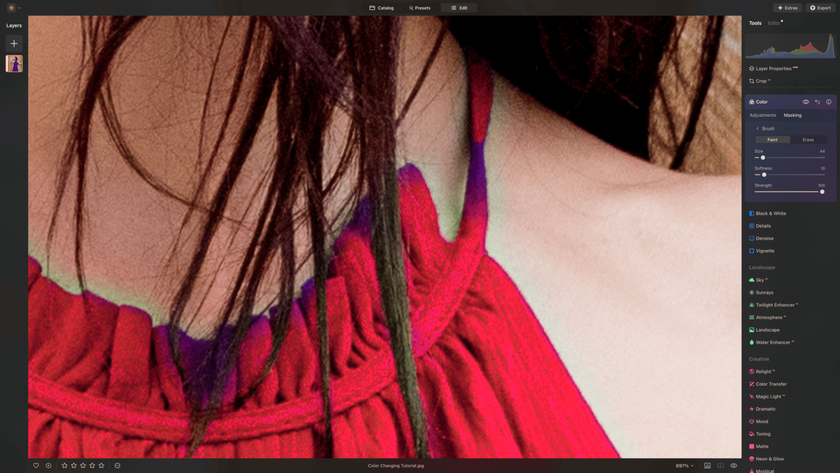
10. If necessary, use the brush or similar tools to adjust any masking issues.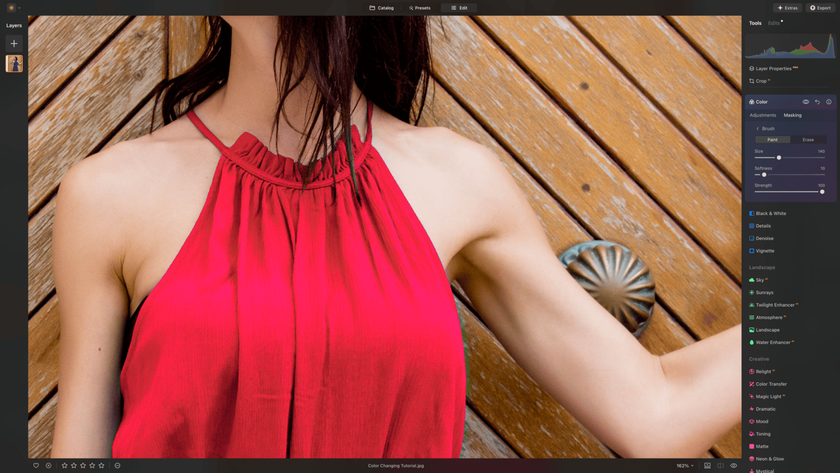
11. Double-check the result and, once happy, export the image or continue editing.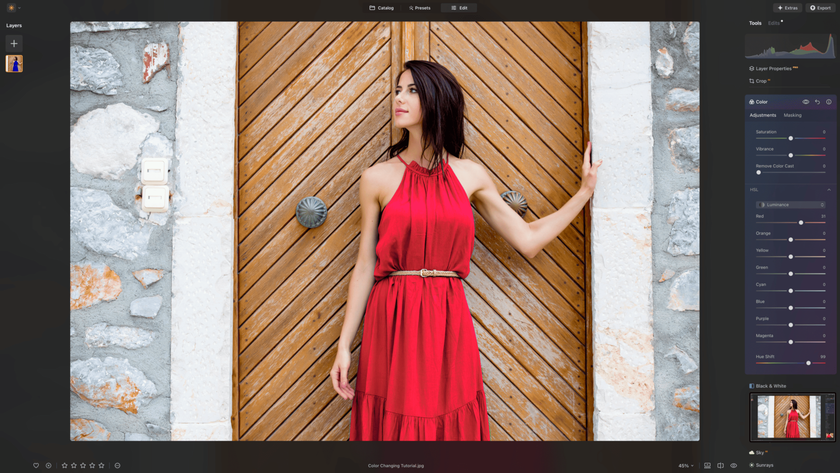
Common Mistakes to Avoid
While the actual process of changing the colour of clothes is quite simple, there are a few common mistakes to avoid for a professional-looking result.
1. Over-saturation. Our eyes get used to looking at the same colour for a long time, and we lose the feeling of saturation. The best solution is to lower the saturation of the image or the specific colour all the way down to zero and then increase it slowly until the result represents a natural amount of saturation.
2. Un-natural colours. Sometimes, we get carried away by the possibility of making significant adjustments, like changing the colour of the clothes and dial-in colours that do not match the scene, model or overall feel of the photo. The easiest way to avoid this is to take a break from the editing for 15-30 minutes and re-visit the photo with fresh eyes, which will allow you to make more natural decisions about the new colour.
3. Inaccurate masking. It is vital to use the zoom-in function in the photo editing software to properly review the masking/selection of the clothing item after the changing of colour. At this point, any imperfection in the masking will be easily visible, and you will be able to fix it.
The Bottom Line
There is no doubt about the creative potential of changing the colour of clothes in photos. It not only allows us to make a significant change to our images, but it also improves our photo editing skills by learning more about colour manipulation and practising the art of selection and masking. As you experiment with different colours and cloth teams, you will succeed, but you will sometimes face setbacks in various projects. However, both these experiences will help you bring this technique to another level.


![10 Best AI Image Upscalers Of 2025 [Free & Paid]](http://media.macphun.com/img/uploads/macphun/blog/2451/1_10BestAIImageUpscalersFreePaidISkylum.jpg?q=75&w=1348&h=715&resize=cover)
