City At Night Photography: Unveil The Neon Dreamscape
September 20, 2024
Dive into the allure of neon night photography. Join Steve Roe on a journey through Seoul and other Asian cities, capturing the magic of urban landscapes illuminated by neon.
You might be very familiar with your city from your photo walks during the day. Perhaps you have familiar spots that you regularly visit, and maybe you’re starting to need a fresh outlook on these beaten tracks for some inspiration. You can shoot at different times of the day, but ultimately, the city truly transforms once the sun goes down and the neon lights turn on.
I’ve been shooting neon night photography since 2017, and it’s a style I’ve never grown tired of. Whether it’s street photography or neon-themed shoots with models, there’s something exciting about the warm glow of neon lights and how they impact the environment.
I’ve primarily been shooting in Seoul, South Korea, but this style of photography has taken me to many cities around Asia where neon is much more common than in my home country, England. If this style of photography intrigues you, read on to learn more about what makes it so addictive and exciting.
Benefits of Shooting at Night
 You’ll have the opportunity to see how city lights impact your surroundings and how you can use them to create new looks and styles. Shooting at night requires a different approach, not just to the shoot itself but also to your editing techniques. Especially when we talk about styles derived from shooting neon lights, such as cyberpunk and retro looks.
So many changes at night that you’ll find yourself full of inspiration and ideas. That’s one of the greatest parts of switching from your regular daytime street photography to night.
Night photography also forces you to become comfortable with the exposure triangle, meaning you’ll likely spend most of your time in manual mode. This improves your understanding of your camera’s functions and light balance, as you’ll need to manage well-exposed light sources while controlling noise in your image.
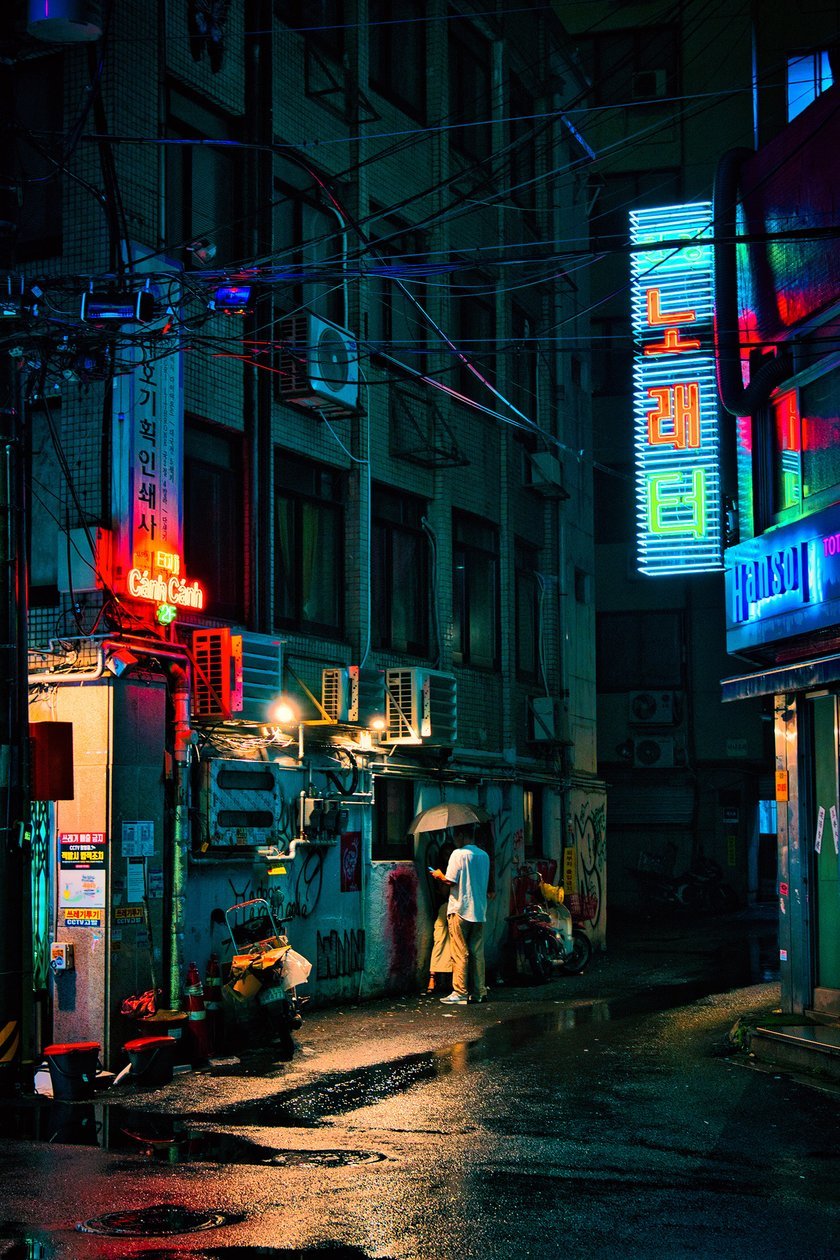
Finally, there’s an undeniable excitement in shooting at night, especially when it rains. Imagine how your regular daytime street scene transforms once the neon lights turn on, and then imagine those streets soaked with color reflections bouncing from every surface. Rainy nights and neon lights create a magical atmosphere, so don’t postpone your shoot if it starts raining—consider it a sign to get out there and capture some amazing shots.
Exclusive Tools of Endless Possibilities in One AI Editor
Explore Now!Top 5 Places to Shoot Neon
 1. Tokyo
 1. Tokyo
This is where the neon cyberpunk aesthetic was born, so where better to shoot neon lights than Tokyo, Japan? You’ll be able to capture a blend of loud, bright neon lights combined with traditional Japanese elements such as architecture and religious buildings. I often describe Tokyo as Disneyland for photographers—it feels like everything works, no matter what time of day you shoot, but especially at night.
2. Seoul
I first arrived in Seoul in 2016, and at that time, many shops and restaurants were adorned with LED lights. However, in recent years, these establishments have swapped LEDs for neon, greatly improving the aesthetics of night photography. The warm glow of neon lights, narrow streets, and an abundance of skyscrapers create a classic cyberpunk aesthetic.
3. New York
The dazzling night lights of New York City have been famous for decades, and even today, you won’t go wrong with a night shoot in the city that never sleeps. Times Square is the most famous spot, but there are plenty of other lights and photo opportunities throughout one of the world’s most iconic cities.
4. Las Vegas
Las Vegas is a city known for its abundance of lights, truly coming alive once the sun goes down. You’ll find the glitz and glamour of neon signs and the bright, dazzling lights of the casinos. There’s also a vintage appeal to shooting the neon lights of Las Vegas, something you may not find elsewhere.
5. Hong Kong
While Hong Kong isn’t quite the neon hotbed it once was, there’s still plenty of opportunity to capture amazing night photos with the remaining neon lights. A few years ago, Hong Kong was renowned for its neon signs towering over the streets, each one a piece of art in its own right. Coupled with rain, it was one of the best cities for shooting a cyberpunk neon style. Recently, though, many of these iconic lights have been dismantled.
Do You Need to Travel for Neon Views?
While these cities are some of the most iconic for neon night photography, major cities worldwide are starting to understand the aesthetic value that neon signs add to shops, restaurants, and bars. LED lights can look too harsh, but neon’s warm glow, ability to be molded into shapes, and even its flashing capabilities make it much more eye-catching. As photographers, we can take advantage of this and elevate our night photography. So take a walk around your city and look for that signature neon glow.
Best Camera Settings for Capturing Neon Lights
 As mentioned previously, shooting neon lights at night means becoming comfortable with the exposure triangle and manual settings on your camera. It may take a few shoots to get this down. My first few attempts had me taking hundreds of photos, with only a handful turning out decent. Here’s a rundown of the essential settings:
Aperture: Start with your aperture for night photography. Open it as wide as possible (in my case, that’s f/2.8) to allow as much light in as possible, ensuring your images are well exposed to reduce noise and grain that typically occur in low-light environments.
Shutter Speed: You’ll also need to adjust your shutter speed. The goal is to balance a slow enough shutter speed to let in enough light while keeping moving subjects sharp. I usually shoot around 1/125 sec and down to 1/80 sec if necessary. This also helps reduce noise, as the longer the shutter is open, the more light it lets in.
ISO: Finally, adjust your ISO. This setting will differ for each photographer, as all cameras handle ISO and noise differently. ISO helps expose the image, but the more you apply, the grainier it can become. My first camera couldn’t handle ISO above 400 without the images becoming unusable. My current professional full-frame mirrorless camera handles ISO above 1000 with no issue. Experiment with your equipment to find its limits.
Shoot for the Highlights
 This is one of the most critical aspects of good night photography, and it’s important to remember the golden rule: always shoot for the highlights. You’ll want to shoot in RAW mode, as it offers a wider dynamic range than JPEG. This gives you more flexibility during editing, allowing you to retrieve details from both shadows and highlights, and balance your image more effectively.
While you can recover a fair amount of detail from darker areas by lifting the exposure without significantly impacting image quality, the same cannot be said for the highlights. Overexposed highlights are difficult—if not impossible—to salvage in post-processing. With that in mind, it’s crucial to ensure your highlights look great in-camera. The details need to be clear and not blown out. If they are overexposed, you might lose those details entirely during editing.
Knowing that you can recover detail from shadows but not from blown-out highlights means you should always prioritise your highlights and ensure they look good at the moment of capture.
Compositional Techniques for Neon Night Photography
 Now that we understand camera settings let’s look at how to frame these beautiful neon signs. At the heart of this style is street photography, so if you’re already familiar with that, you’re off to a good start. However, at night, light is the most important element. Without enough of it, you won’t have an image. Let’s explore how to combine neon lights and street photography to create stunning shots.
Leading Lines
Neon lights are naturally eye-catching, which gives photographers a huge advantage. You can use them as leading lines to direct attention to your subject. Position the subject between you and the neon light or next to it, and the viewer will be drawn to the subject. The light can be above the subject or hanging over the street—it will still guide the eye to that point.
Framing
Neon lights can also be used to frame your subject. This works well if you have more than one light to work with—placing one on either side of the subject creates a natural frame. Alternatively, you can position the subject underneath the neon light to frame them while bathing them in its glow, drawing even more attention.
Reflections
Shooting on a rainy night adds another layer to your images. The reflection of neon lights on wet roads acts as a leading line, while reflections in puddles can create unique and creative compositions.
Contrast and Silhouettes
Neon lights provide strong contrast opportunities. The illuminated areas versus the darker spaces can focus attention on your subject while creating negative space. Use neon lights as a backdrop as your subject walks by, capturing their silhouette for an eye-catching and effective shot.
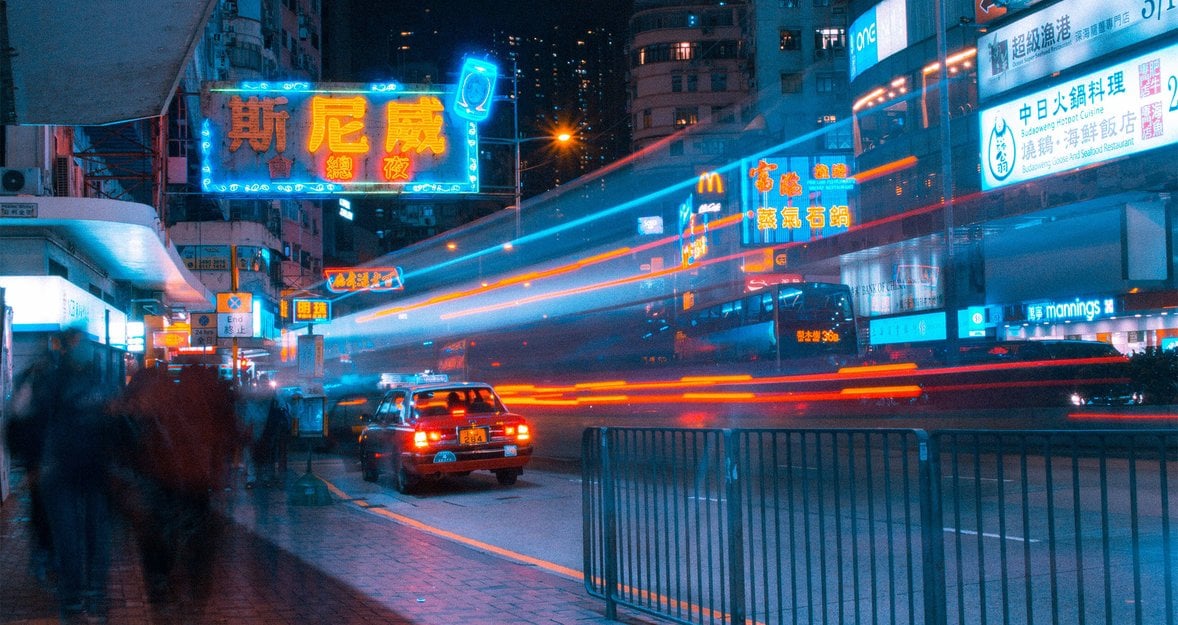
Capture Movement
Night photography offers the chance to capture light trails from vehicles. This technique requires a longer shutter speed, so you’ll need to experiment with your other settings to balance exposure. Set light trails against a neon backdrop for easy cyberpunk-themed images.
The Bottom Line
Once the sun goes down and the neon lights turn on, the city transforms, giving photographers a whole new style to capture. The excitement and buzz of neon night photography can become addictive, especially on rainy nights when you can transport regular urban scenes into retro or cyberpunk worlds with an array of colors bouncing from every surface.
This style of photography will also help you become more comfortable with your camera’s manual settings, pushing you to approach your shoots in a new way. Remember, light is the most important factor—not only as a creative tool but also as a compositional one, helping to frame or guide the viewer’s eye to your subject.
If you can’t make it to one of the cities mentioned above, remember that every major city has some degree of neon lights for you to practice with. And who knows, you might get the opportunity to travel to one of the top spots for this style of photography. Until then, wait for sunset, explore the night, and take advantage of the creative possibilities that neon lights offer—happy shooting!