November 05
19 min. to read
How to Photograph Hypercars and Edit Your Photos in Luminar
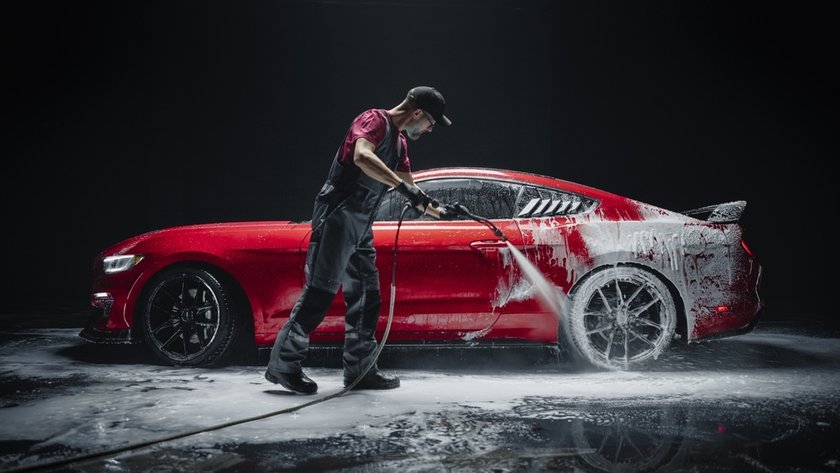
A hypercar’s low body, sculpted panels, and reflective surfaces create plenty of photographic opportunities—and a few challenges. A reflection can reveal the curve of a fender or hide it completely. An extremely low viewpoint can emphasize the front splitter while making the rest of the car disappear.
Successful hypercar photography starts with showing the vehicle’s design clearly. Choose a location that complements its shape, position it thoughtfully in the light, and build a series that includes both complete views and distinctive details. Editing then helps refine exposure, color, and the viewer’s attention.
This guide covers the process from planning the shoot to exporting your finished photographs in Luminar.
Don’t feel like reading the whole breakdown? We’ve pulled together a quick summary below.
Key Takeaways
Plan around the car’s defining features, the available location, and the intended use of the photographs.
Control reflections through positioning before trying to remove them in editing.
Choose aperture according to the depth of field you need; the widest setting is not always suitable for a whole-car photograph.
For motion shots, adjust shutter speed to the vehicle’s movement and your ability to track it.
Edit paintwork, glass, and carbon fiber carefully to preserve realistic color and texture.
Review the complete series for consistency before export.
Plan Your Hypercar Photoshoot
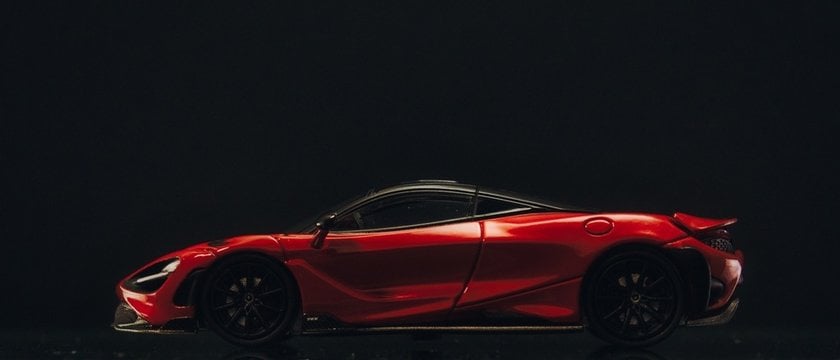
Start by deciding what the photographs need to communicate. A collector’s portrait, an automotive editorial, and a sales listing can feature the same car but need different coverage.
For a creative feature, the emphasis might be dramatic proportions, unusual details, or the relationship between the owner and the vehicle. A sales listing needs clear views of the exterior, interior, equipment, and condition.
Before the session, ask which features deserve attention. These could include exposed carbon fiber, an unusual door mechanism, a distinctive cockpit, or a particular wheel design.
Advanced yet easy-to-use photo editor
Get Luminar Neo NowPrepare the Car and the Location
Arrange cleaning before the shoot, including the glass, wheels, and visible interior surfaces. Fingerprints become especially noticeable on glossy trim and dark paint.
Choose a location with enough room to move around the vehicle and change your shooting distance. Check access with the owner, particularly where a low front splitter could catch on a steep entrance or uneven ground.
Let the owner or designated driver reposition the car and operate unfamiliar doors or body panels. Agree on each setup before moving equipment.
Build a Short Shot List
A varied series might include:
Front and rear three-quarter views.
A clean side profile.
A symmetrical front or rear view.
Wheels, brakes, vents, lights, and material details.
Interior views and controls.
An environmental photograph showing the car within its setting.
An owner or driver portrait, if relevant to the story.
Capture the essential views first. Once those are covered, spend time experimenting with more unusual compositions.
Choose a Background That Supports the Car
Look for backgrounds that separate the vehicle from its surroundings. A dark car against dark trees may lose its roofline, while a bright wall can introduce distracting reflections into glossy paint.
Simple architecture, open landscapes, and uncluttered paved areas can all work. Their usefulness depends on the car’s color, your viewpoint, and the light.
Inspect the entire frame before shooting. Poles behind the roof, bright signs above the windshield, and road markings crossing awkwardly beneath the wheels can weaken an otherwise strong composition.
Move sideways or change camera height before relying on background blur. A cleaner viewpoint often solves more than opening the aperture.
Work With Light and Reflections
Car bodywork reflects its surroundings. The challenge is to keep reflections that describe the shape while reducing those that distract from it.
A broad reflection of the sky can reveal a hood’s curve. A broken reflection of branches may make the same panel look busy or uneven.
Soft Light for Clear Bodywork
Overcast conditions and open shade provide a useful starting point. Broad illumination can make it easier to show paint color and transitions across the body.
However, soft light can also make a scene look flat. Try changing the car’s orientation so one side catches more light than the other. A modest difference in brightness can help define its shape.
Low Sun for Shape and Atmosphere
Early or late sunlight can skim across panels and emphasize contours. Watch the brightest reflections as you adjust exposure: recovering a clipped highlight may be impossible if the original file contains no detail there.
For backlit compositions, check whether the shaded side of the car remains readable. A dramatic outline works well for some photographs, but a complete series should also include views that clearly show the vehicle.
Use a Polarizer Selectively
A circular polarizer can reduce certain reflections on glass and painted surfaces. Rotate it while observing the windshield, hood, and side panels.
The effect changes with the angle of the surface and light. One position may improve the windshield while making the hood look unnaturally flat. It will not remove every reflection.
Compare filtered and unfiltered frames. Reflections help communicate glossy paint and curved surfaces, so reducing them completely is rarely the goal.
Choose Angles That Show the Design
A front three-quarter view is a useful starting point because it shows the front, side, and overall proportions together. Adjust camera height until the headlights, roofline, wheels, and front splitter remain distinct.
Low viewpoints can emphasize width and stance. A slightly higher position may show more of the hood, cockpit, and rear bodywork. Neither is automatically better.
Watch Your Distance
Shooting very close with a wide-angle lens exaggerates the difference between near and distant parts of the car. This can create a dramatic image, but it may also make the front wheel or nose appear disproportionately large.
For more restrained proportions, step back and use a longer focal length to maintain your framing. The change in perspective comes from moving the camera.
Photograph Details With Context
Capture close views of materials and engineering, but include enough information for the viewer to understand them. An air intake photographed in isolation may look abstract; a slightly wider frame can show how it fits into the body.
Focus carefully on badges, stitching, wheel finishes, and carbon-fiber weave. These details are easy to damage with excessive sharpening later.
Camera Settings for Hypercar Photography
There is no single setting that works for every vehicle and location. Use the following as starting points, then check sharpness, exposure, and depth of field.
Situation | Starting approach | What to inspect |
Parked car in daylight | Around f/5.6–f/8, low ISO, suitable handheld shutter speed | Sharpness across the car |
Close-up detail | Around f/2.8–f/5.6 | Whether the important detail is fully in focus |
Parked car at dusk | Tripod, low ISO, aperture chosen for depth of field | Highlight clipping and camera movement |
Moving car with frozen action | Around 1/1000 second or faster as needed | Motion blur and focus tracking |
Panning shot | Start around 1/125 second, then experiment with slower speeds | Sharpness of the car against background movement |
A wide aperture can isolate a badge or cockpit detail, but it may leave part of a three-quarter car view out of focus. Choose depth of field for the photograph rather than using the lowest f-number by default.
Capture RAW files when available. They provide more flexibility for white balance and tonal adjustments, although they cannot restore missed focus or detail that was never recorded.
How to Photograph a Hypercar in Motion
Panning involves following the moving car with the camera during the exposure. The aim is to keep the vehicle relatively sharp while allowing the background to blur. Start tracking before pressing the shutter and continue the movement afterward.
Begin with a shutter speed that gives you a reasonable number of sharp frames. Once your tracking becomes consistent, try slower exposures for stronger background streaks.
Results depend on speed, distance, focal length, and the car’s direction relative to the camera. A setting that works on one pass may fail on another.
Work from an agreed stationary position at a controlled location or a designated trackside area. The driver should know the route and intended movement in advance.
Photographing Hypercars at Night
For a parked car, a tripod allows longer exposures without raising ISO unnecessarily. Keep the vehicle still and check whether headlights or surrounding signs are clipping.
Mixed lighting can introduce different colors across the paint. Streetlights, LEDs, and shop windows may each create a separate cast. Changing position can be more effective than trying to correct everything afterward.
Light trails can add movement around a stationary subject when the location allows it. A long exposure of a moving hypercar, however, will usually blur the vehicle itself. Decide which parts of the scene should remain sharp before choosing the exposure.
Editing Hypercar Photos in Luminar
Start with a technically sound photograph and use editing to make its strongest qualities easier to see. A clear sequence helps prevent repeated adjustments from pushing the image too far.
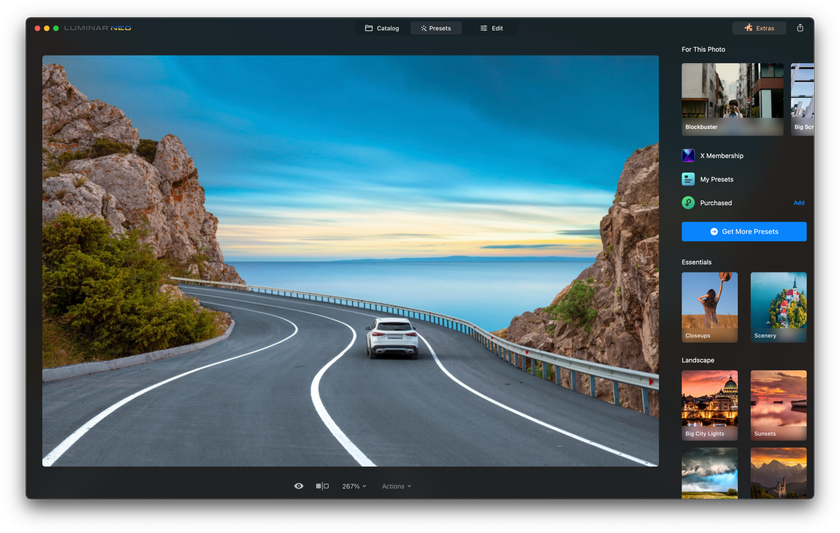
Step 1: Select and Open the Strongest Frame
Compare similar images for focus, reflections, wheel position, and background distractions. Choose the frame with the best foundation rather than the one that needs the most repair.
Open the original in Luminar. Working with a RAW photo editor gives you more flexibility when correcting white balance and exposure.
Step 2: Refine Composition and Geometry
Crop to strengthen the relationship between the car and its surroundings. Leave deliberate space around the vehicle, especially in the direction it faces.
Check the horizon and distracting lens distortion. Avoid stretching the image so aggressively that wheel shapes or body proportions change.
Step 3: Balance Exposure
Adjust the overall exposure, then inspect highlights and shadows separately.
Preserve bright reflections that describe the body while keeping important details readable in dark paint, tires, and vents. Lifting every shadow can remove the depth that made the original lighting effective.
Use masks when the car needs a different correction from the background.
Step 4: Correct Paint Color
Set white balance before making stronger color adjustments. Look for unwanted casts from nearby foliage, colored walls, or artificial lights.
Use photo color editing tools selectively. Increasing saturation across the entire image may make the paint look artificial while also exaggerating the background.
A creative color grade can establish atmosphere, but the car’s recognizable finish should remain believable.
Step 5: Shape Attention With Local Lighting
Small brightness adjustments can help distinguish the car from its surroundings. For example, a subtle lift across a shaded side panel may reveal a contour without changing the mood of the whole photograph.
Luminar’s Light Depth uses AI-based depth mapping and offers controls for the position, softness, warmth, and near or far brightness of the effect. Use a restrained amount, then inspect how the adjustment follows the car’s edges and surrounding space.
Step 6: Retouch Distractions Carefully
Use photo retouching tools for distractions such as sensor spots or small pieces of background litter.
Inspect repairs around wheel spokes, vents, badges, and panel seams. Repeated textures or distorted edges can become more noticeable than the original distraction.
For sales photographs, preserve scratches, dents, and other condition details buyers need to see. For creative work, agree on the extent of retouching with the client.
Step 7: Refine Texture and Style
Apply sharpening and detail adjustments conservatively. Carbon fiber, tire tread, and grilles can quickly develop harsh edges or unnatural texture.
If you use a preset, treat it as a starting point. Reduce its strength or adjust individual corrections to suit the paint and lighting.
Compare several photographs together. A consistent series should feel related while allowing each scene to retain its own lighting.
Step 8: Review and Export
Review the image at full size for artifacts, then at a smaller size to assess composition and overall impact.
Check the paint color, wheel shapes, reflections, and subject edges. If possible, return after a short break before exporting.
Prepare the dimensions, file format, and color profile for the intended destination. Keep the original and editable version so future crops or delivery requests do not depend on a compressed export.
Unleash Your Creative Potential with Luminar Neo
View PlansManaging Larger Automotive Image Workflows
A repeatable photography workflow helps studios keep vehicle shoots organized, from selecting images to delivering consistent exports.
For businesses processing large volumes, Luminar Engine provides image-processing technology that can be integrated into existing software. It runs on the company’s own infrastructure, with base operations including RAW conversion, lens and perspective correction, and exposure adjustment. Technical integration is required.
An automotive imaging business could use it to prepare incoming photographs for further review and editing. Its existing systems would continue to manage vehicle identifiers, file organization, approvals, and delivery.
This is most relevant when routine processing becomes a production bottleneck. Individual creative shoots still benefit from a photographer’s judgment about reflections, paint color, and which adjustments suit each frame.
Bring Out the Car’s Design
A strong hypercar photograph makes the vehicle’s shape, materials, and character easy to appreciate. Thoughtful positioning and controlled reflections do much of that work before editing begins.
Build a varied series, check technical details during the shoot, and use post-processing to refine what the camera captured. The final images should draw attention to the car through clear composition and deliberate light.
FAQ
What Is the Best Lens for Hypercar Photography?
A standard zoom provides flexibility for whole-car views and surrounding context. A short telephoto can help when you have space to step back, while a close-focusing lens is useful for details. Choose according to the available working distance and the perspective you want.
What Aperture Should You Use for Car Photos?
Around f/5.6–f/8 is a useful starting point for a parked whole-car photograph. Wider apertures can isolate details, but check whether the important parts remain in focus. Distance and viewing angle also affect the depth of field you need.
How Do You Reduce Reflections on a Car?
Change the car’s position, your viewpoint, or the surrounding environment first. A circular polarizer can reduce some reflections on glass and paint, but its effect varies across surfaces. Keep reflections that help reveal the body’s shape.
Can You Photograph Hypercars With a Phone?
Yes. Clean the lens, use good light, and avoid moving extremely close with the ultrawide camera unless you want exaggerated proportions. Check fine detail and bright reflections carefully, especially in low light.
How Much Should You Edit a Hypercar Photo?
Adjust enough to support the intended use. Creative photographs can use a stronger visual style, while sales images should accurately show color, equipment, and condition. In either case, inspect retouched areas and preserve convincing reflections and textures.
 >

Black Friday Lifetime Deal: Up to 77% OFF + an extra 10% only for blog readers
Your exclusive code — copy it & use it now