November 05
18 min. to read
How to Edit Jewelry Photos: A Step-by-Step Guide

Jewelry photo editing brings small details into view: the shape of a setting, the finish of a chain, or the color within a gemstone. It also reveals mistakes quickly. Excessive sharpening can make polished metal look rough, while a strong color adjustment can turn rose gold orange.
Start by correcting exposure and white balance, then work on individual areas with masks. Remove temporary distractions, refine the background, and check fine details before exporting. Throughout the process, compare the photograph with the actual piece so the finished image remains an accurate representation.
This guide explains how to edit jewelry photos in Luminar and how to adapt the workflow for product listings and creative campaigns.
Don’t feel like reading the whole breakdown? We’ve pulled together a quick summary below.
Don’t feel like reading the whole breakdown? We’ve pulled together a quick summary below.
Key Takeaways
Begin with a sharp, well-exposed photograph; editing cannot reliably reconstruct missing product details.
Correct white balance before adjusting gemstone or metal colors.
Use masks to edit the jewelry, background, and individual materials separately.
Remove dust and temporary distractions while preserving the item’s design and condition.
Inspect background cutouts around chains, prongs, and transparent stones.
Keep catalog images accurate and consistent; reserve stronger creative effects for campaign imagery.
Why Retouch Jewelry Photos?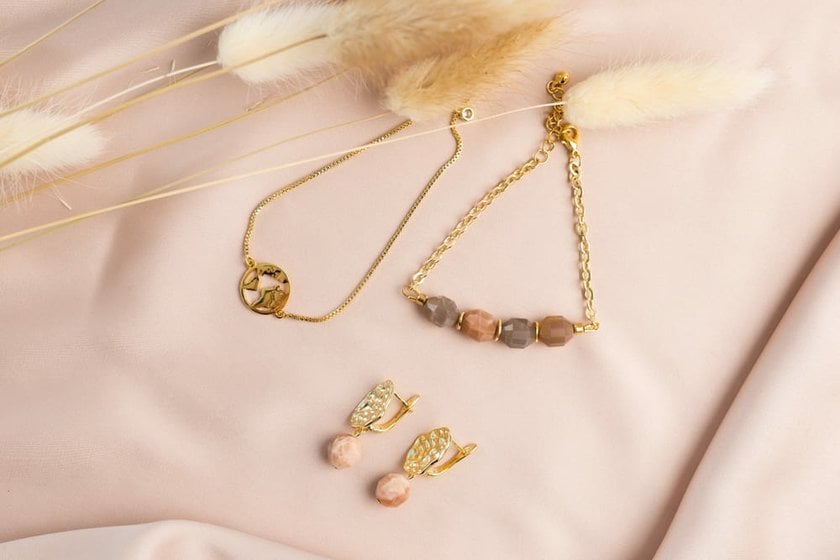
Small objects often need careful preparation for the screen. A photograph that looks clean at thumbnail size may reveal dust, uneven lighting, or distracting reflections when a customer zooms in.
Retouching helps make the product easier to inspect. It can improve separation from the background, correct a lighting-induced color cast, and bring related photographs into a consistent collection.
The purpose of the image determines how far to take those changes.
Image type | Editing priority | What to preserve |
Product listing | Clear detail, accurate color, consistent framing | Design, proportions, materials, and condition |
Close-up detail | Readable engraving, settings, and surface texture | Fine construction details |
Jewelry worn by a model | Believable skin tones and clear product visibility | Fit, scale, and the way the piece hangs |
Campaign or social image | Mood, composition, and brand style | A recognizable, convincing representation of the jewelry |
A catalog image needs to help someone evaluate the piece. A campaign photograph has more room for atmosphere, but the product should still look like the item being promoted.
Before Editing: Check the Original Photograph

Choose the strongest source image before spending time on retouching. Compare focus, reflections, positioning, and exposure across similar frames.
Look closely at the areas customers need to see. Are the prongs sharp? Is the engraving readable? Does a bright reflection hide the stone’s facets?
Avoid deliberately overexposing jewelry on the assumption that brightness can be corrected later. Small specular highlights may naturally appear white, but broad clipped areas can erase useful information. RAW capture offers editing flexibility without guaranteeing recovery of lost detail.
For future shoots, a stable camera, controlled lighting, and clean jewelry will reduce the work required afterward. A neutral reference photographed under the same light also provides a useful starting point for white balance.
If the required parts of a stationary piece cannot fit within the depth of field of one frame, consider capturing a focus stack. This addresses a different problem from sharpening: it combines areas that were actually recorded in focus.
Advanced yet easy-to-use photo editor
Get Luminar Neo NowHow to Edit Jewelry Photos in Luminar
1. Correct Exposure and White Balance

Open the original photograph and establish a balanced starting point. When working with a RAW file, use a RAW photo editor to adjust white balance and tonal detail before making stronger stylistic changes.
In Luminar’s Develop controls, adjust Exposure while watching the jewelry rather than the background alone. A dark background does not necessarily mean the product is underexposed.
Next, inspect Highlights and Shadows. Recover available detail in bright areas and lift shaded areas only as much as needed. Leaving some darker reflections helps polished metal retain its shape.
Set white balance using a neutral reference when available, then refine Temperature and Tint. Gold should remain warm; it should not be treated as a neutral surface. Silver can reflect surrounding colors, so a local cast may need a local correction rather than a global temperature change.
2. Refine Metal and Gemstone Colors

Once white balance is established, assess the materials individually.
Look for corrections that restore the photographed appearance: a green cast from nearby foliage, excessive orange from warm lighting, or a stone that looks too saturated after the initial exposure adjustment.
Use photo color editing tools to make measured changes to hue, saturation, and luminance. Adjust one color range at a time and compare the result with the original.
Be particularly careful when different materials share similar colors. A yellow adjustment intended for the background may also affect a gold chain. Mask the correction when those areas need different treatment.
For repeatable results, compare images on the same display under consistent viewing conditions. Screen brightness and warm display modes can influence your judgment of color and exposure.
3. Use Masks for Local Corrections

Masks control where an adjustment applies. They are useful when a gemstone needs a slight lift but the surrounding metal is already bright enough, or when the background needs correction without changing the product.
Work on one problem at a time:
Brighten a shaded setting without flattening the whole ring.
Reduce a color cast in one section of a chain.
Adjust the background independently of pale metal.
Apply detail adjustments only where texture should remain visible.
Inspect the mask at high magnification. Fine links, spaces between prongs, and partially transparent areas may require manual refinement.
Use soft transitions for gradual lighting changes. For precise product edges, keep the mask closely aligned with the boundary so the adjustment does not create a halo.
4. Remove Dust and Temporary Distractions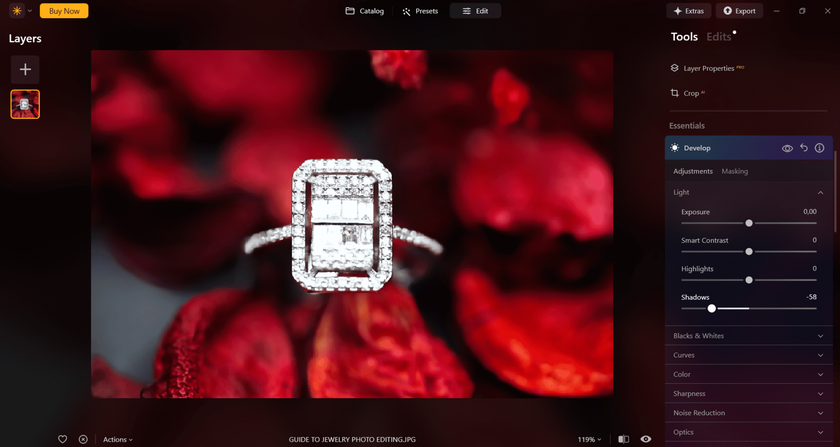
Retouch small distractions before applying final sharpening, which can make them more visible.
In Luminar, select Erase, set a brush slightly larger than the unwanted spot, and paint over it. Apply the removal, then inspect the result before moving to another area. The tool uses surrounding image information to fill the selected region.
Small, separate corrections are easier to evaluate than one large selection across a complex surface. Be especially careful near engraving, repeated chain links, and gemstone settings.
Remove lint, sensor spots, and temporary marks that interfere with presentation. For sales images, retain permanent scratches, wear, inclusions, and other details relevant to the item’s condition.
If a repair changes a prong or breaks the pattern of a chain, undo it. A cleaner-looking result is not useful if it changes the product.
5. Refine Reflections and Natural Sparkle

Reflections communicate material. A polished band should not look like matte plastic, and a faceted gemstone should retain a believable pattern of light and dark areas.
Use local exposure or contrast adjustments to make existing reflections more readable. Reduce distracting brightness where detail remains available, and lift a dark area only enough to reveal its structure.
Avoid making every facet equally bright. The differences between them help the viewer perceive the cut of the stone.
Lens flare is a separate creative effect, not a required step in jewelry retouching. If used in a campaign composition, it should suit the scene’s lighting and leave the product visible. Catalog photographs generally benefit more from clear, naturally captured highlights.
6. Clean or Replace the Background

First decide whether replacement is necessary. A well-photographed background may need only a small brightness correction or the removal of dust.
When a cutout is required, Luminar’s Background Removal AI is available through Edit > Layer Properties > Masking. Select the object to keep, remove the background, and use the Refinement Brush to correct the selection. A replacement background can be added as a layer beneath the product. Access may depend on the features included with your license.
Inspect the result against both a light and a dark background. This helps reveal pale fringes, missing chain sections, and leftover background between links.
Transparent stones need particular attention. They may contain visible information from the original surroundings, so a cutout alone will not always make them look convincing against a different surface.
For additional background choices, see this guide to product photography backgrounds.
Exclusive Tools of Endless Possibilities in One AI Editor
EXPLORE NOW!7. Preserve Believable Shadows

A contact shadow helps show where jewelry rests on a surface. Removing it entirely can make a ring or pendant appear to float.
Where possible, retain the original shadow and refine its brightness. If you create a replacement shadow in a layered composite, match its direction, softness, and position to the lighting.
A convincing shadow is usually more concentrated near the contact point and becomes softer farther away. It should also reflect how the piece is positioned: a suspended pendant and a ring resting on a table need different treatment.
Avoid placing the same dark oval beneath every item. The shape of the jewelry and its relationship to the surface should guide the result.
8. Apply Noise Reduction and Sharpening Carefully

Inspect the photograph at full size before deciding how much detail adjustment it needs.
Reduce visible noise only as far as necessary. Heavy smoothing can remove engraving texture or blur delicate transitions within a stone.
Then apply restrained sharpening. Watch for bright outlines around metal, gritty-looking polished surfaces, and exaggerated contrast along prongs.
Sharpening can improve the appearance of recorded edges, but it cannot verify or reliably restore missing construction details. If a clasp or hallmark was out of focus, another photograph is the better source.
Check the result at the final viewing size as well. An adjustment that looks dramatic at full magnification may contribute little to the image customers actually see.
9. Crop and Match the Collection

Choose a crop that makes the jewelry clear while leaving enough room around its edges. Avoid cutting off clasps, chain ends, or parts of an earring unless the image is deliberately a detail view.
For related products, keep orientation, background treatment, and margins consistent. This makes a collection easier to browse without forcing every piece into identical framing.
Use presets only after the basic corrections are sound. Review their effects on metal and gemstone colors, and reduce or remove adjustments that change the product’s appearance.
When applying settings across a series, group photographs taken under similar lighting. A correction that works for a silver ring on white may be unsuitable for a gold necklace against a dark surface.
10. Export and Inspect the Finished File

Keep the original photograph and editable version, then export a separate file for delivery.
Choose dimensions, format, compression, and color profile for the intended destination. JPEG with sRGB is a common choice for web product images; use PNG when transparency is needed and supported.
Open the exported file and check:
Fine edges and chain links.
Metal and gemstone color.
Remaining dust or retouching artifacts.
Background consistency.
Detail after resizing and compression.
Review marketplace requirements before uploading. Background, crop, text, and image-size requirements can differ between platforms and placements.
Common Jewelry Editing Problems
Problem | Likely cause | Better approach |
Gold looks orange | Excessive warmth or saturation | Recheck white balance, then make a selective color correction |
Silver looks flat | Too little tonal variation | Preserve controlled highlights and darker reflections |
A gemstone becomes a white patch | Clipped exposure or excessive brightening | Reduce the adjustment; reshoot if essential detail is missing |
Chain links disappear | Inaccurate masking or background removal | Refine the edge and inspect spaces between links |
Metal looks rough | Excessive sharpening or texture enhancement | Reduce the effect and apply it selectively |
The piece appears to float | Missing or misplaced contact shadow | Preserve the original shadow or match it carefully |
The collection looks inconsistent | Different lighting, crops, or editing strength | Use a reference image and review the series together |
Scaling Jewelry Image Preparation With Luminar Engine
For a retailer or studio handling a large catalog, repeated image preparation can take time away from detailed retouching.
Luminar Engine is a B2B image-processing SDK designed for integration into a company’s existing software and workflows. It runs on the company’s own infrastructure, with base operations including RAW conversion, lens and perspective correction, and exposure adjustment. Implementation requires technical integration.
A jewelry imaging team could use it to prepare incoming photographs before retouchers assess individual pieces. Product identifiers, file organization, approvals, and publishing would remain the responsibility of the surrounding systems.
This approach is relevant when processing volume justifies automation. Detailed review still matters for gemstone color, fine settings, reflective surfaces, and accurate product representation.
Prepare Jewelry Photos That Customers Can Inspect
A finished jewelry photograph should make the piece easy to understand. Customers need to see its shape, materials, construction, and scale without being distracted by dust, inconsistent backgrounds, or heavy effects.
Work from broad corrections toward small details, and review the collection before publishing. An
FAQ
What Is the Best Way to Edit Jewelry Photos?
Begin with exposure and white balance, then make selective color and lighting corrections. Remove temporary distractions, refine the background, and apply restrained sharpening. Finish by checking the exported image against the original and the actual piece.
How Do You Make Jewelry Sparkle in Photos?
Capture distinct highlights through controlled lighting, then refine their brightness and contrast in editing. Preserve differences between gemstone facets. Artificial sparkle effects should not replace visible product detail in catalog photographs.
How Do You Make a Jewelry Photo Background White?
Adjust the background separately with a mask, or remove it and place the jewelry over a white layer. Inspect pale metal edges, chain openings, transparent stones, and contact shadows. Raising the exposure of the entire image can erase important detail.
Can You Fix Blurry Jewelry Photos?
Mild softness may respond to careful sharpening, but missed focus and motion blur can obscure details that software cannot reliably reconstruct. For accurate product images, choose a sharper frame or reshoot. Focus stacking can help when a stationary piece needs more depth of field.
Should You Use the Same Filter on Every Jewelry Photo?
A shared preset can provide a starting point for images captured under similar conditions. Each photograph still needs review because metal, stone color, background, and lighting affect the result. Aim for consistent presentation without forcing every product into the same color treatment.
 >

Black Friday Lifetime Deal: Up to 77% OFF + an extra 10% only for blog readers
Your exclusive code — copy it & use it now